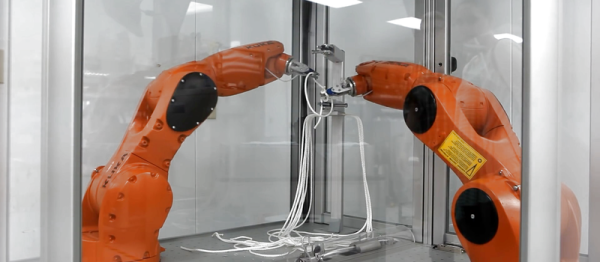
We’re not ashamed to admit that we desperately want a pair of high-end industrial robot arms to play around with. We don’t know where we’d put them — maybe the living room? — but we know that we’d figure something out.
This demo aims to get Boy Scouts interested in robotics by applying the beastly arms to something that all kids love, learning to tie knots. (If you ask us, they’ve got it backwards.) Anyway, there are two videos embedded below for you to peek at.
demo40 Articles
Don’t Mess With Texas – The TI-99/4A Megademo
The demoscene is a hotbed of masterful assembly programming, particularly when it comes to platforms long forgotten by the passage of technology and time. There’s a certain thrill to be had in wringing every last drop of performance out of old silicon, particularly if it’s in a less popular machine. It’s that mindset that created Don’t Mess With Texas – a glorious megademo running on the TI-99/4A.
Entered in the oldskool demo contest at Syncrony 2017, the demo took out the win for [DESiRE], a group primarily known for demos on the Amiga – a far more popular platform in the scene. The demo even includes a Boing Ball effect as a cheeky nod to their roots. Like any good megademo, the different personalities and tastes brings a huge variety of effects to the show – there’s a great take on vintage shooters a la Wolfenstein in there too. [jmph] shared a few more details on the development process over on pouet.net.
The TI-99/4A wasn’t the easiest machine to develop for. It’s got a 16-bit CPU hamstrung by an 8-bit bus, and only 256 bytes of general purpose RAM. Despite the group’s best attempts, the common 32K RAM expansion present in the floppy drive controller is a requirement to run the demo. Just to make things harder, the in-built BASIC is too slow for any real use and there’s no function to allow the use of in-line assembly instructions. The group had to resort to a cartridge-based assembler to get the job done.
In the machine’s favour, it has a great sound chip put to brilliant use – the demo’s soundtrack will take you right back to the glory days of chiptune. It’s also got strong graphics capabilities for the era on par with, if not better than, the Commodore 64. The video subsystem in the TI works so hard that it’s the only DIP in the machine that gets a heatsink! The demo does a great job of pushing the machine to its limits in this regard.
If you’re suddenly feeling a strong attraction to the TI-99/4A, don’t worry – it’s got a cult following all its own. You can even find USB adapters & IDE controllers if you want to build a fully loaded rig, or play a stunning port of Flappy Bird if that tickles your fancy.
[Thanks to Gregg for the tip!]
Helicopter Pendulum Is PID-licious
If you’ve ever tried to tune a PID system, you have probably encountered equal parts overwhelming math and black magic folk wisdom. Or maybe you just let the autotune take over. If you really want to get some good intuition for motion control algorithms, PID included, nothing beats a little hands-on experimentation.
To get you started, [Clovis] wrote in with his budget propeller-based PID demo platform (Portuguese, translated shockingly well here).
The basic setup is a potentiometer glued to a barbecue skewer with a mini-quadcopter motor and rotor on the end of it. A microcontroller reads the voltage and PWMs the propeller through a MOSFET. The goal is to have the pendulum hover stably in midair, controlled by whatever algorithms you can dream up on the controller. [Clovis]’ video demonstrates on-off and PID control of the fan. Adding a few more potentiometers (one for P, I, and D?) would make hands-on tweaking even more interactive.
In all, it’s a system that will only set you back a few bucks, but can teach you more than you’d learn in a month in college. Chances are good that you’re not going to have exactly the same brand of sardine can on hand that he did, but some improvisation is called for here.
If you don’t know why you’d like to master open-loop closed-loop control algorithms, here’s one of the best advertisements that we’ve seen in a long time. But you don’t have to start out with hand-wound hundred-dollar motors, or precisely machined bits. As [Clovis] demonstrates, you can make do with a busted quadcopter and whatever you find in your kitchen.
Projection Mapping In Motion Amazes
Projection mapping is pretty magical; done well, it’s absolutely miraculous when the facade of a building starts popping out abstract geometric objects, or crumbles in front of our very eyes. “Dynamic projection mapping onto deforming non-rigid surface” takes it to the next level. (Watch the video below.)
A group in the Ishikawa Watanabe lab at the University of Tokyo has a technique where they cover the target with a number of dots in an ink that is only visible in the infra-red. A high-speed (1000 FPS!) camera and some very fast image processing then work out not only how the surface is deforming, but which surface it is. This enables them to swap out pieces of paper and get the projections onto them in real time.
Tetris In 446 Bytes
You want to play Tetris. You want to play Tetris on any operating system. You want to play on an old IBM PC, you want to play Tetris on a new MacBook. You want a Tetris that’ll fit inside the master boot record of a disk. You want Tetris as an operating system. You want TetrOS.
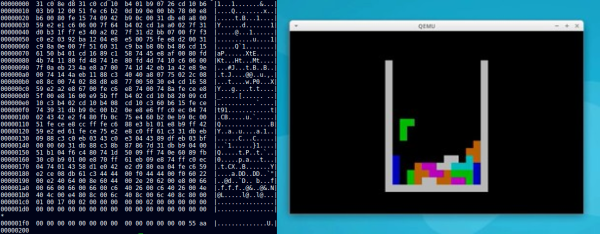
Or maybe you don’t, but it’s a fantastic piece of work, and we love tiny demos. Check it out below the break. Or read through the source code in the banner image.
Paraffin Oil And Water Dot Matrix Display
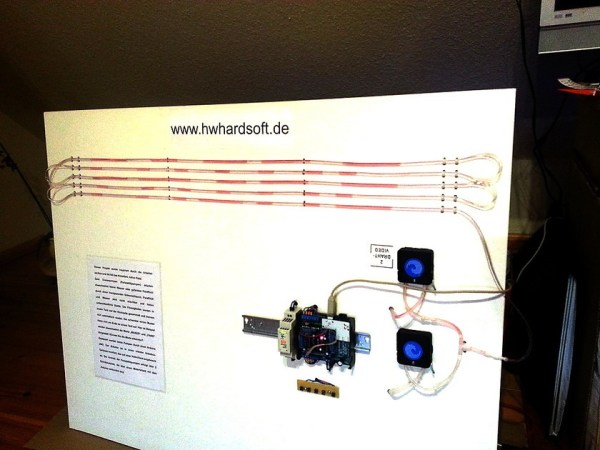
In preparation for Makerfaire, [hwhardsoft] needed to throw together some demos. So they dug deep and produced this unique display.
The display uses two synchronized peristaltic pumps to push water and red paraffin through a tube that switches back over itself in a predictable fashion. As visible in the video after the break, the pumps go at it for a few minutes producing a seemingly random pattern. The pattern coalesces at the end into a short string of text. The text is unfortunately fairly hard to read, even on a contrasting background. Perhaps an application of UV dye could help?
Once the message has been displayed, the water and paraffin drop back into the holding tank as the next message is queued up. The oil and water separate just like expected and a pump at the level of each fluid feeds it back into the system.
We were deeply puzzled at what appeared to be an Arduino mounted on a DIN rail for use in industrial settings, but then discovered that this product is what [hwhardsoft] built the demo to sell. We can see some pretty cool variations on this technique for art displays.
Continue reading “Paraffin Oil And Water Dot Matrix Display”
Hackaday Links: December 20, 2015
If you don’t have a Raspberry Pi Zero right now, you’re not getting one for Christmas. Who would have thought a $5 Linux computer would have been popular, huh? If you’re looking for a new microcontroller platform you can actually buy, the Arduino / Genuino 101 is available in stores. This was released a few months ago, but it still looks pretty cool: DSP, BTLE, and a six-axis sensor.
If you don’t know [David], the Swede, you should. He’s the guy that launched a glider from a high altitude balloon and is one of the biggest advocates of tricopters. Now he bought an airplane wing for his front yard. It was an old Swedish air force transport aircraft being broken up for scrap. Simply awesome.
Chocolate chips. Now that the most obvious pun is out of the way, here’s how you make DIP8 cookie cutters.
[Barb] is over at the Crash Space hackerspace in LA, and she has a YouTube channel that goes over all her creations. This week, it’s a layered wood pendant constructed out of many layers of veneer. Take note of the 3M 77 spray glue used for the lamination and the super glue used as a clear, hard finish.
Star Wars was released and we have a few people digging through the repertoire to see what [John Williams] lifted for the new movie. Here’s musical Tesla coils playing the theme for the Force.
Flickr gives you a full gigabyte of storage, but only if you upload JPEGs, GIFs, and PNGs. That doesn’t prevent you from using Flickr as your own cloud storage.
We know two things about [Hans Fouche]: he lives in South Africa and he has a gigantic 3D printer. His latest creation is an acoustic guitar. It may not sound great, but that’s the quality of the recording. It may not play great, but he can fix that with some acetone vapor. It would be very interesting to see 3D printing used in a more traditional lutherie context; this printer could easily print molds and possibly even something to bend plywood tops.
Starting in 1990, [deater] would make a yearly Christmas-themed demo on his DOS box. You can really see the progression of technology starting with ANSI art trees written in BASIC, to an EGA graphical demo written with QBASIC to the last demo in 96 made with VGA, and SoundBlaster effects written in Turbo Pascal and asm.


