Drone racing is a very exciting sport, in which there is a lot of room for hackers and makers to add that special sauce into the mix. Usually the aerial finish line requires special race-timing hardware to do the lap counting, and there are timing gate transponders available for around $40. In his project CoreIR and CoreIR-Uplink, [Michael Rickert] decided to reverse engineer the IR Protocol that goes into these beacons and made a homebrew version that mimics the original. The transponders send a 7-digit number out repeatedly to a receiver at the finish line as the UAV passes by and that helps track how fast drone pilots flew around a race track. The hack involves flipping an IR LED ON and OFF with the correct timing, and [Michael Rickert] confesses that it was not as easy as he had imagined.
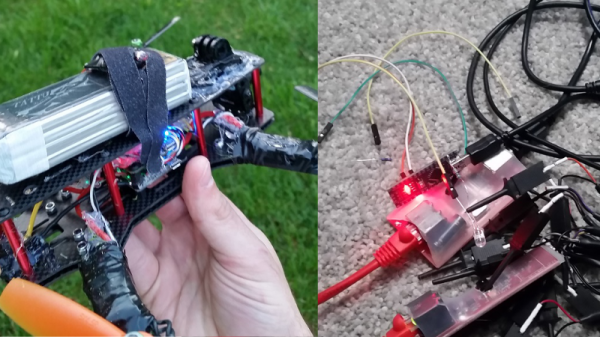
Using a logic analyser he was able to capture the modulated 38Khz carrier signal and extract the timing from the original beacon, but it took a number of iterations to get the code just right. The IRRemote library has a ‘sendRaw’ function which is quite helpful in these situations and was employed for the task. He experimented with a number of Arduino boards to power the project, before finally going with the Arduino Pro Mini. He has shared the code on github, along with photos of the finished hack which replaces the original circuit. The final sketches include functions to generate the 7-digit code to uniquely identify the quadcopter, which completes the hack in itself.
If that was not enough, he’s gone a step further by coding and sharing a desktop client as well, which turns this hack into a full-fledged project and should prove quite useful for drone racers on a budget. The app is written in NodeJS and packaged using the electron framework, a choice that makes for a very simple way to create cross-platform desktop applications.
A build tutorial is available for you to get started, and if drone racing seems a bit tame, check out Drone Wars for a little more carnage.