A Quartet Of Drills Put The Spurs To This Electric Utility Vehicle

Low-slung body style. Four-wheel drive. All electric drivetrain. Turns on a dime. Neck-snapping acceleration. Leather seating surface. Is it the latest offering from Tesla? Nope; it’s a drill-powered electric utility vehicle, and it looks like a blast to drive.

Surprisingly, this isn’t a just-for-kicks kind of build. There’s actually a practical reason for the low form factor and long range of [Axel Borg]’s little vehicle. We’ll leave the back story to the second video below, but suffice it to say that this will be a smaller version of the crawler NASA used to roll rockets out to the launch pad, used instead to transport his insanely dangerous looking manned-multicopter. The running gear on this vehicle is the interesting bit: four hefty electric drills, one for each of the mobility cart wheels. The drills are powered by a large series-connected battery pack putting out 260V at full charge. The universal motors of the drills are fine with DC, and the speed of each is controlled via the PWM signals from a pair of cordless drills. The first video below shows [Axel] putting it through its paces; he didn’t hold back at all, but the vehicle kept coming back for more.

We know this cart is in service to another project, but we’d have a hard time concentrating on anything if we had the potential for that much fun sitting in the shop. Still, we hope that multirotor gets a good test flight soon, and that all goes well with it.

Continue reading “A Quartet Of Drills Put The Spurs To This Electric Utility Vehicle”

A DIY Balcony Crane Lifts Groceries For The Lazy But Patient

If necessity is the mother of invention, then laziness is probably its father. Or at least a close uncle. Who hasn’t thought, “There has to be a better way to do this, one that doesn’t involve me burning precious calories”?

Motivational laziness seems to increase with potential energy, as anyone who needs to haul groceries up four flights of stairs will tell you. This appears to be where this balcony-mounted drill-powered crane came from. Starting with a surplus right-angle gearbox and drum, [geniusz K] fabricated the rest of the crane from steel plate and tubing. We like the quality of fabrication and the tip on making slip couplings from bits of square tubing. The finished product got a nice coat of brown paint to match the balcony railing; keeping the neighbors happy is always important. He tested the crane with a 20-kg weight before installing it on the balcony and put it to work hauling groceries up three stories. Check out the build and the test in the video below.

While it won’t set any speed records, at least the drill is doing the work. But what if you’re impatient as well as lazy? Aside from being two-thirds of the way to programming greatness, you may have to up the game. A heavy-lift quadcopter, perhaps?

Continue reading “A DIY Balcony Crane Lifts Groceries For The Lazy But Patient”

A Scratch-Built Drill Press Vise From Scrap

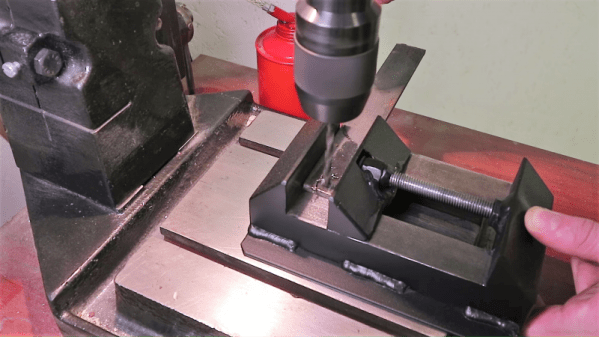
Never underestimate the importance of fixturing when you’re machining parts. No matter what the material, firmly locking it down is the key to good results, and may be the difference between a pleasant afternoon in the shop and a day in the Emergency Room. Flying parts and shattered tooling are no joke, but a lot of times quality commercial solutions are expensive and, well, commercial.  So this scratch-built drill press vise is something the thrifty metalworker may want to consider.

To be sure, [Ollari’s] vise, made as it is almost completely from scrap angle iron, is no substitute for a vise made from precision ground castings. But it’s clear that he has taken great care to keep everything as square and true as possible, and we give him full marks for maximizing his materials. And his tools — nothing more complicated than a MIG welder is used, and most of the fabrication is accomplished with simple hand tools. We like the way he built up sturdy profiles by welding strap stock across the legs of the angle iron used for the jaws, to give them a strong triangular cross-section to handle the clamping force. And using the knurled end of an old socket wrench as the handle was inspired; we’ll certainly be filing that idea away for a rainy day in the shop. Although we might use Acme rather than plain threaded rod.

We always enjoy seeing someone fabricate their own tools, and this one reminds us a bit of the full-size bench vise built up from layers of welded steel we featured a while back. It even looks a little like this 3D-printed vise, too.

Continue reading “A Scratch-Built Drill Press Vise From Scrap”

NASA Remotely Hacks Curiosity’s Rock Drill

We have a lot of respect for the hackers at NASA’s Jet Propulsion Laboratory (JPL). When their stuff has a problem, it is often millions of miles away and yet they often find a way to fix it anyway. Case in point is the Curiosity Mars rover. Back in 2016, the probe’s rock drill broke. This is critical because one of the main things the rover does is drill into rock samples, collect the powder and subject it to analysis. JPL announced they had devised a way to successfully drill again.

The drill failed after fifteen uses. It uses two stabilizers to steady itself against the target rock. A failed motor prevents the drill bit from retracting and extending between the stabilizers. Of course, sending a repair tech 60 million miles is not in the budget, so they had to find another way. You can see a video about the way they found, below.

Continue reading “NASA Remotely Hacks Curiosity’s Rock Drill”

DIY Drill-Powered Water Pump

Whether you need to pump water out of your basement this spring, or just want to have fun shooting water around in the yard this summer, here’s a way to build a pump instead of buying one. This is a simple but ingenious build, and [NavinK30] did everything shy of machining his own hardware and making his own tools. Well, it looks as if he might have made that drill.

As you’ll see in his how-to after the break, this centrifugal pump is mostly acrylic, PVC, and fasteners. [Navin] cut two sides and a base for the paddles from acrylic, and joined them with a heat-formed sidewall made of PVC. We love that he cut and bent his own paddles from sheet metal. These are bolted to a round piece of acrylic that attaches to the outside with a long hex bolt. A ball bearing mounted on the drill side allows the pump to churn freely as long as the bolt is chucked into the drill, and the hose clamp is tight enough to hold down the trigger.

Have an extra drill, but don’t need to pump water? Add a camping stove and use it to power a small-batch coffee roaster.

Continue reading “DIY Drill-Powered Water Pump”

What To Do With Your Brand New Ultrasonic Transducer

We wager you haven’t you heard the latest from ultrasonics. Sorry. [Lindsay Wilson] is a Hackaday reader who wants to share his knowledge of transducer tuning to make tools. The bare unit he uses to demonstrate might attach to the bottom of an ultrasonic cleaner tank, which have a different construction than the ones used for distance sensing. The first demonstration shows the technique for finding a transducer’s resonant frequency and this technique is used throughout the video. On the YouTube page, his demonstrations are indexed by title and time for convenience.

For us, the most exciting part is when a tuned transducer is squeezed by hand. As the pressure increases, the current drops and goes out of phase in proportion to the grip. We see a transducer used as a pressure sensor. He later shows how temperature can affect the current level and phase.

Sizing horns is a science, but it has some basic rules which are well covered. The basic premise is to make it half of a wavelength long and be mindful of any tools which will go in the end. Nodes and antinodes are explained and their effects demonstrated with feedback on the oscilloscope.

We have a recent feature for an ultrasonic knife which didn’t cut the mustard, but your homemade ultrasonic tools should be submitted to our tip line.

Continue reading “What To Do With Your Brand New Ultrasonic Transducer”

Power Your Guitar Pedals With Drill Batteries

Guitar pedals are a great way to experiment with the sound of your instrument. However, they require electricity, and when you’re using more than a couple, it can get messy. Some will run on batteries, while others are thirstier for more current and will only work with a plugback. There are a great many solutions out there, but most people with more than a few pedals to power will end up going to some kind of mains powered solution. [Don] is here to show us that it’s not the only way.

Mains power is great for some things, but where pedals are concerned, it’s not always perfect. There are issues with noise, both from cheap power supplies and poorly designed pedals, and it means you’re always hunting for a power socket, which is limiting for buskers.

[Don] realised that the common drill battery is a compact source of clean, DC power, and decided to use that to power his rig. By slapping together a drill battery with a pre-assembled buck converter and a 3D printed adapter, he was able to build a portable power supply for his pedals. Thanks to the fact that the vast majority of pedals use 9V DC with the same input jack design, it’s a cinch to wire up. With an appropriately sized buck converter, a drill battery could supply even a hefty pedalboard for a significant period of time.

Overall, it’s a great hack that solves a problem faced by many performing musicians. We’ve seen our fair share of guitar pedals around Hackaday – perhaps you’d like to see how one makes it from concept to production?

Continue reading “Power Your Guitar Pedals With Drill Batteries”