photo booth

Reach Out And Touch Someone With WiFi Photo Booth

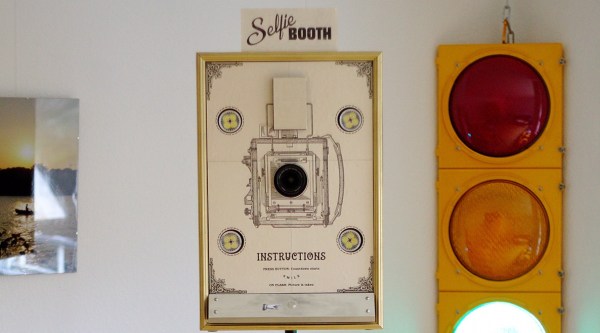
[kitesurfer1404] put together a nice looking vintage photobooth with WiFi capability. He’s using an arduino to monitor the state of the buttons, LED lighting control, seven segment display AND the DSLR camera. He then uses a Raspberry Pi to control imagine processing and to provide scaling and other effects, which can take up to 20 seconds per image. The Pi runs in WiFi Access Point mode, so anyone with a WiFi capable device can connect to the photo booth and view the images.

We’ve seen some interesting twists on photo booths before. But [kitesurfer1404’s] vintage style makes his stand out all on its own. He designed the graphics with Inkscape and printed them on thick paper. He then soaked the graphics in tea for several hours and dried then for several more days to get that nice rustic look.

Be sure to check out [kitesurfer1404’s] site for full details and an assortment of high resolution images of his project.

Astrophotography And Data-Analysis Sense Exoplanets

[David Schneider] was reading about recent discoveries of exoplanets. Simply put these are planets orbiting stars other than the sun. The rigs used by the research scientists include massive telescopes, but the fact that they’re using CCD sensors led [David] to wonder if a version of this could be done on the cheap in the backyard. The answer is yes. By capturing and processing data from a barn door tracker he was able to verify a known exoplanet.

Barn Door trackers are devices used to move a camera to compensate for the turning of the earth. This is necessary when taking images throughout the night, as the stars will not remain “stationary” to the camera’s frame without it. The good news is that they’re simple to build, we’ve seen a few over the years.

Other than having to wait until his part of the earth was pointed in the correct direction (on a clear night) at the same time as an exoplanet transit, [David] was ready to harvest all the data he needed. This part gets interesting really quickly. The camera needed to catch the planet passing in between the earth and the star it revolves around (called a transit). The data to prove this happened is really subtle. To uncover it [David] needed to control the data set for atmospheric changes by referencing several other stars. From there he focused on the data for the transit target and compared points across the entire set of captured images. The result is a dip in brightness that matches the specifications of the original discovery.

[David] explains the entire process in the clip after the break.

Continue reading “Astrophotography And Data-Analysis Sense Exoplanets”

100% DIY Intervalometer Is 100% Awesome

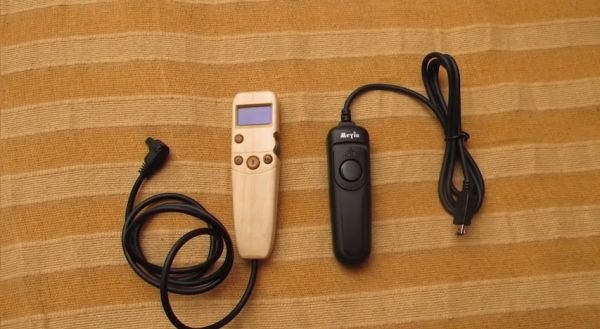
It’s easy to tell from this process documentary that [Nagyizee] is not one to settle for prefabricated anything. He could have just bought some off-the-shelf DSLR intervalometer, but that would mean interfacing with someone else’s design through cold, soulless plastic.

[Nagyizee] wanted a one-of-a-kind tool built from the ground up. In addition to a timer, he was in the market for a light sensor and sound detection. He chose an STM32F100 ARM Cortex M3 running at 8MHz in the name of power efficiency and started designing the UI and firmware. A custom graphic library for the OLED display streamlines it even further. Once the schematic was finalized, [Nagyizee] devised a stylish and ergonomic wooden case to be milled with a tiny Proxxon F70.

With the enclosure decisions out of the way, he etched and drilled the PCB and placed the components. The light sensor needed a lens and a prism, so he made one from a 10mm LED body. Not one to miss a detail, [Nagyizee] also turned some buttons, hand painted them, and made a scroll wheel. He ends the video with a demonstration that proves it is quite capable. In addition to standard cable release mode, it handles long exposure times, sequential shooting, and capture on light, shadow, or sound. But wait, there’s more: [Nagyizee]’s creation combines modes with ease and grace.

Continue reading “100% DIY Intervalometer Is 100% Awesome”

An External Autofocus For DSLRs

Most modern DSLR cameras support shooting full HD video, which makes them a great cheap option for video production. However, if you’ve ever used a DSLR for video, you’ve probably ran into some limitations, including sluggish autofocus.

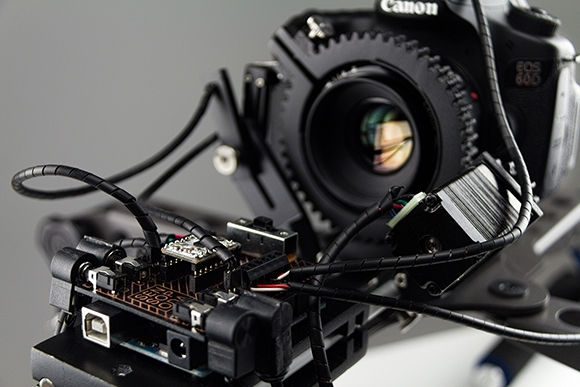
Sensopoda tackles this issue by adding an external autofocus to your DSLR. With the camera in manual focus mode, the device drives the focus ring on the lens. This allows for custom focus control code to be implemented on an external controller.

To focus on an object, the distance needs to be known. Sensopoda uses the HRLV-MaxSonar-EZ ultrasonic sensor for this task. An Arduino runs a control loop that implements a Kalman filter to smooth out the input. This is then used to control a stepper motor which is attached to the focus ring.

The design is interesting because it is rather universal; it can be adapted to run on pretty much any DSLR. The full writeup (PDF) gives all the details on the build.

Adding A Digital Back To A Sweet Old Camera

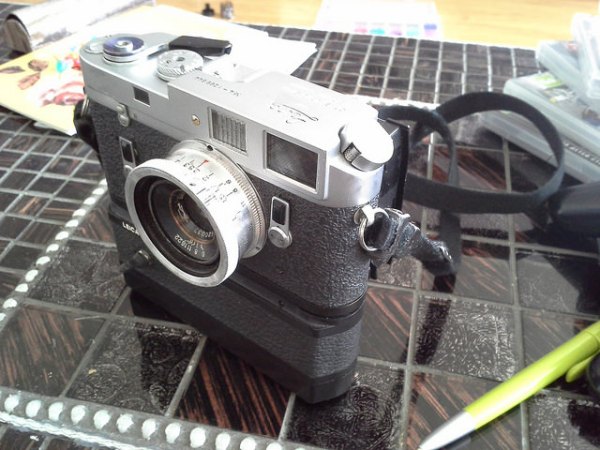
[Eugene] wanted to use his vintage Leica M4 as a digital camera, and he had a Canon EOS 350D digital camera sitting around unused. So he Frankensteined them together and added a digital back to the Leica’s optical frontend.

It sounds simple, right? All you’d need to do is chop off the back from the EOS 350D, grind the digital sensor unit down to fit into exactly the right spot on the film plane, glue it onto an extra Leica M4 back door, and you’re set. Just a little bit of extremely precise hackery. But it’s not even that simple.

Along the way [Eugene] reverse-engineered the EOS 350D’s shutter and mirror box signals (using a Salae Logic probe), and then replicated these signals when the Leica shutter was tripped by wedging an Arduino MiniPro into an old Leica motor-winder case. The Arduino listens for the Leica’s bulb-flash signal to tell when the camera fires, and then sends along the right codes to the EOS back. Sweet.

There are still a few outstanding details. The shutter speed is limited by the latency in getting the signal from the Leica to the 350D back, so he’s stuck at shutter speeds longer than 1/8th of a second. Additionally, the Canon’s anti-IR filter didn’t fit, but he has a new one ordered. These quibbles aside, it’s a beautiful hack so far.

What makes a beautiful piece of work even more beautiful? Sharing the source code and schematics. They’re both available at his Github.

Of course, if you don’t mind completely gutting the camera, you could always convert your old Leica into a point and shoot.

Thumbnail that say The Hacklet

Hacklet #11- Cameras

11

We preempt this week’s Hacklet to bring you an important announcement.

Hackaday.io got some major upgrades this week. Have you checked out The Feed lately? The Feed has been tweaked, tuned, and optimized, to show you activity on your projects, and from the hackers and projects you follow.

We’ve also rolled out Lists! Lists give you quick links to some of .io’s most exciting projects. The lists are curated by Hackaday staff. We’re just getting started on this feature, so there are only a few categories so far. Expect to see more in the coming days.

Have a suggestion for a list category? Want to see a new feature?  Let us know!

Now back to your regularly scheduled Hacklet

There are plenty of cameras on Hackaday.io, from complex machine vision systems to pinhole cameras. We’re concentrating on the cameras whose primary mission is to create an image. It might be for art, for social documentation, or just a snapshot with friends.

pinstax[theschlem] starts us off with Pinstax, a 3D Printed Instant Pinhole Camera. [theschlem] is using a commercial instant film camera back (the back for a cheap Diana F+) and 3D printing his own pinhole and shutter. He’s run into some trouble as Fuji’s instant film is fast, like ISO 800 fast. 3 stops of neutral density have come to the rescue in the form of an ND8 filter. Pinstax’s pinhole is currently 0.30mm in diameter. That translates to just about f/167. Nice!

largeformat

Next up is [Jimmy C Alzen] and his Large Format Camera. Like many large format professional cameras, [Jimmy’s] camera is designed around a mechanically scanned linear sensor. In this case, a TAOS TSL1412S. An Arduino Due runs the show, converting the analog output from the sensor to digital values, stepping the motor, and displaying images in progress on an LCD. Similar to other mechanically scanned cameras, this is no speed demon. Images in full sunlight take 2 minutes. Low light images can take up to an hour to acquire.

democracy[Jason’s] Democracycam aims to use open source hardware to document protests – even if the camera is confiscated. A Raspberry Pi, Pi Cam module, and a 2.8″ LCD touchscreen make up the brunt of the hardware of the camera. Snapping an image saves it to the SD card, and uses forban to upload the images to any local peers. The code is in python, and easy to work with. [Jason] hopes to add a “panic mode” which causes the camera to constantly take and upload images – just in case the owner can’t.

digiholgaThe venerable Raspberry Pi also helps out in [Kimondo’s] Digital Holga 120d. [Kimondo’s] fit a Raspberry Pi model A, and a Pi camera, into a Holga 120D case. He used the Slice of pi prototype board to add a GPIO for the shutter release button, a 4 position mode switch, and an optocoupler for a remote release. [Kimondo] even added a filter ring so he can replicate all those instagram-terrific filters in hardware. All he needs is to add a LiPo battery cell or two, a voltage regulator, and a micro USB socket for a fully portable solution.

openreflex

Finally, we have [LeoM’s] OpenReflex rework. OpenReflex is an open source 3D printed Single Lens Reflex (SLR) 35mm film camera. Ok, not every part is 3D printed. You still need a lens, a ground glass screen, and some other assorted parts. OpenReflex avoids the use of a pentaprism by utilizing a top screen, similar to many classic twin lens reflex cameras. OpenReflex is pretty good now, but [Leo] is working to make it easier to build and use. We may just have to break out those rolls of Kodachrome we’ve been saving for a sunny day.

That’s it for this week’s Hacklet! Until next week keep that film rolling and those solid state image sensors acquiring. We’ll keep bringing you the best of Hackaday.io!

Retrotechtacular: Kodak Built World’s First DSLR… Using A Canon Camera Body

worlds-first-dslr

It has been far too long since we’ve seen an installment of Retrotechtacular, and this is a great one to start back with. It’s always a treat to get the story from the horse’s mouth. How about the tale of the world’s first Digital Single-Lens Reflex camera? [Jame McGarvey] shared the story of how he developed the device in 1987.

That’s it shown above. It’s not surprising to see that the only real modification to the camera itself is the back cover. The difference between an SLR and a DSLR is really just the D, which was accomplished by adding a CCD in place of the film.

The entire story is a treat, but there are a couple of nuggets the we enjoyed most. The possibly-clandestine purpose of this device is intriguing. It was specifically designed to pass as a film camera which explains the ribbon cable connecting the CCD module to the control box which would be stored in a camera bag. It is also delightful to hear that the customer who tasked Eastman Kodak with developing the system preferred Canon camera bodies. So this Kodak DSLR indeed used a Canon F-1 body.

Once you get done looking this one over you will also enjoy learning how a CCD actually works.

[Thanks Ben]

Retrotechtacular is a weekly column featuring hacks, technology, and kitsch from ages of yore. Help keep it fresh by sending in your ideas for future installments.