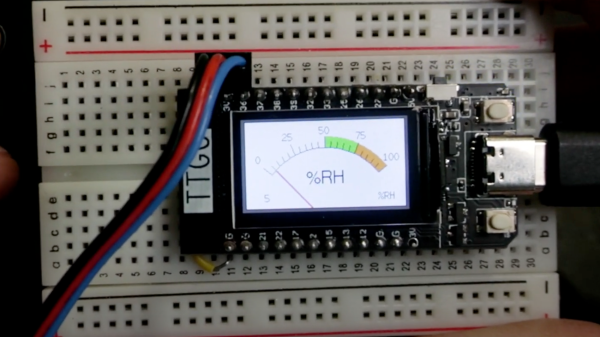
Volos Projects educator [Danko Bertović] had a TTGO ESP32 board looking for a project, so he implemented a surprisingly functional weather station for such a small screen. Presumably that was too boring for him, so he decided to write a version of the classic Atari game Breakout instead. [Danko] prefers using the Arduino IDE for ESP32 projects, and has made the Breakout software available as an Arduino sketch. We hope the weather station sketch will be released soon, too. The TTGO is a small ESP32 board with an ST7789V 1.14 in (29 mm) TFT color display, available from your favorite Shenzhen market supplier. This platform is perfect for all kinds of niche applications. We’d love to hear how you are using, or plan to use, these modules in your projects.
We wrote about one such project last summer, where a similar TTGO module was used to display 50-year broadcast delayed transcripts of the Apollo 11 mission. [Danko] is no stranger to Hackaday — he has made several Arduino-based calculator projects. Perhaps the most remarkable being the circuit sculpture binary number calculator from last year, another project that morphed into a computer game (Pong).
Terrestrial radio is all well and good, but it limits you to listening to local stations. [Nick Koumaris] lives in a small town in Southern Greece, and his favorite stations sadly don’t transmit in his area. Thus, an internet radio was the natural solution.
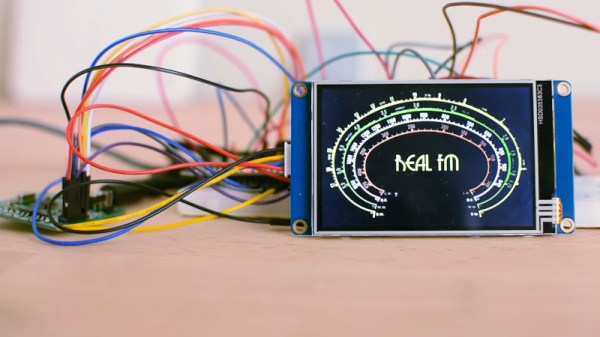
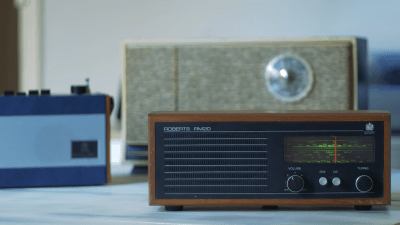
[David Watts] did a similar build, throwing the hardware inside a stunning Roberts RM20 radio from the 1970s.While a Raspberry Pi is a common way to go in these situations, an ESP32 has enough grunt to do the job without the long boot times that come with running a full Linux distribution. Combined with a VS1503 MP3 decoder board and a PAM8403 amplifier, it’s more than capable of tuning in streams online. [Nick] went with a retro-look interface on an LCD, using a Nextion part for its onboard controller and in-built GUI tools. Taking inspiration from the project, [David Watts] executed a similar build, but instead used an Arduino Nano to interface the controls on a vintage Roberts RM20 radio instead.
While we’ve all got smartphones we can use to listen to content online, it can be nice to use a device that allows us to put on some music without constant notifications and chimes every time an email comes in or a government scandal erupts in a nearby country. When building your own radio, you can tailor the interface to suit your tastes – like this build that lets users scan the globe for a station to listen to. Video after the break.
Universal Serial Bus, or USB, is so ingrained in modern computing that it’s hard to imagine a time without it. That time did exist, though, and it was a wild west of connector types, standards, and interfacing methods. One of the more interesting interfaces of the time was the SIO system found in 8-bit Atari computers which ended up sharing a lot of the features of modern USB, and its adaptability is displayed in this modern project which brings WiFi, Bluetooth, USB, and SD card slots to any old Atari with an SIO port.
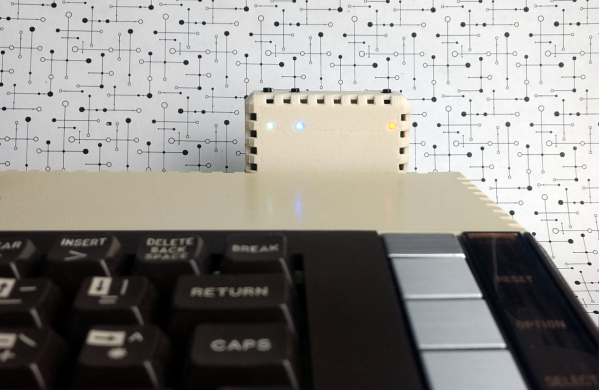
The project is called FujiNet and it uses the lightweight protocol of SIO to add a number of modern features to the 8-bit machine. It’s based on an ESP32, and the chip performs the functions of a network adapter by bridging WiFi and Bluetooth to the Atari. It does this by simulating drives that would have potentially been used on the Atari in its time, such as a floppy disk drive, an RS232 interface, or a modem, and translating them to the modern wireless communication protocols. It even has the ability to emulate a printer by taking the output of the print job from the Atari and converting it to PDF within the device itself.
Not only does this bring a lot of functionality to the Atari, which you may be able to use to view sites like retro.hackaday.com, but the FujiNet is housed in a period-appropriate 3D-printed case that matches the look and feel of the original Atari. If you need a more generic solution for your retrocomputing networking adventures that isn’t limited to SIO, we recommend grabbing a Raspberry Pi to handle that.
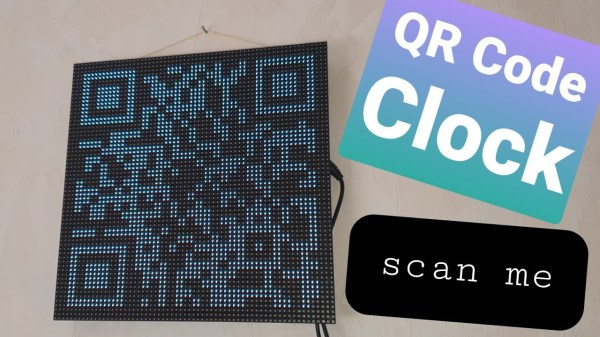
Not every build needs to be immediately useful or revolutionary. Plenty of builds are just for fun, for education, or even purposefully useless but still challenging. This clock, for example, might fit into all three categories. It’s a clock that displays time through a QR code, making it completely inscrutable unless you have a device which likely has its own readable clock on it already.
The QR Code clock comes to us from [Aaron] and is based on the now-ubiquitous ESP32 WiFi chip. The ESP32 is connected to a 64×64 LED matrix which is updated every second with a code for the current time. With single-second resolution that means that even with a method for reading a QR code by hand, like you sometimes can with barcodes, there’s no way to read it without a smartphone since it changes so rapidly.
Of course [Aaron] recognizes the flaw in his design in his video in which he notes tongue-in-cheek that with this clock you would never have to look at a smartphone again, since the clock is right there on the wall. We appreciate the humor and also that [Aaron] has made all of his source code available in case you would like to use this as an example project for using QR codes for more useful purposes. For now, though, we’ll just forward you along to some other useless machines.
These days, everything’s got a clock in it, and a good proportion of those clocks are automatically syncronized to high-accuracy Internet time servers. Back in the past, things weren’t so easy. Often, institutions that required accurate time would use a single highly-accurate primary clock to drive a series of secondary clocks around a facility. Without the primary clock, the secondary clock has no signal to drive it. [Oleksii Samorukov] had just such a clock, and whipped up a controller to stand in for timekeeping duty.
The secondary clock in question is a Pragotron PJ 27, which requires regular 12V signals of alternating polarity in order to keep time. To handle this job, [Oleksii] decided to use an ESP32 in combination with an L298N motor controller. The L298N is an H-bridge driver chip, allowing it to easily supply the 12V signals in alternating polarities where required. To ensure the system keeps accurate time, the ESP32 regularly queries an NTP time server over WiFi.
It’s a tidy build, and one that brings this attractive 1960s timepiece into the modern era. We’d love to have such a stylish, well-built clock in our own home, too. Of course, if you want really accurate time, building a GPS clock is a great option, too!
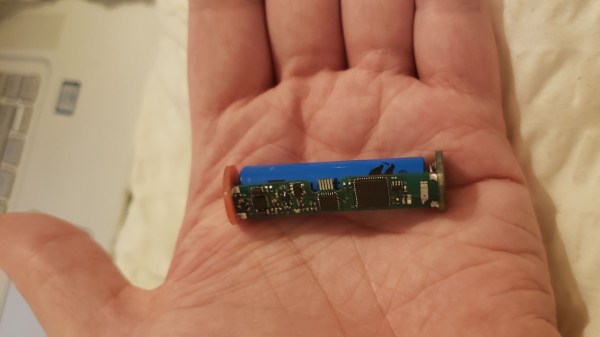
Internet-connected sex toys are a great way to surprise your partner from work (even the home office) or for spicing up long-distance relationships. For some extra excitement, they also add that thrill of potentially having all your very sensitive private data exposed to the public — but hey, it’s not our place to kink-shame. However, their vulnerability issues are indeed common enough to make them regular guests in security conferences, so what better way to fight fire with fire than simply inviting the whole of Twitter in on your ride? Well, [Space Buck] built just the right device for that: the Double-Oh Battery, an open source LiPo-cell-powered ESP32 board in AA battery form factor as drop-in replacement to control a device’s supply voltage via WiFi.
Double-Oh Battery with all the components involved
In their simplest and cheapest form, vibrating toys are nothing more than a battery-powered motor with an on-off switch, and even the more sophisticated ones with different intensity levels and patterns are usually limited to the same ten or so varieties that may eventually leave something to be desired. To improve on that without actually taking the devices apart, [Space Buck] initially built the Slot-in Manipulator of Output Levels, a tiny board that squeezed directly onto the battery to have a pre-programmed pattern enabling and disabling the supply voltage — or have it turned into an alarm clock. But understandably, re-programming patterns can get annoying in the long run, so adding WiFi and a web server seemed the logical next step. Of course, more functionality requires more space, so to keep the AA battery form factor, the Double-Oh Battery’s PCB piggybacks now on a smaller 10440 LiPo cell.
But then, where’s the point of having a WiFi-enabled vibrator with a web server — that also happens to serve a guestbook — if you don’t open it up to the internet? So in some daring experiments, [Space Buck] showcased the project’s potential by hooking it up to his Twitter account and have the announcement tweet’s likes and retweets take over the control, adding a welcoming element of surprise, no doubt. Taking this further towards Instagram for example might be a nice vanity reward-system improvement as well, or otherwise make a great gift to send a message to all those attention-seeking people in your circle.
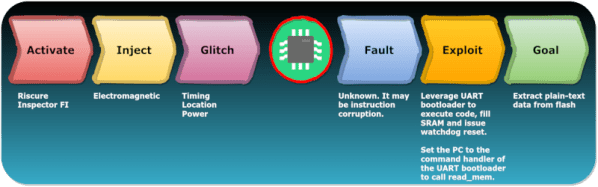
There is a scene from the movie RED (Retired, Extremely Dangerous) where Bruce Willis encounters a highly-secure door with a constantly changing lock code deep inside the CIA. Knowing the lock would be impossible to break, he simply destroyed the wall next to the door, reached through, and opened the door from the other side. We thought about that when we saw [raelize’s] hack to bypass the ESP32’s security measures.
Before you throw out all your ESP32 spy gadgets, though, be aware that the V3 silicon can be made to prevent the attack. V1 and V2, however, have a flaw that — if you know how to exploit it — renders secure boot and flash encryption almost meaningless.