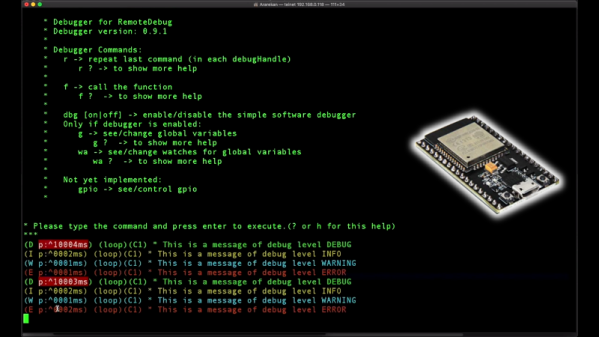
Debugging tools are critical to quick and effective development. Without being able to peek under the hood at what’s really going on, it can be difficult to understand and solve problems. Those who live on the Arduino platform are probably well acquainted with using the serial port to debug, but it’s far from the only way. [JoaoLopesF] has coded the RemoteDebug tool for ESP platforms, and the results are impressive.
RemoteDebug does away with the serial interface entirely, instead using the ESP’s native wireless interface to send debug data over TCP/IP. It’s all handled over telnet, making it completely platform agnostic. By handling things over the WiFi connection, it negates issues with physical access, as well as hassles with cables and limited serial ports. It’s also of benefit to robotics projects, which no longer need a tether when debugging.
It comes with a similar set of features to [JoaoLopesF]’s earlier work, SerialDebug. Things like verbosity and timestamps are all built in, making it easy to get high-quality debug data without having to reinvent the wheel yourself. Video after the break.
Brian Lough has followed a roundabout but probably not unusual route to the hardware hacking scene. Educated in Electronic and Computer Engineering, Brian is a software developer by trade who became enamored of Arduino development when the ESP8266 hit the market. He realized the microcontrollers such as these offered incredible capabilities on the cheap, and the bug bit him.
Since then, Brian has fully embraced the hardware hacking way, going so far as to live stream complete builds in a sort of collaborative “hack-along” with his viewers. He’s also turned a few of his builds into legitimate products, selling them on his Tindie store and even going so far as to automate testing before shipping to catch errors and improve quality.
Yes, [Heliox] has built a Valentine’s day project, and the presentation is top notch as always. A heart is 3D printed in white filament, with two chambers separated by a thick wall. Each chamber features five NeoPixel LEDs, controlled by an ESP8266 in the base. The color of each chamber can be controlled through the Blynk smartphone app, allowing you to choose the exact colors that best represent your relationship.
The 3D printed heart does a good job of diffusing the LEDs, with the device showing a rich and consistent glow without any unattractive hotspots. It’s a fun holiday build, and if you’re quick, you might just have time to print one yourself if you start right away.
Last year, we saw quite a bit of media attention paid to blockchain startups. They raised money from the public, then most of them vanished without a trace (or product). Ethics and legality of their fundraising model aside, a few of the ideas they presented might be worth revisiting one day.
One idea in particular that I’ve struggled with is the synthesis of IoT and blockchain technology. Usually when presented with a product or technology, I can comprehend how and/or why someone would use it – in this case I understand neither, and it’s been nagging at me from some quiet but irrepressible corner of my mind.
The typical IoT networks I’ve seen collect data using cheap and low-power devices, and transmit it to a central service without more effort spent on security than needed (and sometimes much less). On the other hand, blockchains tend to be an expensive way to store data, require a fair amount of local storage and processing power to fully interact with them, and generally involve the careful use of public-private key encryption.
I can see some edge cases where it would be useful, for example securely setting the state of some large network of state machines – sort of like a more complex version of this system that controls a single LED via Ethereum smart contract.
What I believe isn’t important though, perhaps I just lack imagination – so lets build it anyway.
Blinking an LED is generally considered the hardware equivalent of the classic “Hello World” project. It’s a quick and simple test to show that you’ve got the basics worked out, and a launching point for bigger and better things. So why should it be any different in this glorious new Internet of Things era?
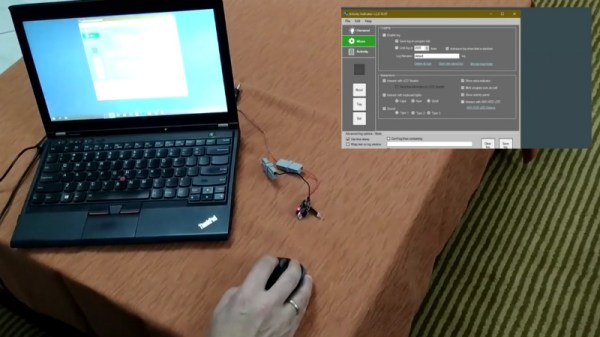
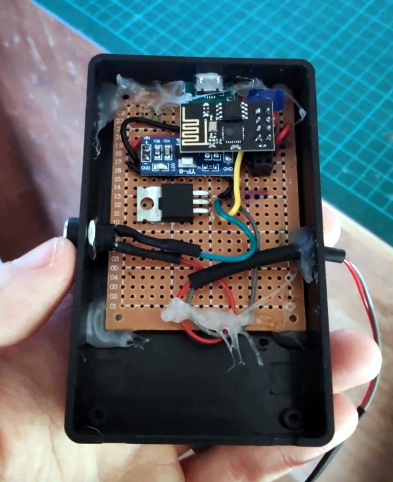
The “WiFi HDD LED” created by [Limbo] is essentially just that, a status LED that can be triggered remotely thanks to the WiFi capability of the ever-popular ESP8266. Don’t think there’s much use for a wireless LED that blinks when your computer’s hard drive is thrashing around? Maybe not, but it’s definitely worth checking out if you’re looking for a good way to get your feet wet in the world of ESP hacking.
On the hardware side, this is exactly what you’d expect: an LED hanging off the digital pin of an ESP8266 module. If you go with the bare ESP-01 like [Limbo], things are somewhat more complex due to the need for a voltage regulator, but if you’re using one of the more common ESP development boards then there’s nothing else you need to add. Really, as a proof of concept you could even use the built-in LED on those boards.
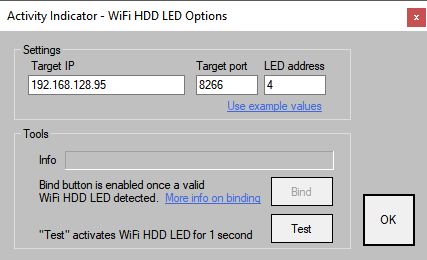
As you might imagine, this project is more about the software than the hardware. The code on both sides of the equation has been released as open source for your hacking pleasure, and is more capable than you’d probably expect. The LED is actually an extension of a system activity monitor that [Limbo] had previously developed and includes a binding function to make sure you’re talking to the right blinking ESP. It’s probably overkill for many purposes, but it’s a good example of how to do more robust UDP connections than we’re used to seeing.
Are you bored of your traditional bow tie? Do you wish it had RGB LEDs, WiFi, and a web interface that you could access from your smartphone? If you’re like us at Hackaday…maybe not. But that hasn’t stopped [Stephen Hawes] from creating the Glowtie, an admittedly very slick piece of open source electronic neckwear that you can build yourself or even purchase as an assembled unit. Truly we’re living in the future.
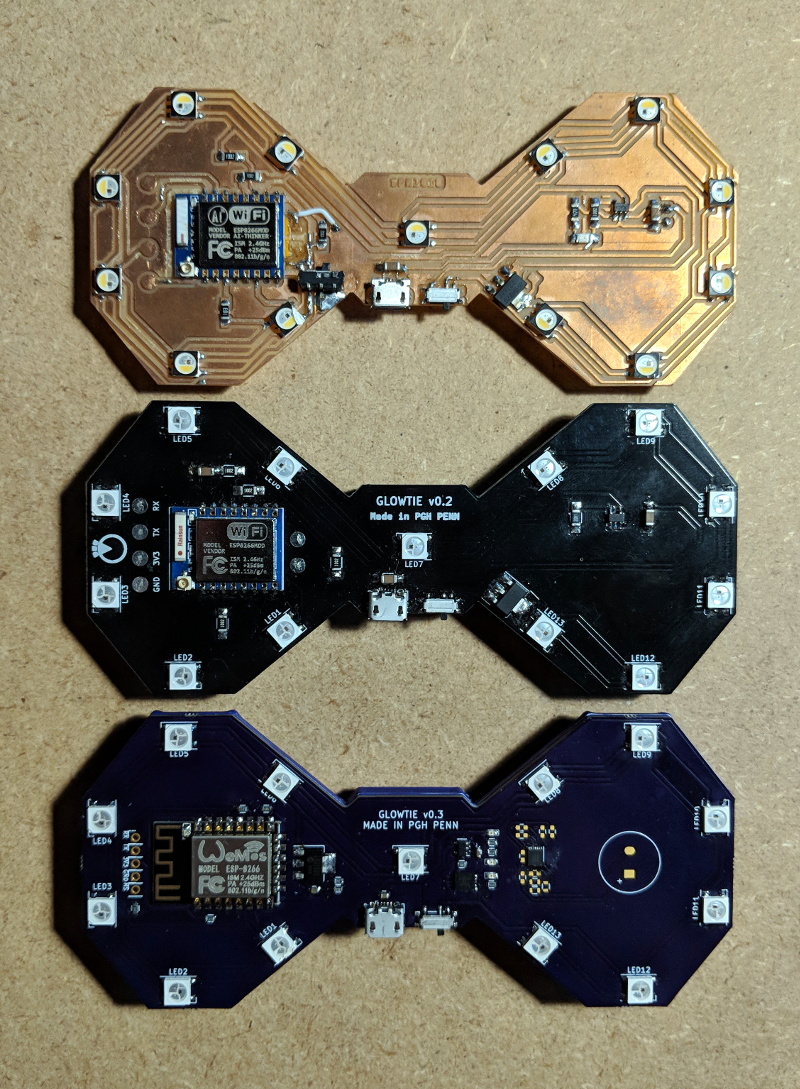
Evolution of the Glowtie
While we’re hardly experts on fashion around these parts (please see the “About” page for evidence), we can absolutely appreciate the amount of time and effort [Stephen] has put into its design. Especially considering his decision to release the hardware and software as open source while still putting the device up on Kickstarter. We seen far too many Kickstarters promising to open the source up after they get the money, so we’re always glad to see a project that’s willing to put everything out there from the start.
For the hardware, [Stephen] has gone with the ever popular ESP8266 module and an array of WS2812B LEDs around the edge of the PCB. There’s also a tiny power switch on the bottom, and a USB port for charging the two 1S 300mAh lipo batteries on the backside of the Glowtie. The 3D printed rear panel gives the board some support, and features an integrated bracket that allows it to clip onto the top button of your shirt. For those that aren’t necessarily a fan of the bare PCB look or blinding people with exposed LEDs, there’s a cloth panel that covers the front of the Glowtie to not only diffuse the light but make it look a bit more like a real tie.
To control the Glowtie, the user just needs to connect their smartphone to the device’s WiFi access point and use the web-based interface. The user can change the color and brightness of the LEDs, as well as select from different pre-loaded flashing and fading patterns. The end result, especially with the cloth diffuser, really does look gorgeous. Even if this isn’t the kind of thing you’d wear on a daily basis, we have no doubt that you’ll be getting plenty of attention every time you clip it on.
At this point it’s something of a given that a member of the ESP8266 family is likely your best bet if you want to cobble together a small Internet-connected gadget. Costing as little as $3 USD, this well documented all-in-one solution really can’t be beat. But of course, the hardware is only one half of the equation. Deciding how to handle the software side of your homebrew Internet of Things device is another story entirely.
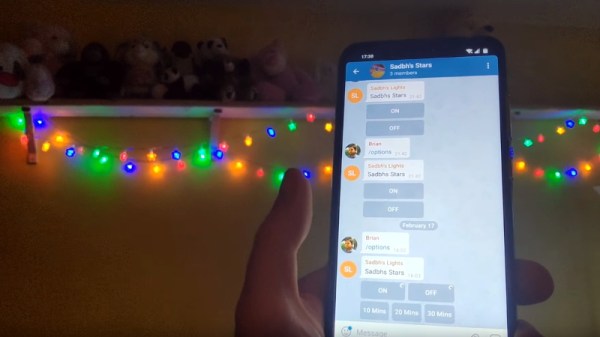
A simple Telegram ESP8266 switch
It would be fair to say that there’s no clear-cut “right” way to approach the software, and it really depends on the needs or limitations of your particular project. For example [Brian Lough] finds that building Telegram support into his ESP8266 allows him to accomplish his goals with the minimum amount of fuss while at the same time using an environment he’s already comfortable with. He recently wrote in to share one of his Telegram projects with us, and in the video after the break, takes the time to explain some of the things he likes best about controlling his hardware through the encrypted chat platform.
But you don’t have to take his word for it, you can try it yourself. Thanks to the software library that [Brian] has developed to connect his projects to Telegram, the aptly named “Universal Telegram Bot Library”, anyone can easily follow in his footsteps. Adding his Telegram library to your next ESP8266 project is as easy as selecting it in the Arduino IDE. From there the video explains the process for getting a bot ID from Telegram, and ultimately how you use it to receive messages from the service. What you do with those messages is entirely up to you.