AvoRipe Takes A Firm Grip On The Ultimate First World Food Problem

You don’t have to be an extinct mammal or a Millennial to enjoy the smooth, buttery taste of an avocado. Being psychic on the other hand is definitely an advantage to catch that small, perfect window between raw and rotten of this divaesque fruit. But don’t worry, as modern problems require modern solutions, [Eden Bar-Tov] and [Elad Goldberg] built the AvoRipe, a device to notify you when your next avocado has reached that window.

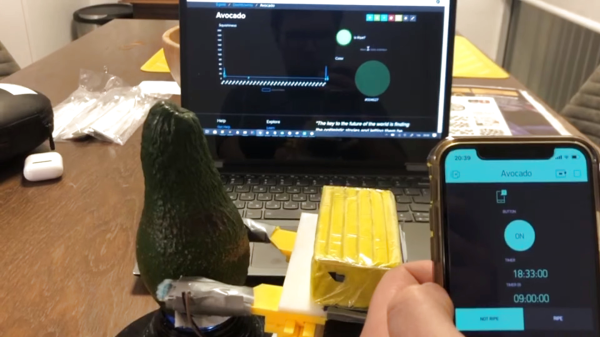
Taking both the firmness and color of an avocado as indicators of its ripeness into account, the team built a dome holding a TCS3200 color sensor as stand for the avocado itself, and 3D printed a servo-controlled gripper with a force sensor attached to it. Closing the gripper’s arms step by step and reading the force sensor’s value will determine the softness the avocado has reached. Using an ESP8266 as centerpiece, the AvoRipe is turned into a full-blown IoT device, reporting the sensor readings to a smartphone app, and collecting the avocado’s data history on an Adafruit.IO dashboard.

There is unfortunately one big drawback: to calibrate the sensors, a set of nicely, ripe avocados are required, turning the device into somewhat of a chicken and egg situation. Nevertheless, it’s a nice showcase of tying together different platforms available for widescale hobbyist projects. Sure, it doesn’t hurt to know how to do each part from scratch on your own, but on the other hand, why not use the shortcuts that are at our disposal to remove some obstacles — which sometimes might include programming itself.

Continue reading “AvoRipe Takes A Firm Grip On The Ultimate First World Food Problem”

Large hi-res pressure sensor mat

Hi-Res, Body-Sized Pressure Sensor Mat

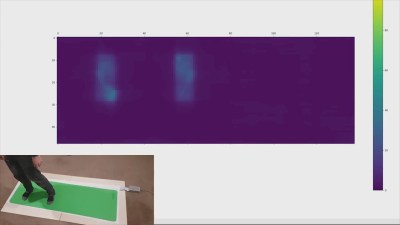
Hackers often find uses for pressure sensitive materials, detecting footfalls during walking or keypresses in a synthesizer being two examples. [Marco Reps] decided he’d make a hi-res, body-sized pressure sensitive mat mainly for computer-guided physiotherapy, though he wouldn’t rule out using it for gaming (twister anyone?). That meant making the equivalent of a body-sized matrix circuit of around 7000 sensors, as well as a circuit board with a multitude of shift registers. The result has a surprisingly good resolution, capable of making clearly distinguishable the heel, arch and front part of a foot.

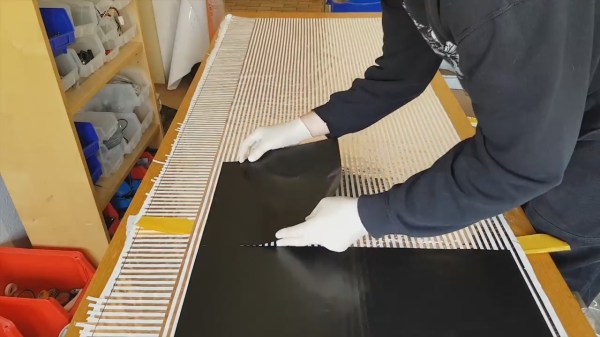
His choice of pressure sensitive material was Velostat, a polymeric foam available as large sheets. The foam is impregnated with carbon black to make it electrically conductive, but being a foam, its resistance changes when pressure is applied. The first layer of the mat is made up of one centimeter wide strips of copper tape laid out lengthwise and spaced one centimeter apart. That’s followed by the Velostat and then another layer of copper tape oriented horizontally this time. The pressure sensors are the sandwiches formed by where the tapes overlap. In the first video below he shows how he measured and graphed the Velostat’s dynamic range to help decide to use one centimeter squares. He also puts together a smaller prototype, with good results.

Testing the mat
Testing the mat

For the body-sized mat, we count around 50 by 140 overlapping areas for a total of around 7000 one square centimeter sensors. And of course to measure each sensor in that large matrix, as you can imagine, he made up a custom circuit board with shift registers. The board works by applying positive voltage to the columns one-by-one, while each time going through all the rows and reading their voltages. Making the board was in itself was an adventure, taking a chance on a Chinese manufacturer asking only $2. But watch the second video below where he evaluates the result, including trying unsuccessfully to delaminate a board. Sadly he forgot to include places on the board for diodes, one for each column, and fixing that is another adventure he walks us through. Patience was definitely a prerequisite here, not only for making the mat, and fixing the diode problem, but also for connecting up 96-pin ribbon cables. We applaud his efforts, and his results. Check out the second video below for the making of the large mat and the circuit board.

Continue reading “Hi-Res, Body-Sized Pressure Sensor Mat”

Hackaday Prize Entry: 3D Printed Linear Actuator Does 2kg+

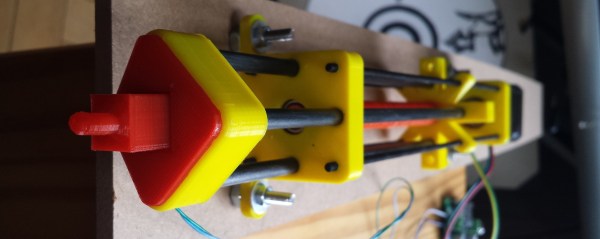
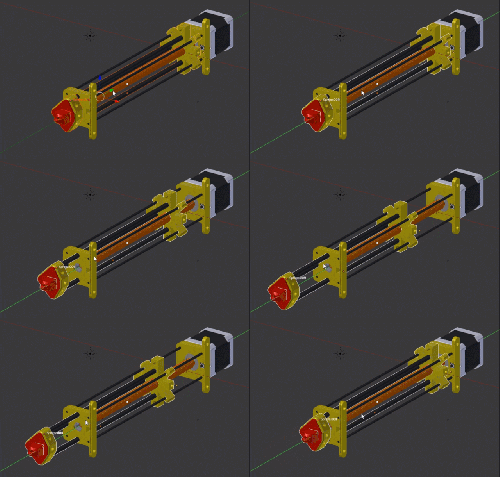
The rabbit hole of features and clever hacks in [chiprobot]’s NEMA17 3D Printed Linear Actuator is pretty deep. Not only can it lift 2kg+ of mass easily, it is mostly 3D printed, and uses commonplace hardware like a NEMA 17 stepper motor and a RAMPS board for motion control.

The main 3D printed leadscrew uses a plug-and-socket design so that the assembly can be extended easily to any length desired without needing to print the leadscrew as a single piece. The tip of the actuator even integrates a force sensor made from conductive foam, which changes resistance as it is compressed, allowing the actuator some degree of feedback. The force sensor is made from a 3M foam earplug which has been saturated with a conductive ink. [chiprobot] doesn’t go into many details about his specific method, but using conductive foam as a force sensor is a fairly well-known and effective hack. To top it all off, [chiprobot] added a web GUI served over WiFi with an ESP32. Watch the whole thing in action in the video embedded below.

Continue reading “Hackaday Prize Entry: 3D Printed Linear Actuator Does 2kg+”

Toy Piano Gets Synth Overhaul

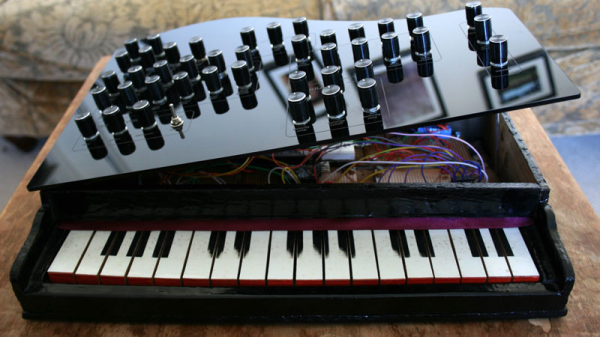
The Peanuts cartoon character Schroeder liked to bang out Beethoven a toy piano. Now, thanks to this hack from [Liam Lacey], Schroeder can switch to Skrillex. That’s because [Liam] built a polyphonic synth into a toy piano. It’s an impressive build that retains the look and feel of the piano, right down to a laser-etched top panel with knobs that match the glossy black styling.

The brains of the synthesizer is a Beaglebone Black using the Maximillian synthesis library. To capture the key presses, he used Velostat, a pressure-sensitive material that changes resistance under pressure. This is probably the only toy piano in the world with fully polyphonic velocity and aftertouch. The build also includes MIDI support, with two ports on the back. [Liam]’s build log is full of more details than we can even summarize here.

This beautiful build won [Liam] first place in the Element 14 Music Tech competition, and it is a well-deserved prize for a clean and elegant way to update a vintage piano.

Continue reading “Toy Piano Gets Synth Overhaul”

Experiments With A Bowden Extruder Filament Force Sensor

We were excited to learn that someone had started working with force sensors on filament extruders, especially after we posted about a recent development in filament thickness sensors.

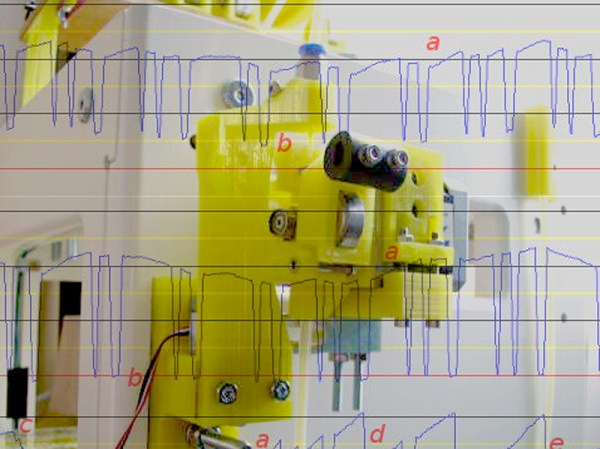
[airtripper] primarily uses a Bowden extruder, and wanted to be a little more scientific in his 3D printing efforts. So he purchased a force sensor off eBay and modified his extruder design to fit it. Once installed he could see exactly how different temperatures, retraction rates, speed, etc. resulted in different forces on the extruder. He used this information to tune his printer just a bit better.

More interesting, [airtripper] used his new sensor to validate the powers of various extruder gears. These are the gears that actually transfer the driving force of the stepper to the filament itself. He tested some of the common drive gears, and proved that the Mk8 gear slipped the least and provided the most constant force. We love to see this kind of science in the 3D printing community — let’s see if someone can replicate his findings.


Turning A Typewriter Into A Mechanical Keyboard

Is your keyboard too quiet? Is your Cherry MX Blue board not driving your coworkers crazy enough? If the machine gun fire of a buckling spring keyboard isn’t enough for you, there’s only one solution: [Russell]’s typewriter turned into a mechanical keyboard.

Converting typewriters into keyboards has been done for a very long time; teletypes, the first computer keyboards, were basically typewriters, and the 1970s saw a number of IBM Selectrics converted into a keyboard with serial output. Even in recent years, typewriters have been converted into keyboards with the help of some switches and an ATMega. [Russell]’s mechanical keyboard improves on all of these builds by making the electronic interface dead simple, and a project that can be done by anyone.

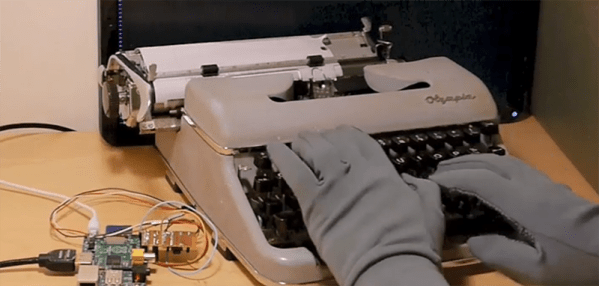
Instead of installing switches underneath every key or futzing about with the weird mechanics of a Selectric typewriter, [Russell] is only installing a touch-sensitive position sensor into the frame of the typewriter. When a key is pressed, it strikes a crossbar in the frame of the typewriter. With a single ADC chip and a Raspberry Pi, [Russell] can determine which key was pressed and use that information to output a character to a terminal.

It’s a very simple solution for an electrical interface to a mechanical device, and the project seems to work well enough. [Russell] is using his new keyboard with Vim, even, something you can check out in the video below.

Continue reading “Turning A Typewriter Into A Mechanical Keyboard”