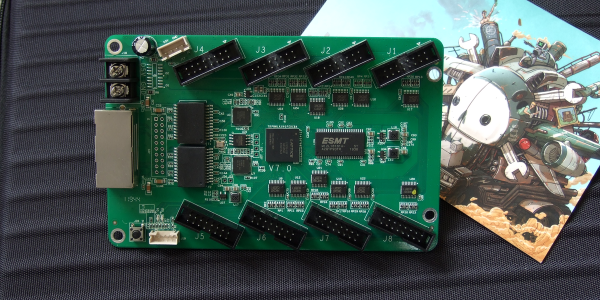
Our new part of the day is the ColorLight 5A-75B, a board that’s meant to drive eight of those ubiquitous high-density color LED panels over gigabit Ethernet. If you were building a commercial LED wall, you’d screw a bunch of the LED panels together, daisy-chain a bunch of these boards to drive them, supply power, and you’d be done. Because of that high-volume application, these boards are inexpensive, around $15 each, and available as quickly as you can get stuff shipped from China.
But we’re not here to talk commercial applications. Managing fast Ethernet and pushing so many pixels in real time is a task best handled by an FPGA, and [Tom Verbeure] noticed that these things were essentially amazing FPGA development boards and started hacking on them. [q3k] put it up on GitHub, and you can follow along with the chubby75 reverse engineering project to dig into their secrets.
While the first generations of these boards used the old-standby Spartan 6, things got interesting for fans of open FPGA tools when newer versions were found using the Lattice ECP5-25 chips, the little brother of the stonking big chip [Sprite_TM] used on the 2019 Hackaday Supercon badge. If you want to grab one you’re looking for ColorLight boards marked with revision 6 or 7 as of this writing.
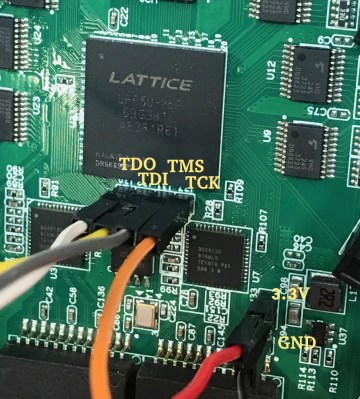
What does this mean? For the price of a gourmet hamburger, you get an FPGA that’s big enough to run a RISC-V softcore, two 166 MHz, 2 MB SDRAMS, flash for the FPGA bitstream, a bazillion digital outputs on 5 V level shifters, and two gigabit Ethernet ports. The JTAG port is broken out in 0.1″ headers, and it works with OpenOCD, which is ridiculously convenient. How’s that for a well-stocked budget FPGA dev board that’s served by a completely open toolchain? Continue reading “New Part Day: LED Driver Is FPGA Dev Board In Disguise” →