Investigating The World’s Rarest Game Boy

Early last year, a very unique Game Boy Color showed up on Chinese shopping site Taobao. Rather than the rather anemic-looking display of the original GBC, this version was modified with a modern IPS LCD. Even in the pictures shown on the product page, it was clear the display on this unit was far more advanced than anything Nintendo ever packed into a Game Boy. The retro gaming community went wild, and soon the site was overwhelmed with orders. The majority of the sales were canceled by the seller, and it’s believed as few as 75 of these hacked GBCs were actually shipped out.

Thanks to one of his viewers, [Colin] was able to get his hands on one of these extremely rare customized handhelds. Clearly a man after our own heart, his first inclination was to tear the thing apart and see how they built it. While he had a fairly good idea of how they managed this hybrid of modern and classic technology, there were a couple of surprises inside.

The device has a completely stock main board, and as such works and plays like a normal GBC. But upon flipping the main board over, [Colin] found a nest of thin magnet wire connecting the new display controller to individual buttons on the front panel. As he later confirmed when he reassembled the system, this allows the user to adjust the display’s brightness by holding “Select” and using the directional pad.

As for the screen itself, the big surprise was that it’s clearly pulled out of a relatively recent smartphone. The screen is physically much larger than the opening in the GBC’s front panel, but through some software trickery the image is displayed only in the area that’s visible to the player. [Colin] managed to get a hold of a few contacts “in the know” who confirmed to him that both the hardware and software for the display controller were specifically created for this application, and are unlikely to be duplicated by anyone else.

Considering most of the Game Boy hacks we cover are about somebody jamming modern hardware into them, it’s an interesting change of pace to see a group that was so adamant about retaining as much original hardware as possible while still managing to improve the user experience.

[Thanks to Doc Oct for the tip]

Continue reading “Investigating The World’s Rarest Game Boy”

Repairing A Sunburned Game Boy Screen

The original Game Boy is a classic. Sure, it had no backlight, but there is something special about playing on that classic green screen. Unfortunately, some of these older systems are suffering a terrible fate — screen burn. Game Boy’s played best with lots of light — especially out in the sun. But that same sun did terrible things to the screen. A black splotch in the center of the LCD is the telltale sign of a burned Game Boy. You might think that screen replacement is the only option, but [The Retro Future] shows us how to repair this issue.

A reflective LCD is a layer cake made up of polarizers, two panes of glass, and a reflector. The burns often seen on Game Boy screens usually are in the polarizer and the optically clear glue which attaches the plastic polarizer to the glass. We’re guessing these burns happen when someone leaves their Game Boy out in the sun. Between the sun rays directly striking the top polarizer and the rays bounced back from the reflector at the rear of the screen, that poor polarizer doesn’t stand a chance.

Repairing the burn is a delicate operation, as one false move could crack the thin LCD glass. The first step is to carefully peel off the burned polarizer. This leaves a mess of dried glue, which can be scraped off or dissolved with alcohol. A new linear polarizer can then be placed on the front of the screen. [The Retro Future] chose not to glue the polarizer, but we’re betting some UV cure LOCA (Liquid Optically Clear Adhesive) from a cell phone screen protector would do the trick.

If you love the look of the classic Game Boy, but want to play just about any classic game, grab a Raspberry Pi zero, and build a retro Pi Boy.

Continue reading “Repairing A Sunburned Game Boy Screen”

Pi Handheld With A Mindblowing Enclosure

The Raspberry Pi is possibly the world’s most popular emulation platform these days. While it was never intended to serve this purpose, the fact remains that a small, compact computer with flexible I/O is ideally suited to it. We’ve featured a multitude of builds over the years using a Pi in a mobile form factor to take games on the go. [Michael]’s build, however, offers a lot more than a few Nintendo ROMs and some buttons from eBay. It’s a tour de force in enclosure design.

The build starts with the electronics. In 2017 it’s no longer necessary to cobble together five different accessory boards to handle the controls, battery charging, and display. Boards like Kite’s Super All In One exist, handling everything necessary for a handheld game console. With this as a starting point, he then set out to recreate Nintendo’s classic Game Boy, with a few tweaks to form and function.

It’s a textbook example of smart planning, design, and execution. We are taken through the process of creating the initial CAD drawings, then combining 3D printed parts with wood and carbon fibre for a look that is more akin to a high-end piece of hi-fi gear than anything related to gaming. The attention to detail is superb and the write-up makes it look easy, while [Michael] shares tips on how to safely cut carbon fibre to make your own buttons.

The final results are stunning, and it’s a great example of why a fine piece of wood is always a classy way to go for an enclosure. For another great example, try this walnut keyboard, or check out the roots of the Raspberry Pi Game Boy movement.

Game Boy Advance SP in ECG device

Game Boy Advance Hiding In A Medical Device

It turns out that medical manufacturers also do hacking once in a while. [Jana Marie Hemsing] recently tweeted a photo of an ECG-Trigger-Unit that she’d opened up. Inside she found that the LCD screen was that of a Game Boy Advance (GBA) and the reason she could tell was that the screen’s original case was still there, complete with GAME BOY ADVANCE SP written on it.

In the manufacturer’s defense, this device was likely made around the year 2000 when gaming products were some of the best sources for high speed, high quality, small LCDs displays.  This design document for a portable ECG measurement instrument from as recently as 2013 cites reasons for using a GBA as:

  • impressive plotting results,
  • no serious transmission delays, and
  • fine graphics processing capability.

The Verge had even turned up this US patent from 1997 that has the diagnostic medical device be a cartridge for plugging into a Game Boy. At the time, PCs were frequently used for medical displays but this patent cites issues such as the higher cost of PCs, software installation issues, and crashing. However, they talk about the crashing being due to running word processing and spreadsheet software on the same PC, something not likely to happen if the PC is dedicated to bedside monitoring.

But despite all those pros, wouldn’t you feel surprise and alarm when you first glimpse the Game Boy inside the device that’s monitoring your heart? We also have to wonder what licensing these products went through in the countries in which they were used. This particular device was made by German company Medical Imaging Electronics.

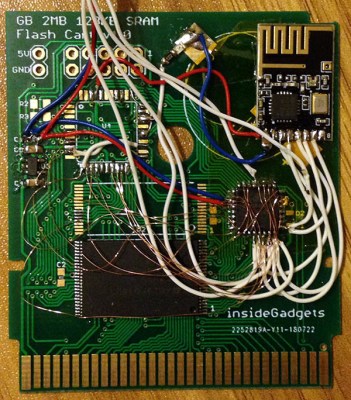
Game Boy hacks aren’t limited to the medical industry though. Here on Hackaday, we’ve seen them turned into remote controls for flying drones and we’ve seen Game Boy cartridge emulators that use STM32. Finally, if you’re wondering where you saw [Jana Marie]’s name before, she was one of the two hackers driving the motorized armchair in a photo in our [Jenny List]’s SHACamp 2017 write-up.

Our thanks to [geonomad] for the tip!

Yes, Of Course Someone Shot The Eclipse On A Game Boy Camera

This one shouldn’t surprise us, but there is something particularly enjoyable about seeing the total eclipse of the Sun through a Game Boy camera.

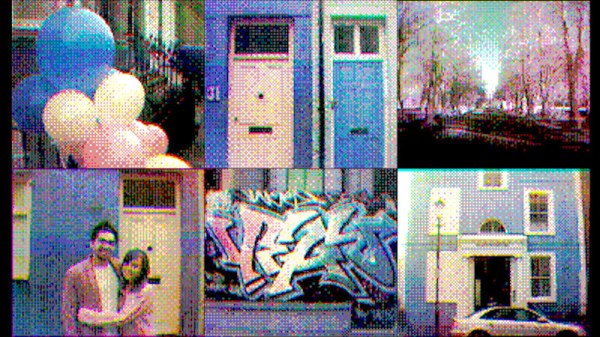
The Game Boy got its camera accessory back in 1998 when CCD-based cameras with poor resolution were just becoming widely available to the public. This camera can capture 128×112 pixel images in the four value grey scale for which the handheld is so loved.

Having taken part in eclipse mania ourselves we can tell you that unless you did some serious research and prep for photographing the thing, this makes as much sense as pulling out your smartphone did. We posit that it certainly produced a more pleasing result.

[jhx] says this is more a weird halo effect of the shot than it is a quality image of totality. At this resolution, the moon-covered Sun should be very few pixels in size, right? But fidelity is for photographers, this is for hackers. Getting the digital image off of the Game Boy camera involved using an Interact Mega Memory cartridge on a Game Boy Pocket to transfer it over, then using a USB 64M cartridge to copy from the Mega Memory and ultimately to a computer.

Glamour shots ain’t easy, yo. But it is possible to read images directly off the Game Boy camera thanks to some reverse engineering work.

[via Kotaku]

Two-Bit Astrophotography

The Game Boy Camera is a 128×112 pixel sensor from 1998 that was probably the first digital camera in many, many homes. There’s not much you can do with it now, besides replicate old Neil Young album covers and attempting and failing to impress anyone born after the year 1995. Nevertheless, screwing around with old digital cameras is cool, so [Alex] strapped one fo these Game Boy Cameras to an old telescope.

For any astrophotography endeavor, the choice of telescope is important. For this little experiment, [Alex] used a 6” Fraunhofer telescope built in 1838 at the Old Observatory of Leiden. The Game Boy with Camera was attached to the scope using a universal cell phone adapter. Apparently the ‘universal’ in this universal cell phone adapter is accurate – the setup was easy and [Alex] quickly got an image of a clocktower on his Game Boy.

Turning to the heavens, [Alex] took a look at the most interesting objects you can see with a 6-inch telescope. Images of the moon turned out rather well, with beautiful 2-bit dithering along the terminator. Jupiter was a bright white spot in a sea of noise, but [Alex] could see four slightly brighter pixels orbiting where Stellarium predicted the Galilean moons would be.

Was this experiment a success? Between cloudy nights and a relatively small telescope, we’re saying yes. These are pretty impressive results for such a terrible digital camera.

Game Boy Mod Uses Raspberry Pi Compute Module 3

[inches] wanted the power of a Raspberry Pi 3 in a form factor closer to the Pi Zero for a Game Boy mod. This led him to design a custom PCB to interface with one of the less popular items in the Raspberry Pi line: the Compute Module 3. A hardware comparison between the three platforms is available here.

After correcting some minor issues, it booted correctly on the first try. The final result is slightly larger than a Raspberry Pi Zero, but significantly smaller than the Raspberry Pi 3, and fits perfectly inside the Game Boy for a clean build.

The Raspberry Pi Zero remains difficult to source in some parts of the world and can cost nearly as much as the more powerful CM3 (e.g. in Southeast Asia). If you’re comfortable making a breakout board and benefit from the added computing power, it’s a reasonable option when it needs to be small.

Worth noting is that the Raspberry Pi Foundation does sell an open-source development kit for the CM3 that has been used in some projects, but the retail cost is relatively high compared to a Raspberry Pi 3. Smaller but less feature-rich breakout boards like the one by [inches] make the CM3 more accessible.

Thanks to [Lou Hannoe] for the tip.