Gameboy Case Lives On With A Pi Zero

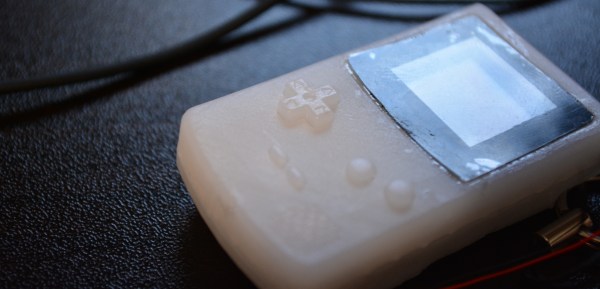
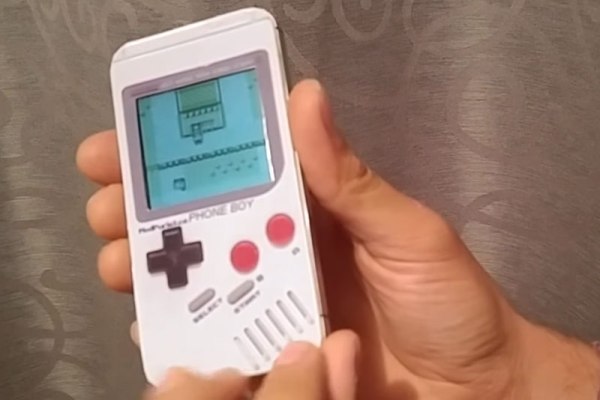
After scoring a non-functioning Gameboy in mint condition for $10, [Chad] decided it was time for a fun electronics project, so he ordered an LCD and bought a Pi Zero.

He started with a 3.5″ LCD off eBay for about $25, and got it running with the Pi Zero. It’s only 320×240 resolution, but hey, we’re recreating a Gameboy — not a smartphone. The next step was rather finicky: cutting up the case to fit the new components in.

Using a collection of files he whittled down the screen opening in the case to make room for the LCD, a few hours later and it looked surprisingly good.

From there he started laying out the components inside of the case, trying to figure out the best layout for everything to fit nicely. To power the unit he’s using a lithium ion battery from a Samsung Note which should give him some serious play-time. It fits right in where the game card is suppose to go.

To add some extra control functionality he’s added the game-pad buttons from a SNES onto the back where the battery door is, he’s also got a USB port on the side, a MicroSD card slot, and even a new audio pre-amp with potentiometer for controlling the speaker volume.

In case you can’t find a mint condition Gameboy case like [Chad] did, you could just print one from scratch

Continue reading “Gameboy Case Lives On With A Pi Zero”

Building A Better Game Boy With A Pi

The most collectible Game Boy, by far, would be the Game Boy Micro. This tiny Game Boy is small enough to lose in your pocket. It can only play Game Boy Advance games, the screen is tiny, but just look at the prices on eBay: it’s one of the few bits of consumer electronics that could be seen as an investment in retrospect.

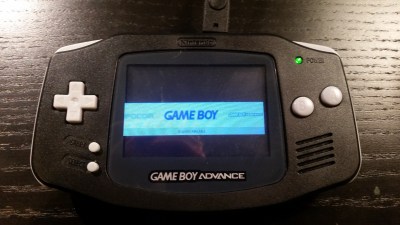
The popularity of the Game Boy Micro, the ability for the Raspberry Pi to emulate old game consoles, and the introduction of the Raspberry Pi Zero could only mean one thing. It’s the PiGrrl Zero, a modern handheld to play all your retro games.

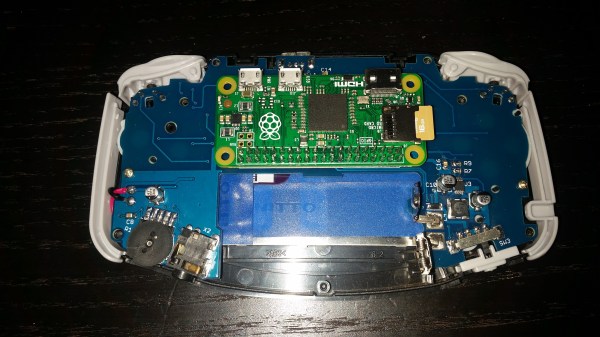
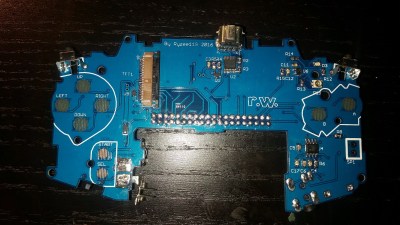
The design goals for the PiGRRL Zero were simple enough: a 2.2 inch 320×240 display, a d-pad, four buttons on the face and two shoulder buttons. There’s a big battery, audio output, and a 3D printed case. This would be somewhat unremarkable if it weren’t for the PCB designed for PiGRRL Zero. It’s designed to be soldered directly onto the Raspberry Pi Zero, taking advantage of the mostly component-free back side of this tiny single board computer.

With this PCB, the Pi Zero is turned into a tiny battery-powered computer running emulations of all the classics. NES, SNES, Sega, and of course Game Boy Advance games are readily playable on this devices, and for a price that’s a fair bit lower than what a mint condition Game Boy Micro goes for. Our judges thought it was cool enough to be one of the winners of the Pi Zero Contest. Check it out!


Raspberry_Pi_LogoSmall

The Raspberry Pi Zero contest is presented by Hackaday and Adafruit. Prizes include Raspberry Pi Zeros from Adafruit and gift cards to The Hackaday Store!
See All the Entries

Hackaday Links: January 3, 2016

Cx5 is a strange material that’s a favorite of model makers and prop replicators. It’s kind of like a wax, kind of like a clay, and a little bit like a plastic. Now it’s a 3D printer filament. It looks very interesting for sculpted and highly detailed models, something the 3D printing scene hasn’t had yet.

So you want a CNC machine, right? Tormach makes a good one, and here’s what it takes to put a PCNC440 in your garage. This is an incredible amount of work and a great excuse to buy an engine hoist.

[Zemnmez] could find dozens of apps and webpages that would calculate resistor color codes for him automatically. What he couldn’t find is one that would do it in reverse – i.e. type in a resistor value and return the correct color code. He made this.

[aggaz] needed a way to connect multiple MIDI devices to his computer. The MIDI spec provides a neat piece of hardware for just this occasion – the MIDI thru box. The only thing you need to build a single MIDI thru box is an opto-isolator and a buffer. It’s easy enough to build, although the DIN5 jacks used for MIDI devices are pretty expensive nowadays. (FWIW- We get an invalid certificate error when loading this page but you should still be able to load it.)

AliExpress always has some interesting stuff on it, and [Ethan] found something very cool. They’re A8 CPUs found in the latest iPhone. Are they real? Who knows. I bought one, and you’re going to get pictures in another links post in a month or so.

The Game Boy Micro was released by Nintendo in 2005 and quickly became one of the coolest and most desired handheld consoles on the planet. You need only look at the eBay listings for the Micro as evidence of its desirability. [ModPurist] took an old DS Lite and converted it into a Game Boy Micro – same idea, larger package.

Breaking Out A Game Boy Link Cable

[Samuel] is working on one of the most important electronics projects of our generation. He’s building a device for the Game Boy that will allow Pokemon trades between generation II and III. Yes, This means bringing your Charmander from Pokemon Red to your team in Pokemon Ruby, Sapphire, or Emerald. and finally completing the National Dex you’ve been working on for 20 years. Before he gets to designing this system, he first needs to listen in on the Game Boy Link Cable, and that means creating a breakout board.

The Game Boy Link Cable – sometimes inaccurately referred to as the Zelda cable – is a special proprietary connector. The design is well documented, but unlike the Wii Nunchuck controller, there’s no readily available breakout board available for this piece of obsolete technology.

Together with a his friend [David], [Samuel] loaded up a copy of Eagle and designed a board that will fit on a small piece of copper clad FR4. This design was then sent over to a small CNC mill, The traces were machined away, and a sextet of pins were soldered into the holes.

With a breakout board for the Game Boy Link Cable, [Samuel] now has a great platform for peering into the strange and magical world of Pokemon. He’ll be using a Teensy microcontroller for his trading device, and with several similar projects already completed by others around the Internet, the potential for a Gen II to Gen III Pokemon trader is palpable.

Raspberry Pi 2 Game Boy Brings Sexy Back From 1989

When the ever-versatile Raspberry Pi was released, the potential for cheap video game emulation was immediately obvious. Some of the very first Raspi projects to hit the internet were arcade cabinets, and it wasn’t long until people were making them portable. A purpose-build Linux distort called RetroPie has become very popular specifically because of the Raspi’s game-emulation potential. However, the actual hardware for these emulation systems isn’t always the most aesthetically (or ergonomically) pleasing. That’s where reddit user [Cristov9000] has managed to stand out from the crowd.

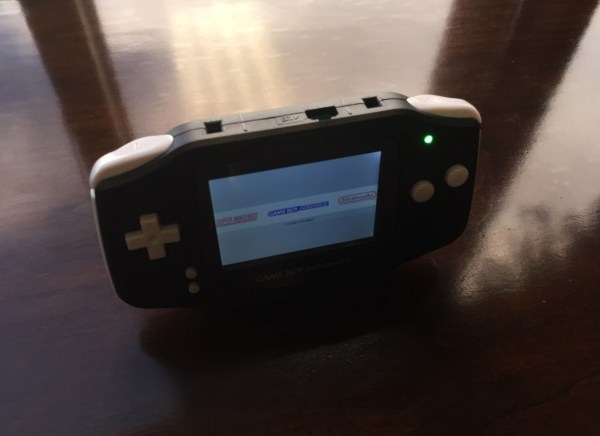
[Cristov9000] accomplished this by combining high-quality design (and 3D printing) with the careful use of original Nintendo parts. Game Boy and SNES buttons and elastomers were used to achieve the correct button feel. Other original Game Boy parts, like the volume wheel and power switch, ensure that the system feels as much like 1989 OEM hardware as possible.

Also impressive is the internal hardware, including 3 custom PCBs used to tie everything together to work via the Raspberry Pi 2 GPIO pins. The display is a 3.5″ TFT screen, and with the 6000 mAh it can handle gameplay for more than 7 hours. Other details, like the integrated mono speaker and rear shoulder buttons complete the experience. Combined with the RetroPie and an assortment of emulators, this is one of the most impressive portable gaming builds we’ve seen, especially among a crowded list of awesome raspi-based Game Boy builds.

Arduboy Classic Plays On Original Game Boy Screen

The Arduboy is a Kickstarter backed, 8 bit video game console that mimics the look of a very tiny Nintendo Gameboy. The Arduboy Classic is actually using the case, button and LCD screen from a classic Game Boy.

[uXe] is using the same brains, an ATMEGA32U4, along with a 328 as a co-processor to handle the classic “creme-n-spinich” gameboy screen. 2K of dual port ram acts as a buffer between the two micro-controllers meaning they can not only run while not being in lock step with eachother, but that each micro can read or write to the ram at the same time.

Currently the whole setup is spread out on a breadboard while all the interfacing is worked out, but it is working quite well. Future plans are to make a drop in motherboard replacement for the classic game system, and there is ample room for all the new electronics on the original footprint.

If you’re unfamiliar with the Arduboy project, check out our interview with it’s creator, [Kevin Bates]. That and the demo of [uXe’s] hack based on the project are both found after the break.

Continue reading “Arduboy Classic Plays On Original Game Boy Screen”

8-bit Digital Photo Gun

One of the first popular mass-produced digital cameras was the Game Boy camera, a terrible black and white image sensor stuck inside a highly modified Game Boy cartridge. With a Game Boy, the camera, and the Game Boy printer, it was able to produce low-resolution but still surprisingly usable images. Combine all these parts together with the best of hacker art from [vtol] and what do you get? The Game Boy Instant Photo Gun.

There aren’t many details for this build, but it looks like this is an uncased Game Boy Brick, a Game Boy camera, and Game Boy Printer assembled into something that looks dangerous and won’t get past a TSA checkpoint. That might be fixed by repurposing an old NES zapper.

We’ve seen [vtol]’s work before with a machine that probably doesn’t steal your credit card info, a levitating speaker, and something that doesn’t reference [Tarkovsky] enough. This build is right up there with the rest of them.

Thanks [Itay] for the link.