Climbing Wall in Garage

Rock Climbing Wall Installed In Garage Doubles As Storage Space

Climbing enthusiast and human spider [Swighton] just couldn’t get enough climbing crammed into his day. If he couldn’t get out to the climbing spots, why not bring the climbing spot to him? So he did that by building a climbing wall in his garage.

The process started with determining the available space that can be allocated to the project. In [Swighton]’s case he could afford an 8×12 ft section of real estate. The garage ceilings were 8 ft high. A few days were spent sketching out ideas and designs. To suit his needs, the wall had to have a 45 degree overhang section, a small 90 section (think ceiling, not wall) and a pull-up bar. Once the design was finalized, it was time to pull some sheet rock off the walls and ceiling so that the 2×4 and 2×6 climbing wall framing could be securely fastened to the current garage structure.

Three-quarter inch plywood would cover the wooden frame. Before the plywood sheets were cut to size and installed, he drilled holes every 8 inches to accept t-nuts. These t-nuts allow hand holds to be installed and easily reconfigured. The quantity of t-nuts adds up quickly, an 8 inch square spacing results in 72 t-nuts per sheet of plywood.

[Swighton] also added a hatch to allow access to the inside of the climbing wall so that space would not go to waste. It is now a storage area but may become a kids’ fort in the future. After it was all said and done the wall only cost $400 which includes $180 for the hand holds.

If you’re like [Swighton] and can’t get enough climbing action, check out this wall with light up hand holds or this interactive wall.

A Bluetooth Garage Door, Take Three

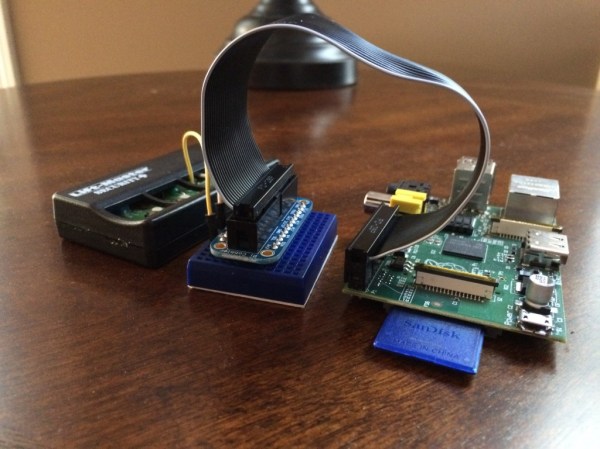
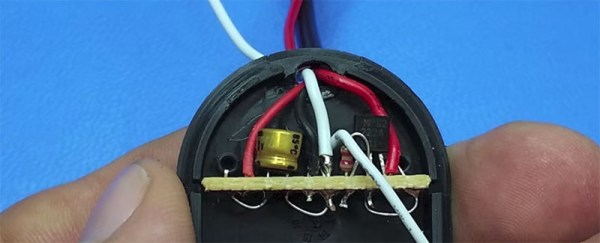
A few years ago, [Lou] came up with a pretty clever build to open his garage door with his phone. He simply took a Bluetooth headset, replaced the speaker with a transistor, and tied the transistor to a few wires coming out of his garage door opener. When the Bluetooth headset connected, the short beep coming from the speaker output opened the door.

The newest version of this build does away with the simple Bluetooth headset and replaces it with a Bluetooth 4.0 chip. The reason for this is that Apple and their walled garden of an App store would never allow a Samsung Bluetooth headset to be used with one of their iDevices.

The latest build is just about as simple as using a Bluetooth headset. A board that appears to use TI’s CC2540 chip is attached to the garage door opener with a few passives and a transistor. Pairing the new circuit with a phone is as simple as shorting a pair of pins, and the new iOS app does exactly what it should – opens a garage door at the press of a non-button.

While it’s not something that can be put together with scraps from a junk drawer, it’s still an extremely simple solution to opening a garage door with a phone. Video below.

Continue reading “A Bluetooth Garage Door, Take Three”

Garage Door Opener

Capacitive Garage Door Opener Hides Behind Your Dash

[Pyrow] wanted to upgrade his garage door opener remote. It worked just fine, but changing those tiny batteries out can be an inconvenience. Plus, the remote control was taking up valuable storage space and would always rattle around while driving. [Pyrow] decided to make use of an Omron E2K-F10MC2 capacitive touch sensor to fix these issues.

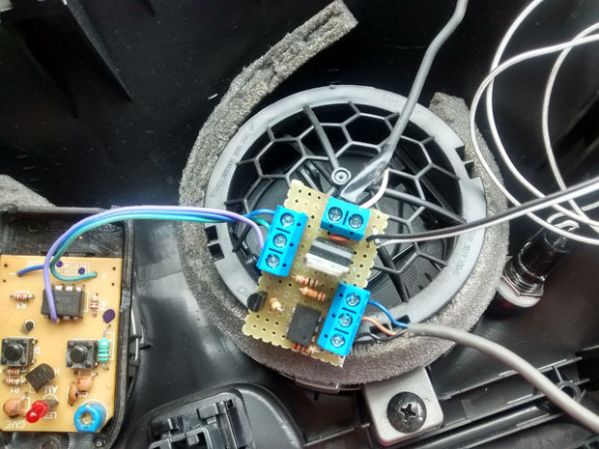
[Pyrow’s] circuit still makes use of the original remote control. He just added some of his own components to get it to do what he wanted. The circuit is powered by the car’s battery, so it never needs a battery replacement. The circuit is protected with a fuse and the power is regulated to prevent electrical spikes from burning up the original remote control. The actual circuit is pretty simple and uses mostly discrete components. It’s all soldered onto proto board to keep it together. He only had to solder to three places on the original remote control in order to provide power and simulate a button press.

Next, [Pyrow] took his dash apart. He used double-sided tape to attach the touch sensor to the back of the dash.  After securing the electronics in place with tape, he now has a working hidden garage door opener. Full schematics are available in the writeup linked above. Also, be sure to watch the demonstration video below.

Continue reading “Capacitive Garage Door Opener Hides Behind Your Dash”

Robotic Scalextrics

scalectrics

At the Volkswagen factory there are two towers – AutoTürme – filled with gigantic robots lifting cars into parking spaces. It’s by far the most efficient way of putting a huge number of cars in a small footprint. Slot cars exist, so how about a completely overwrought yet entirely awesome robotic parking garage for 1:32 scale cars? (.es, Google translatrix)

The project is built around several ‘racks’ to hold cars arranged around a central elevator. An Arduino takes care of moving all the motors and reading all the sensors, with the basic idea behind the project being the ability to select a car and have it appear in the pit of the track a few moments later.

Although this is just one small part of what is already a very impressive slot car track, it is however the most electronic. Other unique additions include a very unique cantilever/suspension bridge and the usual modeling techniques of creating a landscape with little more than cardboard and glue.

The best way to get a sense of how cool the parking garage is through the video. You can check that out below.

Continue reading “Robotic Scalextrics”

Retrotechtacular: ROTOPARK Is A Futuristic Parking Structure From 40 Years Ago

retrotechtacular-rotopark

Pictured above is a functioning model of an automated underground parking structure which was built and used, but obviously it never caught on widely. That makes us a bit sad, as it removes the need to find an empty parking spot every time you use the garage; and having a robot park your car for you seems very future-y.

The gist of the ROTOPARK system is a carousel and elevator system for parking cars. just drive into a single-stall garage at ground level, take your ticket, and walk out the people-hole. The garage stall floor is a sled which moves down an elevator (shown as blue stalls on the left half of the image) to be stored away in the rotating carousels of cars.

Obviously mechanical failure is a huge issue here. What if the elevator breaks? Also, at times of high traffic we think getting your vehicle back out of the system would be quite a bit slower than the “static” parking garages we’re used to. Oh well, maybe some day. Check out the classic marketing video after the break which shows off the concept, construction, and use of the system.

Continue reading “Retrotechtacular: ROTOPARK Is A Futuristic Parking Structure From 40 Years Ago”

GE Garage And Chicago Ideas Week

IMG_0443

I’ve been on vacation and managed to get a day to play at the GE Garage mobile fab lab currently setup in downtown Chicago. GE has partnered with Chicago Ideas Week to bring the future of fabrication technologies to a space where the community can walk in off the street and work with some amazing hardware like CNC mills, laser cutters and 3D printers. The group is also giving classes at select times on using the equipment and general electrics. Unfortunately I was in town near the end of this event which will be Oct 20th. If you are in the area I do recommend jumping on the excellent transportation you’ll find in Chicago and have some fun at the space. Here are more details on location, classes and times.

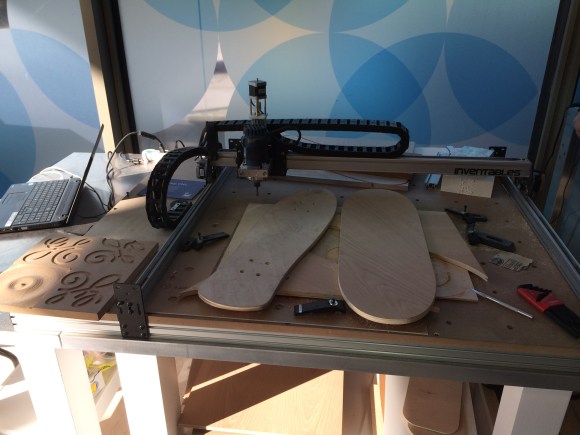
I didn’t expect to squeeze any work into my vacation but I did take a guided tour of the fab space with my iPhone 5s.  You can join me after the break to watch the tour, which is a bit rough but still covers a lot of fun topics. Get at look at their line-up or Replicator 2 3D printers. See some fantastic prints from metal made on industrial scale printers. Learn more about the up-scaled CNC seen above that was cutting out skateboard decks. And finish up with an injection molding machine.

Continue reading “GE Garage And Chicago Ideas Week”

Garage Parking Monitor Guides You In Every Time

THEPARKINGSPOTTER2

The live Adafruit Show and Tell stream from last weekend featured this project put together by [Silent Jeff]. He’s called “Silent” because when it came time to present his project on the show his microphone wasn’t working. As you can see in the video after the break, [PT] and [Ladyada] worked together to explain the project (of which they had no prior knowledge) using a game of charades. This is one of the follow-up images he sent them which details his parking spotter project.

[Ladyada] compliments [Jeff] on the finished look of the device and we agree. Not only does this do a great job of letting a driver know if they have pulled far enough into the garage, but it’s finished appearance ensures it won’t ever look out-of-place. The two silver discs near the lower end of the box are the sensors of an ultrasonic rangefinder. You mount this box so that the sensor is measuring distance between itself and the bumper of your vehicle. As the distance decreases the LEDs change to let you know when to stop. Inside the case you’ll find a voltage regulator and single-chip running the Arduino bootloader. [Jeff] says this is just his second Arduino project and we hope that at this rate we’ll be looking for big things from him in the not too distant future!

This is basically the same idea as cars that use parking assist sensors in the bumper. It’s just attached to the building instead of to the vehicle itself.

Continue reading “Garage Parking Monitor Guides You In Every Time”