How do you know that new appliance you bought won’t burn your house down? Take a look at any electrical appliance, and you’ll find it marked with at least one, and most often, several safety certification marks such as UL, DIN, VDE, CSA or BSI. Practically every electrical product that plugs into utility supply needs to go through a mandatory certification process to ensure it meets these conformity test requirements. Some examples include domestic and industrial electrical appliances, tools, electrical accessories, consumer electronics and medical electronics.
When you look through a typical safety test standard, you’ll notice it breaks down the various tests in two categories. “Type” tests are conducted on prototypes and samples of the final product or its individual parts and components, and are not generally repeated unless there are changes in design or materials. “Acceptance” tests are routine verification tests conducted on 100% of the products produced. For example, a typical Type test would be used to check the fire retardant properties of the plastics used in the manufacture of the product during development, while a Routine test would be carried out to check for high voltage breakdown or leakage and touch currents on the production line.
Nowadays, a majority of countries around the world adopt standards created by international organizations such as IEC, ISO, and ITU, then fine tune them to suit local requirements. The IEC works by distributing its work across almost 170 Technical Committees and Subcommittees which are entrusted with the job of creating and maintaining standards. One of these committees is “TC89 Fire hazard testing” whose job is to provide “Guidance and test methods for assessing fire hazards of electro-technical equipment, their parts (including components) and electrical insulating materials”. These tests are why we feel safe enough to plug something in and still sleep at night.
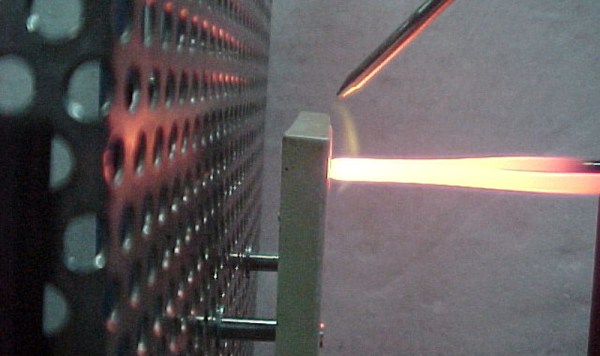
Practically all electrical products need to confirm to this set of tests as part of their “Type” test routine. This committee produces fire hazard testing documents in the IEC 60695 series of standards. These documents range from general guidelines on several fire hazard topics to specific instructions on how to build the test equipment needed to perform the tests. It’s interesting to see how some of these tests are carried out and the equipment used. Join me after the break as we take a look at that process.
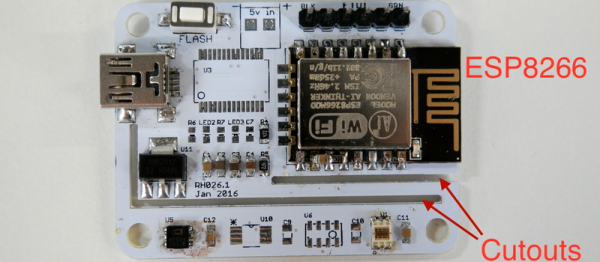
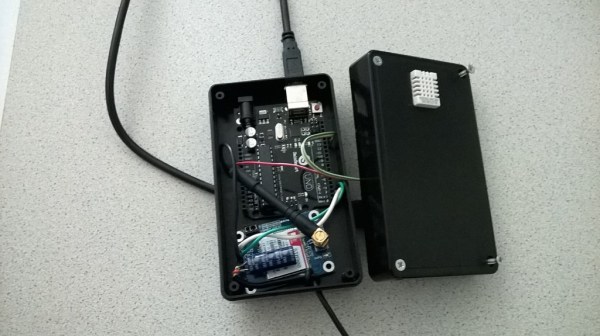
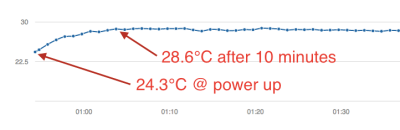 Next came the clever bit. [Richard] put cutouts into the board to hopefully stop the flow of heat from the ESP8266 module to the temperature sensor. Again, he found that the board heats up by around four degrees Celcius or nine degrees Farenheit. That’s a horrible result in any units.
 Fail of the Week is a Hackaday column which celebrates failure as a learning tool. Help keep the fun rolling by writing about your own failures and