Throwing Down The FPGA Gauntlet

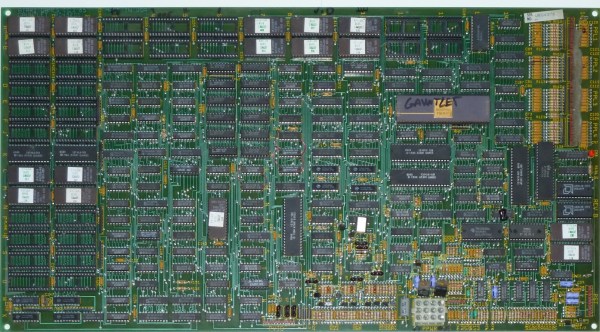
Gauntlet is a well-known arcade game from 1985 with many sequels and ports to more modern architectures such as Xbox and GameCube. Thanks to its popularity and relative age, the original arcade cabinet is well documented with the schematics available online. It was regarded as the most complex and ambitious hardware Atari had ever developed at the time it was released. In what can only be described as an absolute labor of love, [Alex] has recreated the arcade hardware on the Pipistrello FPGA board.

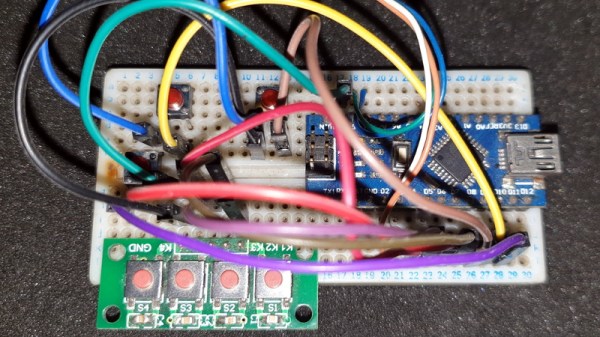
The project can actually play Gauntlet, Gauntlet II, and Vindicators II as they all ran on the same hardware. Four joysticks are supported so up to four players can play, though the EEPROM is emulated in RAM so high scores are reset when the device is powered down. The FPGA is almost out of space and can’t quite squeeze in the SRAM needed. So an SRAM expansion daughterboard is required; nothing a quick board run from our favorite purple PCB manufacturer can’t solve.

In the repo is an incredible write-up detailing the system, how it works, and the process of debugging it. This project also includes a complete simulation of the TMS5220 Voice Synthesis Processor, as Gauntlet was the first coin-operated arcade machine with a voice synthesizer. Getting the video correct was particularly tricky and it took several tries to get the color palette and motion looking right. Since [Alex] didn’t have access to an original Gauntlet arcade cabinet, they had to make do with MAME. After writing a test to make sure the FPGA was working correctly, there were differences between the MAME emulation and the FPGA output. To help out, [Colin Davies] came to the rescue. After [Colin] hooked up an original Gauntlet Arcade PCB with the motion test loaded up, the test showed that the FPGA had the correct behavior.

During development [Alex] actually simulated several frames of the game in ISIM (at a whopping 90 seconds per frame or 90 minutes per in-game second). Using ISIM allowed them to compare system state to MAME and validate the design much faster as they could better inspect the interworkings of the different modules. Using a clever trick of grabbing state from MAME after a few seconds, they primed the FPGA state and saved themselves a few hours of simulation.

If you’re looking to get into old hardware style arcade game development, give the browser-based 8bitworkshop IDE a spin. Or start with something a little smaller in scope and size with this adorable mini CRT arcade cabinet.

Continue reading “Throwing Down The FPGA Gauntlet”

Improved Part Searches For JLCPCB Parts

Finding the JLCPCB component parts library frustrating to navigate, [Jan Mrázek] took matters into his own hands and made an open-source parametric search utility. We’ve all probably wasted time before trying to track down a particular flavor of a part, and this tool promises to make the process easier.  It downloads data from the JLCPCB parts site upon initialization and presents the user with typical selection filters for categories and parameter values. You can install it yourself on GitHub Pages, or [Jan] provides a link to his site.

For the curious, the details of how to pull parts information from the JLBPCB site can be found in the project’s source code.  We like it when a distributor provides this level of access to their part details and parameters, allowing others to sort and filter the parts in ways not originally envisioned by the site design team.  We think this is a win-win situation — distributors can’t sell parts that designers can’t find.

If [Jan]’s name sounds familiar, it should be.  We have written about several of his projects before, two of them are also PCB designer tools ( KiCad Board Renderings and KiCad Panelization ).

Hackaday Links Column Banner

Hackaday Links: October 11, 2020

If you’re interested in SDR and digital signal processing but don’t know where to start, you’re in luck. Ben Hillburn, president of the GNU Radio Project, recently tweeted about an online curriculum for learning SDR and DSP using Python. The course was developed by Dr. Mark Lichtman, who was a lead on GNU Radio, and from the look of it, this is the place to go to learn about putting SDRs to use doing cool things. The course is chock full of animations that make the concepts clear, and explain what all the equations mean in a way that’s sure to appeal to practical learners.

It’s not much of a secret that the Hackaday community loves clocks. We build clocks out of everything and anything, and any unique way of telling time is rightly applauded and celebrated on our pages. But does the clock motif make a good basis for a video game? Perhaps not, but that didn’t stop Clock Simulator from becoming a thing. To “play” Clock Simulator, you advance the hands of an on-screen clock by pressing a button once per second. Now, thanks to Michael Dwyer, you don’t even have to do that one simple thing. He developed a hardware cheat for Clock Simulator that takes the 1PPS output from a GPS module and wires it into a mouse. The pulse stream clicks the mouse once per second with atomic precision, rendering the player irrelevant and making the whole thing even more pointless. Or perhaps that is the point.

Maybe we were a little hard on Clock Simulator, though — we can see how it would help achieve a Zen-like state with its requirement for steady rhythm, at least when not cheating. Another source of Zen for some is watching precision machining, and more precise, the better. We ran into this mesmerizing video of a CNC micro-coil winder and found it fascinating to watch, despite the vertical format. The winder is built from a CNC lathe, to the carriage of which a wire dispenser and tensioning attachment have been added. The wire is hair-fine and passes through a ruby nozzle with a 0.6 mm bore, and LinuxCNC controls the tiny back and forth motion of the wire as it winds onto the form. We don’t know what the coil will be used for, but we respect the precision of winding something smaller than a matchhead.

Dave Jones over at EEVblog posted a teardown video this week that goes to a place few of us have ever seen: inside a processor module for an IBM System/390 server. These servers earned the name “Big Iron” for a reason, as everything about them was engineered to perform. The processor module Dave found in his mailbag was worth $250,000 in 1991, and from the look of it was worth every penny. From the 64-layer ceramic substrate supporting up to 121 individual dies to the stout oil-filled aluminum enclosure, everything about this module is impressive. We were particularly intrigued by the spring-loaded copper pistons used to transfer heat away from each die; the 2,772 pins on the other side were pretty neat too.

Here’s an interesting question: what happens if an earthquake occurs in the middle of a 3D printing run? It’s probably not something you’ve given much thought, but it’s something that regular reader Marius Taciuc experienced recently. As he relates, the magnitude 6.7 quake that struck near Kainatu in Papua New Guinea (later adjusted to a 6.3 magnitude) resulted in a solid 15 seconds of shaking at his location, where he was printing a part on his modified Mendel/Prusa i2. The shaking showed up clearly in the part as the machine started swaying with the room. It’s probably not a practical way to make a seismograph, but it’s still an interesting artifact.

Lo-Fi Art On A 32×32 Matrix

Display technology has improved by leaps and bounds over the last few years, thanks in no small part to the smartphone revolution. High-resolution LCD panels are dirt cheap and easy to interface with. There’s absolutely no logical reason to try and show images on a 32×32 array of RGB LEDs. But that didn’t stop [Felix Spöttel] from doing it anyway.

The project, which he calls thirtytwopixels, was designed to work in conjunction with MPD (Music Player Daemon) to show the album art for whatever is currently playing. The ultra-low resolution display added a certain element of abstractness to the artwork, which [Felix] said made it an interesting conversation starter. Guests would try and guess what the album art was depicting given the sparse rendition shown on the matrix.

[Felix] gives an excellent explanation of how to get the server and client-side software up and running should you want to recreate his setup, but his Python scripts also have a function where you can push an arbitrary image to the display if you don’t want to connect everything up to the MPD backend.

On the hardware side, thirtytwopixels uses the Raspberry Pi Zero W, a Adafruit RGB Matrix Bonnet, and a 32×32 LED matrix that uses the HUB75 interface. Even a relatively small LED matrix like this can get pretty thirsty, so [Felix] is using a 5 volt power supply that can deliver 4 amps to keep the electronics happy.

If you wanted to keep the low resolution aesthetic but make the display larger, we’ve seen WS2812B LED strips and 3D printed frames used to make a custom jumbo matrix which could surely be adapted for this concept.

Tube Amp Is Modeled With The Power Of AI

There is a certain magic and uniqueness to hardware, particularly when it comes to audio. Tube amplifiers are well-known and well-loved by audio enthusiasts and musicians alike. However, that uniqueness also comes with the price of the fact that gear takes up space and cannot be configured outside the bounds of what it was designed to do. [keyth72] has decided to take it upon themselves to recreate the smooth sound of the Fenders Blues Jr. small tube guitar amp. But rather than using hardware or standard audio software, the magic of AI was thrown at it.

In some ways, recreating a transformation is exactly what AI is designed for. There’s a clear and recordable input with a similar output. In this case, [keyth72] recorded several guitar sessions with the guitar audio sent through the device they wanted to recreate. Using WaveNet, they created a model that applies the transform to input audio in real-time. The Gain and EQ knobs were handled outside the model itself to keep things simple. Instructions on how to train your own model are included on the GitHub page.

While the model is simply approximating the real hardware, it still sounds quite impressive, and perhaps the next time you need a particular sound of your home-built amp or guitar pedal, you might reach for your computer instead.
Continue reading “Tube Amp Is Modeled With The Power Of AI”

Access An 8-bit Atari Through Twitter

Building a retro computer, or even restoring one, is a great way to understand a lot of the fundamentals of computing. That can take a long time and a lot of energy, though. Luckily, there is a Twitter bot out there that can let you experience an old 8-bit Atari without even needing to spin up an emulator. Just tweet your program to the bot, and it outputs the result.

The bot was built by [Kay Savetz] and accepts programs in five programming languages: Atari BASIC, Turbo-Basic XL, Atari Logo, Atari PILOT, and Atari Assembler/Editor, which was a low-level assembly-type language available on these machines. The bot itself runs on a Raspberry Pi with the Atari 800 emulator, rather than original hardware, presumably because it’s much simpler to get a working network connection on a Pi than on a computer from the 80s. The Pi runs a python script that polls Twitter every two minutes and then hands the code off to the emulator.

[Kay]’s work isn’t limited to just Ataris, though. There’s also an Apple II BASIC bot for all the Apple fans out there that responds to programs written in AppleSoft BASIC. While building your own retro system or emulating one on other hardware is a great exercise, it’s also great that there are tools like these that allow manipulation of retro computers without having to do any of the dirty work ourselves.

Arduino Gets Old PC Booted And Back Into Action

How many people still have a PS/2 keyboard kicking around in 2020? Admittedly asking such a question of the Hackaday audience is probably cheating (there’s a decent chance one of you will type a comment on one just to prove a point), but even the most pedantic reader has to admit that it’s a long dead standard. So we’re hardly surprised to hear that [Turbaned Engineer] didn’t have one handy when he tried to boot a motherboard so old that he couldn’t access the BIOS with a USB keyboard.

But rather than waiting for an adapter to show up in the mail, he decided to rig up an Arduino Nano to mimic a PS/2 keyboard just long enough for him to navigate the system configuration. Since that basically meant he only needed the arrow keys and Enter, he was able to rig up a handful of momentary buttons to serve as input. We wouldn’t recommend typing out your memoirs with such a spartan board, but it’s certainly good enough to juggle around the order of boot devices.

The fun didn’t stop there, though. [Turbaned Engineer] also had to clean some corrosion and fix a blown resistor on a bank of RAM to drag this old soldier over the finish line. He didn’t have a case handy, so he made a free-form one using the polycarbonate packaging that ICs ship in. The final machine isn’t exactly a sleeper, but it’s good enough to play Super Mario Bros. 3 on the TV.

At the end of the day, the minimal input device [Turbaned Engineer] put together isn’t so far removed from other homebrew keyboards we’ve seen recently. It seems that QMK even has some basic support for the PS/2 interface. Not that it would come up very often, but a “retro” mode might be an interesting addition to your next custom keyboard build.