An Easy-To-Make Pi-Powered Pocket Password Pal

Sometimes, we see a project where it’s clear – its creator seriously wants to make a project idea accessible to newcomers; and today’s project is one of these cases. The BYOPM – Bring Your Own Password Manager, a project by [novamostra] – is a Pi Zero-powered device to carry your passwords around in. This project takes the now well-explored USB gadget feature of the Pi Zero, integrates it into a Bitwarden-backed password management toolkit to make a local-network-connected password storage, and makes a tutorial simple enough that anybody can follow it to build their own.

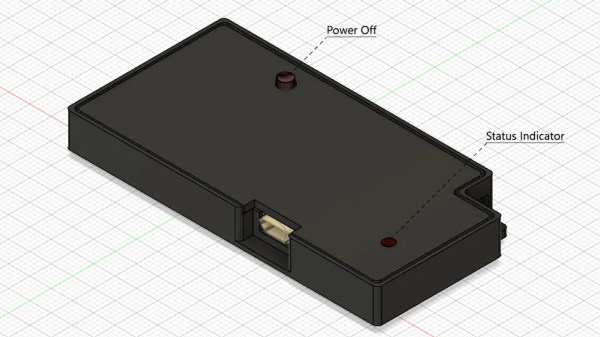
For the physical part, assembly instructions are short and sweet – you only need to solder a single button to fulfill the hardware requirements, and there’s a thin 3D-printable case if you’d like to make the Pi Zero way more pocket-friendly, too! For the software part, the instructions walk you step-by-step through setting up an SD card with a Raspbian image, then installing all the tools and configuring a system with networking exposed over the USB gadget interface. From there, you set up a Bitwarden instance, and optionally learn to connect it to the corresponding browser extensions. Since the device’s goal is password management and storage, it also reminds you to do backups, pointing out specifically the files you’ll want to keep track of.

Overall, such a device helps you carry your passwords with you wherever you need them, you can build this even if your Raspberry Pi skills are minimal so far, and it’s guaranteed to provide you with a feeling that only a self-built pocket gadget with a clear purpose can give you! Looking for something less reliant on networking and more down-to-commandline? Here’s a buttons-and-screen-enabled Pi Zero gadget that uses pass.

Infinitely Scrolling E-Ink Landscape Never Repeats

Traditional Chinese landscape scrolls can be a few dozen feet long and require the viewer to move along its length to view all the intricate detail in each section. [Dheera Venkatraman] replicated this effect with an E-Ink picture frame that displays an infinitely scrolling, Shan Shui-style landscape that never repeats.

E-ink picture frame with infinitely scrolling landscape
A new landscape every time you look

The landscape never repeats and is procedurally generated using a script created by [Lingdong Huang]. It consists of a single HTML file with embedded JavaScript, so you can run it locally with minimal resources, or view the online demo. It is inspired by historical artworks such as A Thousand Li of Rivers and Mountains and Dwelling in the Fuchun Mountains.

[Dheera]’s implementation uses a 10.3″ E-ink mounted in an off-the-shelf picture frame connected to a Raspberry Pi Zero running a forked version of [Lingdong]’s script. It does a decent job of avoiding the self-illuminated electronic look and creates a piece of decor that you could easily just stand and stare at for a long time.

Computer-generated art is making a lot of waves with the advent of AI models like Dall-E and Stable Diffusion. The ability to bring original art into existence with a simple phrase will have an undeniably profound long-term effect on the art world.

Lighting Up Glue Stick Bicycle Tyres With RGB

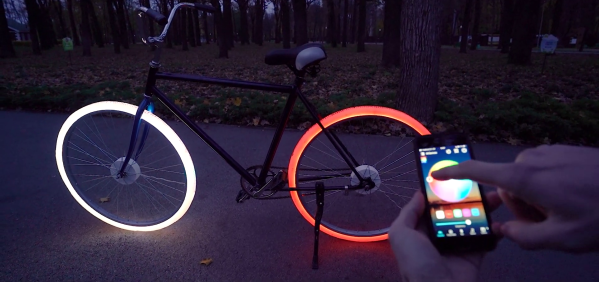
Being visible to motorists is a constant concern for cyclists, but we doubt [The Q] will have this problem with his RGB LED illuminated tires made from glue sticks.

The project started with a set of 3D-printed tire molds that bolt to the standard wheels. A bot of melted glue sticks is poured into the mold, allowed to cool, and the mold sections are removed with the help of a heat gun after cooling. We doubt the weight and hardness make the tires particularly practical, but you can’t make normal tires glow from the inside. 

The idea to illuminate the tires probably came after molding, because they had to be cut off to fit the LEDs. [The Q] built a simple hot wire jig with a piece of nichrome wire between two screws and used it to cut a few millimeters from the inside of the tire and fit a sleeved RGB LED strip in the wheel. Power come from a set of three 18650 batteries housed with a wireless controller in a 3D printed hub-mounted enclosure.

Like [The Q]’s hubless and partial wheel bicycles, it’s a definite head-turner, with function following form. 

Continue reading “Lighting Up Glue Stick Bicycle Tyres With RGB”

3D Printed Strain Wave Gearbox

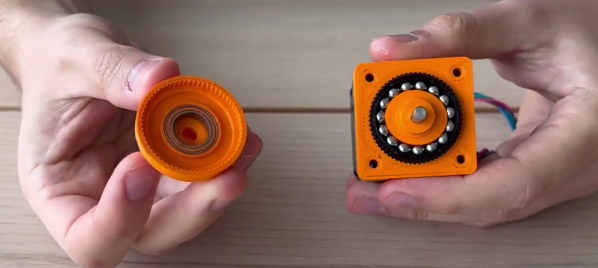
3D-printed gearboxes are always an interesting design challenge, especially if you want to make them compact. [ZeroBacklash] created a little strain wave gearbox (harmonic drive) for when you want to trade speed for torque on NEMA 17 stepper motors.

Strain wave gears work by deforming a stationary flexible spline into an ellipse so the teeth engage the internal teeth of the output spline. Add a couple of extra teeth on the output side, and you get a high-reduction gearbox with fewer parts and reduced volume than equivalent spur gearing. Keeping the flexible spline stationery is achieved by making half of it engage with a stationary spline with the same number of teeth.

In this case, there are 60 teeth on the input side and 62 on the output, giving a gear ratio of 30:1. The flexible spline is deformed using a set of bearing balls and an elliptical plug on the shaft of the motor. It makes for a compact design that matches the frontal size of the stepper motor and is only about 27 mm long. [ZeroBacklash] has not released any design files, but the idea should be simple to replicate.

We’ve featured a couple of 3D printed harmonic drives of different sizes, but they usually use a pair of ball bearings as the wave generators, which doesn’t lend itself well to smaller designs.

Dropping Marbles With Millisecond Accuracy

All eight version of the drop mechanism
The road to the perfect marble dropper

[Martin] of the band [Wintergatan] is on his third quest to build the ultimate musical marble machine, and that means dropping marbles with maximum reliability and precision timing. Working through several iterations, and returning to first principles, he engineered a marble gate that can drop marbles with a timing standard deviation of 0 ms.

[Wintergatan]’s first two machines, Marble Machine and Marble Machine X gained significant attention, but their complexity was their undoing. As it turns out, a Rube Goldberg machine that makes music has a lot of potential failure points, and both machines proved too temperamental for the live stage. The third version, Marble Machine XT (T for “touring”) needed to be re-engineered for simplicity and reliability to be practical on the road.

[Martin] broke the marble machine concept down to its key components, of which the marble drop gate is the most obvious. Using a pair of contact microphones to record the moment of release and impact, he can measure the timing with precision. The first design had a standard deviation of 3.91 ms, which is not nearly enough for us to detect by ear, but is not up to [Martin]’s standard for “tight music”. It used a clock-type escapement mechanism, where the wheel is the release gate. After reviewing his measurement software and compensating for drift between the software components of his setup, the measured standard deviation was reduced by 1 ms. Another breakthrough was to remove any guiding surfaces below the gate and let gravity do all the work. The 8th iteration proved to be the winner and used the escapement arm as the drop gate and wheel to hold back the queue of marbles.

Coming from an arts background, [Martin] had to learn a lot of engineering lessons the hard way. Looking at the videos on his YouTube channel, it seems like he is taking the lessons to heart, and we look forward to seeing the Marble Machine XT come to life.

Continue reading “Dropping Marbles With Millisecond Accuracy”

Europe’s Energy Squeeze Pushes Large Hadron Collider To Halt Operations

Energy prices have been in the news more often than not lately, as has war. The two typically go together, as conflicts tend to impact on the supply and trade of fossil fuels.

With Europe short on gas and its citizens contemplating a cold winter, science is feeling the pinch, too. CERN has elected to shut down the Large Hadron Collider early to save electricity.

Continue reading “Europe’s Energy Squeeze Pushes Large Hadron Collider To Halt Operations”

A Pi Pico plugged into a breadboard, with an I2C OLED display connected to it

Need An USB-I2C Adapter? Use Your Pico!

Given its abundance and simplicity, the RP2040 has no doubt become a favourite for USB peripheral building – in particular, USB-connected tools for electronics experiments. Today, we see one more addition to our Pico-based tool arsenal – a USB-I2C adapter firmware for RP2040 by [Renze Nicolai]. This is a reimplementation of the ATTiny-based I2C-Tiny-USB project and complies to the same protocol – thus, it’s compatible with the i2c-tiny-usb driver that’s been in the Linux kernel for ages. Just drag&drop the .uf2, run a script on your Linux system, and you will get a /dev/i2c-X device you can work with from userspace code, or attach other kernel drivers to.

The software will work with any RP2040 devboard – just connect your I2C devices to the defined pins and you’ll have them show up in i2cdetect output on your Linux workstation. As a demo, [Renze] has written a userspace Python driver for one of these SSD1306 128×64 OLEDs, and gives us a commandline that has the driver accept output of an ffmpeg command capturing your main display’s contents, duplicating your screen on the OLED – in a similar fashion that we’ve seen with the “HDMI” I2C-driven display a few months back. Everything you might need is available on the GitHub page, including usage instructions and examples, and the few scripts you can use if you want to add an udev rule or change the I2C clock frequency.

Just to name a few purposes, you can use a Pi Pico as a tool for SWD, JTAG, CAN, a logic analyser with both digital and analog channels, or even as a small EMP-driven chip glitching tool. The now-omnipresent $3 Pi Pico boards, it seems, are a serious contender to fondly remembered hacker tools of the past, such as the legendary BusPirate.

Continue reading “Need An USB-I2C Adapter? Use Your Pico!”