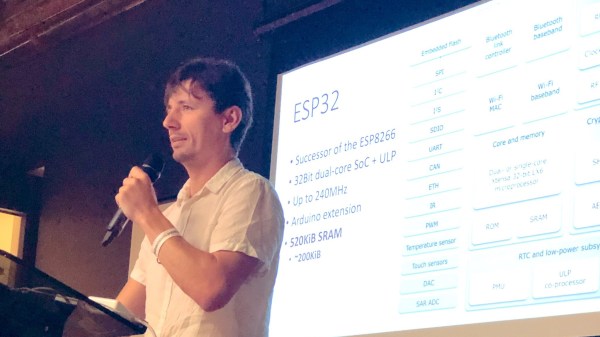
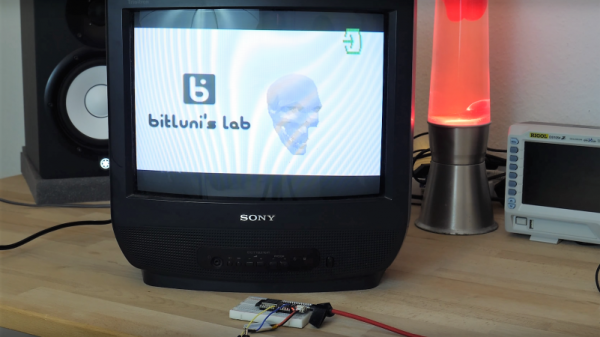
An Eye-Catching Raspberry Pi Smart Speaker

[curcuz]’s BoomBeastic mini is a Raspberry Pi based smart connected speaker. But don’t dis it as just another media center kind of project. His blog post is more of a How-To guide on setting up container software, enabling OTA updates and such, and can be a good learning project for some. Besides, the design is quite elegant and nice.

boombeastic_02
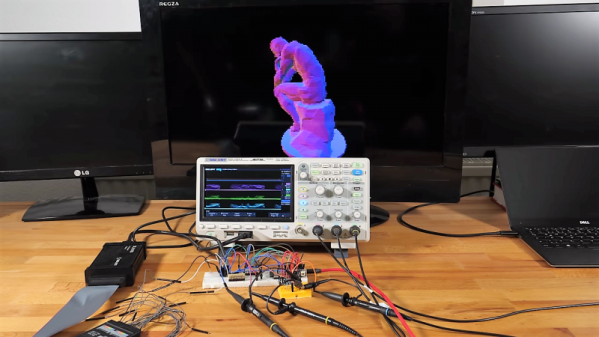
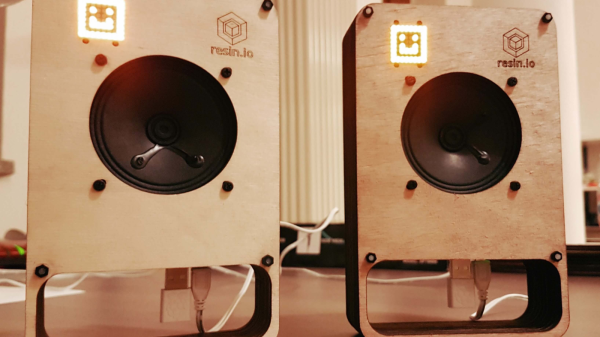
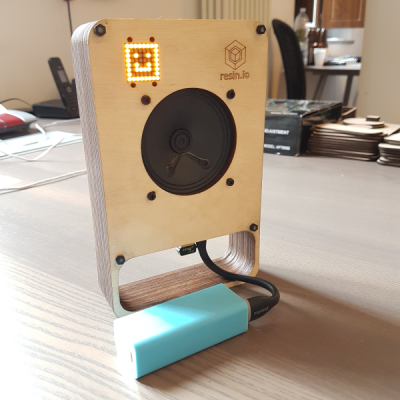
The hardware is simple. There’s the Raspberry-Pi — he’s got instructions on making it work with the Pi2, Pi2+, Pi3 or the Pi0. Since the Pi’s have limited audio capabilities, he’s using a DAC, the Adafruit I2S 3W Class D Amplifier Breakout for the MAX98357A, to drive the Speaker. The I2S used by that part is Inter-IC Sound — a 3 wire peer to peer audio bus — and not to be confused with I2C. For some basic visual feedback, he’s added an 8×8 LED matrix with I2C interface. A Speaker rounds out the BoM. The enclosure is inspired by the Pimoroni PiBow which is a stack of laser cut MDF sheets. The case design went through four iterations, but the final result looks very polished.

On the software side, the project uses Mopidy — a Python application that runs in a terminal or in the background on devices that have network connectivity and audio output. Out of the box, it is an MPD and HTTP server. Additional front-ends for controlling Mopidy can be installed from extensions, enabling Spotify, Soundcloud and Google Music support, for example. To allow over-the-air programming, [curcuz] is using resin.io which helps streamline management of devices that are hard to reach physically. The whole thing is containerized using Docker. Additional instructions on setting up all of the software and libraries are posted on his blog post, and the code is hosted on GitHub.

There’s a couple of “To-Do’s” on his list which would make this even more interesting. Synced audio being one: in a multi-device environment, have the possibility to sync them and reproduce the same audio. The other would be to add an Emoji and Equalizer display mode for the LED matrix. Let [curcuz] know if you have any suggestions.

Continue reading “An Eye-Catching Raspberry Pi Smart Speaker”

Run A RepRap On An ESP8266

What can’t the little $5 WiFi module do? Now that [lhartmann] has got an ESP8266 controlling the motors of a 3D printer, that’s one more item to check off the list.

What’s coolest about this project is the way that [lhartmann] does it. The tiny ESP8266 has nowhere near the required number of GPIO pins, the primary SPI is connected to the onboard flash memory, and the secondary SPI is poorly documented and almost nobody uses it. So, [lhartmann] chose to use the I2S outputs.

I2S is most often an audio protocol, so this might at first seem like a strange choice. Although I2S sounds like I2C, it’s really essentially an SPI protocol with a fourth wire that alternates to designate the right or left channel. It’s actually just perfect for sending 16×2 bits of data at high data rates.

[lhartmann] takes these 32 bits and feeds them into four shift registers, producing 32 outputs from just the four I2S data lines. That’s more than enough signals to run the stepper motors. And since it updates at 192 kHz sample rate, it’s plenty fast enough to drive them.

The other side benefit of this technique is that it can work on single-board computers with just a little bit of software. Programming very complicated stepper movements then becomes just a matter of generating the right “audio” file and playing it out. [lhartmann] demonstrated this earlier with an Orange Pi. That’s pretty cool, too.

The code for turning the ESP8266 and a short handful of 74HC595s into a 3D printer controller are up on GitHub, so go check it out.

Thanks [CNLohr] for the tip!

Color TV Broadcasts Are ESP8266’s Newest Trick

The ESP8266 is well known as an incredibly small and cheap WiFi module. But the silicon behind that functionality is very powerful, far beyond its intended purpose. I’ve been hacking different uses for the board and my most recent adventure involves generating color video from the chip. This generated video may be wired to your TV, or you can broadcast it over the air!

I’ve been tinkering with NTSC, the North American video standard that has fairly recently been superseded by digital standards like ATSC. Originally I explored pumping out NTSC with AVRs, which lead to an entire let’s learn, let’s code series. But for a while, this was on the back-burner, until I decided to see how fast I could run the ESP8266’s I2S bus (a glorified shift register) and the answer was 80 MHz. This is much faster than I expected. Faster than the 1.41 MHz used for audio (its intended purpose), 2.35 MHz used for controlling WS2812B LEDs or 4 MHz used to hopefully operate a reprap. It occasionally glitches at 80 MHz, however, it still works surprisingly well!

The coolest part of using the chip’s I2S bus is the versatile DMA engine connected to it. Data blocks can be chained together to seamlessly shift the data out, and interrupts can be generated upon a block’s completion to fill it in with new data. This allows the creation of a software defined bitstream in an interrupt.

Why NTSC? If I lived in Europe, it would have been PAL. The question you’re probably thinking is: “Why a dead standard?” And there’s really three reasons.

Continue reading “Color TV Broadcasts Are ESP8266’s Newest Trick”

Audio Streaming On The Cheap With An RPi Zero

The minuscule size of the Raspberry Pi Zero makes it perfect for hacks where size is a factor. For example, a small, standalone device for getting streaming audio into your speakers. The RPi Zero doesn’t have an audio output on board, so PolyVection paired it up with their PlainDAC to build a minimal audio streaming device.

Their build uses a few lines from the GPIO header to drive an I2S digital to analog converter. The DAC is a PCM5142 from Texas Instruments that provides high quality sound output, and contains a built in programmable DSP.

The hardware fits into a 3D printed case, coming in at 68 mm by 48 mm. There’s no WiFi inside, but this can be added with an external USB device for wireless streaming. The DAC used is supported by the Linux kernel, so a simple configuration is all that’s needed to pipe audio out.

Once you have a device like this assembled, you can install a server like Music Player Daemon to remotely control the device and cue up internet radio channels.

Hackaday Prize Entry: Superb Audio With The Teensy

The Raspberry Pi and Teensy 3 both have I2S interfaces, and that means these boards can be used to play very high quality audio. A codec and an I2S interface is one thing, but turning that digital stream into a quality analog output is another thing entirely. You need only look at audiophile forums for enough mis- and disinformation for that evidence.

For his Hackaday Prize entry [William Hollender] is building an audio board for the Teensy 3.x. It features very high-end opamps, the right filters, and the correct topology to turn a digital audio stream into an analog signal that would please the most temperamental ear.

The Teensy Super Audio Board uses the Cirrus CS4272 audio codec chip, a high quality chip that can handle sample rates of up to 192kHz at 24 bit depth. This chip doesn’t include the analog input and output buffers, and this means [William] has quite a build in front of him. This means using high quality opamps, low noise power supplies, and knowing how to build a circuit and measure its noise.

So far, the tests revealed incredible dynamic range, flatness, and frequency response of this tiny little board. It also works with the Raspberry Pi. Now it’s just a matter of getting a few more of these boards put together for the Best Product part of the Hackaday Prize.


The 2015 Hackaday Prize is sponsored by:

Update: Battlezone On Vector Display Step-by-Step

When we ran the story of Battlezone played on tube displays earlier this week there were immediately questions about recreating the hack. At the time the software wasn’t available, and there is also a bit of hardware hacking necessary to get the audio working. You asked and [Eric] from Tubetime delivered. He’s posted a pair of articles that show how to get an STM32F4 Discovery board to play the classic game, along with instructions to build the firmware.

The hardware hack in this case is untangling the pinout used on the discovery board. It seems that one of the lines needed to get sound working for this hack is tied to one of the two DACs. If you read the original coverage you’ll remember that both of the DACs are used to drive X and Y on the vector display. The image above shows a cut trace on the bottom of the board. You’ll then need to route that signal to an alternate pin by soldering a jumper wire from the chip to a resistor on the board.

This (as well as one other alteration that bridges two of the chip pins) is a great example of work you should be unafraid to do on your own dev boards. We’ve had to do it with the Launchpad boards to get at the functionality we needed. We’d like to hear your own epic stories of abusing dev boards to do your bidding. Let us know in the comments.

ESP8266 As A Networked MP3 Decoder

Support libraries, good application notes, and worked examples from a manufacturer can really help speed us on our way in making cool stuff with new parts. Espressif Systems has been doing a good job with their ESP8266 product (of course, it doesn’t hurt that the thing makes a sub-$5 IOT device a reality). Only recently, though, have they started publishing completed, complex application examples. This demo, a networked MP3 webradio player, just popped up in Github, written by the man better known to us as Sprite_tm. We can’t wait to see more.

The MP3 decoder itself is a port of the MAD MP3 library, adapted for smaller amounts of SRAM and ported to the ESP8266. With a couple external parts, you can make an internet-connected device that you can point to any Icecast MP3 stream, for instance, and it’ll decode and play the resulting audio.

What external parts, you ask? First is something to do the digital-to-analog conversion. The application, as written, is build for an ES9023 DAC, but basically anything that speaks I2S should be workable with only a little bit of datasheet-poking and head-scratching. Of course, you could get rid of the nice-sounding DAC chip and output 5-bit PWM directly from the ESP8266, but aside from being a nice quick demo, it’s going to sound like crap.

The other suggested external IC is an SPI RAM chip to allow for buffering of the incoming MP3 file. WiFi — and TCP networks in general — being what they are, you’re going to want to buffer the MP3 files to prevent glitching. As with the dedicated DAC, you could get away without it (and there are defines in the “playerconfig.h” file to do so) but you’ll probably regret it.

In sum, an ESP8266 chip, a cheap I2S DAC, and some external RAM and you’ve got a webradio player. OK, maybe we’d also add an amplifier chip, power supply, and a speaker. Hmmm…. and a display? Or leave it all configurable over WiFi? Point is, it’s a great worked code example, and a neat DIY device to show your friends.

The downsides? So far, only the mono version of the libMAD decoder / synth has been ported over to ESP8266. The github link is begging for a pull request, the unported code is just sitting there, and we think that someone should take up the task.

Other Resources

In our search for other code examples for the ESP8266, we stumbled on three repositories that appear to be official Espressif repositories on Github: espressif, EspressifSystems, and EspressifApp (for mobile apps that connect to the ESP8266). The official “Low Power Voltage Measurement” example looks like a great place to start, and it uses the current version of the SDK and toolchain.

There’s also an active forum, with their own community Github repository, with a few “Hello World” examples and a nice walkthrough of the toolchain.

And of course, we’ve reported on a few in the past. This application keeps track of battery levels, for instance. If you’ve got the time, have a look at all the posts tagged ESP8266 here on Hackaday.

You couldn’t possibly want more resources for getting started with your ESP8266 project. Oh wait, you want Arduino IDE support?

Thanks [Sprite_tm] for the tip.