PHONK – A Hacker’s Fun Shortcut To Android Programming

As the common myth goes, the average human utilizes only about 10% of the true potential their smartphone is capable of. Especially when it comes to electronics projects, it seems that we often overlook how we can integrate and take advantage of their functionality here. Maybe that’s not a big surprise though — while it isn’t rocket science, getting into mobile development certainly has its hurdles and requires a bit of commitment. [Victor Diaz] figured there had to be a better way, so he went on and created PHONK, the self-contained creative scripting toolbox for Android.

PHONK is installed like any other app, and allows rapid prototyping on your Android device via JavaScript by abstracting away and simplifying the heavily boilerplated, native Java parts. So instead of setting up an app from scratch with all the resources defining, UI design, activity and application lifecycle management — not to mention the Android development environment itself — PHONK takes care of all that behind the curtain and significantly reduces the amount of code required to achieve the task you’re actually interested in. In case you’re worrying now that you have to actually program on your phone, well, you can, which can definitely come in handy, but you don’t have to.

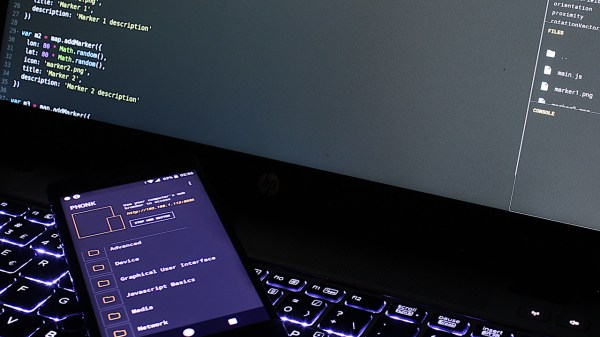
Once the app is opened, a web server is started, and connecting to it from any modern browser within the same WiFi network presents you the PHONK development environment with everything you need: editor, file browser, console, and API documentation. You can write your code in the browser, and pressing the run button will execute it straight on the device then. As everything is self-contained within the app itself, no additional software is required, and you can start right away by exploring the set of provided examples that showcase everything supported so far: sensor interaction, BLE server and client, communication protocols like MQTT or WebSockets, OpenStreetMap maps, and even integration with Pure Data and Processing. Attach a USB OTG cable and you can program your Arduino, have serial communication, or interface a IOIO board. You can even connect a MIDI controller.

This is really impressive work done by [Victor], and a lot of attention to detail went into the development. If you have an old Android phone collecting dust somewhere, this would be a great opportunity to revive it and build something with it. And as [Victor] writes on the project’s GitHub page, he’s always curious what people will come up with. If you’re thinking about building a mobile sensor lab, or want to learn more about the sensors inside your phone, have a look at the 36C3 talk about phyphox.

Dreamcast Gets A Plug-n-Play Hard Drive Mod

The Dreamcast was a proud moment for Sega, at least initially, being the first console to launch of a new generation. Unfortunately this didn’t translate into massive sales, and the plug was pulled far earlier than expected. The console retains a dedicated fanbase to this day however, who continue to tinker with the hardware. [DreamcastChannel] is one of them, and put together a nifty plug-and-play hard drive mod.

The mod is based on earlier work, which consisted of manually soldering the 44 lines of an IDE cable on to the main Dreamcast motherboard. This allowed an IDE hard drive to be neatly mounted inside the shell, but [DreamcastChannel] knew it was possible to do better.

Starting from scratch, the GDROM optical drive assembly is gutted, leaving just its metal case and PCB. The IDE cable for the hard disk is then soldered to the pads on the PCB. A 3D printed mount is used to fix the hard drive to the metal case. This allows the entire assembly to slot neatly into the Dreamcast, using the GDROM’s original connector.

It’s a hack that makes putting a hard drive into the Dreamcast neat and tidy. Combined with a hacked BIOS and Dreamshell, it makes playing backup games a breeze. We’ve seen plenty of Dreamcast hacks before, too – the VMU is often a key candidate for attention. Video after the break.

Continue reading “Dreamcast Gets A Plug-n-Play Hard Drive Mod”

Raspberry Pi Revives Stand-Alone DivX Player

It might seem almost comical to our more fresh-faced readers, but there was a time when you could go into a big box retailer and purchase what was known as a “DivX Player”. Though they had the outward appearance of a normal DVD player, these gadgets could read various digital video file formats off of a CD-R or DVD-R, complete with rudimentary file browser. Depending on how much video compression you could stomach, a player like this would allow you to pack an entire season of a show or multiple movies onto a single disc. Before we started streaming everything online, that was kind of a big deal.

Room to grow.

[Roberto Piva] got his hands on one of these early digital media players, a KiSS DP-500 circa 2003, and decided that it was too unique to send off to the recycling center. Not only was he curious about what made it tick, but he thought it would be interesting to try converting it into a Raspberry Pi powered streaming media player. One might say there’s something almost perverse about taking the carcass of one of these devices and stuffing it full of the same technology that made it obsolete in the first place, but who are we to judge?

Upon opening the vintage set top box, [Roberto] was immediately struck by how empty the thing was. He got the impression the device was a rush job, pushed out to capitalize on a relatively short-lived trend. Looking at it, we have to agree. It’s almost as though they got a deal on some old VCR chassis laying around in a warehouse someplace and decided to stick some (at the time) modern electronics in it. It even uses what appears to be a standard IDE optical drive rather than something purpose built.

[Roberto] hoped that he could tap into the player’s original power supply, but upon testing found that it wasn’t quite up to the task to reliably running a modern Pi. So into the cavernous enclosure went a powered USB hub, which he wired up to the original power switch on the player’s front panel. The original PSU couldn’t handle the Pi, but it does work nicely to spin up an IDE hard drive that he mounted to the top of the optical drive with zip ties.

This was enough to get a nice Kodi set top box that’s capable of pulling media from the Internet or the internal HDD, but [Roberto] has more plans for the future. He wants to try and get the optical drive working through a USB-to-IDE adapter so the device can come full circle and once again play burned discs full of video files, and mentions he would like to reverse engineer the front panel and IR receiver to control Kodi.

While this isn’t the first time we’ve seen a DVD player get an internal Raspberry Pi, the fact that this one is using an IDE drive is an interesting spin and should make for a very clean final product. We’ve also seen how integrating the original physical controls can really help sell the experience with these Pi-infused players. If you’ve got the space in your entertainment for one of these early 2000’s leviathans, they might make an ideal base for your own Pi set top box build.

A Lightweight AVR IDE

It’s entirely possible to do your coding in vim or emacs, hammering out hotkeys to drive the interface and bring your code to life. While working in such a way has its charms, it can be confronting to new coders, and that’s before even considering trying to understand command line compiler settings. The greenhorn coder may find themselves more at home in the warm embrace of an IDE, and [morrows_end] has now built one for those working with AVR assembly code.

The IDE goes by the name of Simple AVR IDE, or savr_ide for short. Programmed in C++ with the FLTK widget library, [morrows_end] has tested it on Windows XP, but notes that it should successfully compile for Linux, Unix, and even MacOS too.

All the basic features are there – there’s syntax highlighting, as well as integration with the AVRA assembler and AVRDUDE for programming chips. It’s a tool that could make taking the leap into assembly code just that little bit easier.  For another taste of bare metal coding, check out [Ben Jojo]’s discussion of x86 bootloaders.

A Tiny IDE For Your ATtiny

When writing code for the ATtiny family of microcontrollers such as a the ATtiny85 or ATtiny10, people usually use one of two methods: they either add support for the chip in the Arduino IDE, or they crack open their text editor of choice and do everything manually. Plus of course there are the stragglers out there using Eclipse. But [Wayne Holder] thinks there’s a better way.

The project started out as a simple way for [Wayne] to program the ATtiny10 in C under Mac OS, but has since evolved into an open source, cross-platform integrated development environment (IDE) for programming a wide range of ATtiny chips in C, C++, or Assembly. Not only does it integrate the source code editor and programmer, but it even bundles in documentation for common variants of the chips including block diagrams and pinouts; making it a true one-stop-shop for ATtiny hacking.

His IDE runs under Java, including OpenJDK, and [Wayne] provides a stable pre-built executable for those who don’t want to clone the whole GitHub repository. He’s included the GNU/AVR toolchains, though notes that testing so far has been limited to Mac OS, and he’s interested in feedback from Windows and Linux users. Assembly is done either with GNU AVR-AS, or an assembler of his own design, though the latter is currently limited to the ATTiny10.

To actually get the code onto the chip, the IDE supports using the Arduino as a programmer as well as dedicated hardware like the BusPirate or the USBasp. If you go the Arduino route, [Wayne] has even come up with a little adapter board which he’s made available through OSH Park to help wrangle the diminutive chips.

The ATtiny10 might have something of a learning curve, but in exchange this family of tiny microcontrollers offers an incredible amount of capability. When you’re working with what’s essentially a programmable grain of rice, the only limit is your own creativity.

BSD Breathes New Life Into Obsolete Equipment

An old laptop or desktop computer that’s seen better days might still have a little bit of use left in it for a dedicated task. Grabbing a lightweight flavor of Linux and running a web server, firewall, or Super Nintendo emulator might get a few more years out of it. You can also get pretty creative repurposing obsolete single purpose  machines, as [Kristjan] did with some old Cisco server equipment.

The computer in question isn’t something commonly found, either. It’s an intrusion detection system meant to mount in a server rack and protect the server itself from malicious activity. While [Kristjan] mentions that Cisco equipment seems to be the definition of planned obsolescence, we think that this Intel Celeron machine with an IDE hard drive may have gone around the bend quite some time ago. Regardless, it’s modern enough to put back to work in some other capacity.

To that end, a general purpose operating system was installed, and rather than use Linux he reached for BSD to get the system up and running. There’s one other catch, though, besides some cooling issues. Since the machine was meant to be used in a server, there’s no ACPI which means no software shutdown capability. Despite all the quirks, you can still use it to re-implement a network security system if you wanted to bring it full-circle.

Open Source IDE For FPGAs As QtCreator Learns Verilog

Classic battles: PC vs Mac, Emacs vs Vi, Tastes Great vs Less Filling, and certainly one that we debate around the Hackaday watercooler: command line or IDE? There’s something to be said for using good old command line tools, and even if you like to configure your favorite editor to be nearly an IDE, at least it is one you are familiar with and presumably leverage over several different uses.

Most commercial FPGA tools come with a heavy-weight IDE. The open source tools for Lattice (IceStorm) typically is driven by the command line or a makefile. Until now. [Rochus-Keller] released VerilogCreator which is a plugin for QtCreator.

We were impressed because as IDEs go, QtCreator is both useful and lightweight, two things that don’t go together for many similar tools. [FPGAwars] has had an IDE based on Atom (apio-ide) although it hasn’t been updated in nearly a year. IceStudio sees more updates, of course, but it isn’t so much an IDE as a GUI-based code builder.

[Rochus-Keller] says there’s more to come. However, even at this early stage the IDE does syntax coloring, tooltips, inline messages, and can analyze source code allowing you to cross-reference symbols as you’d expect. There are configurations for Icarus to do simulations or you can use Verilator or Yosys — the synthesizer behind IceStorm. It appears it can also interact with Tcl-based workflows like those used by most FPGA vendor IDEs.

There’s quite a bit still on the to-do list, so we are excited to see where this is going. QtCreator isn’t hard to learn and it doesn’t’ feel as bloated as some of the big IDEs like Eclipse. If you want a quick introduction to QtCreator, we did that already. If you want to draw boxes instead of writing Verilog directly, try IceStudio.