There are millions of IoT devices out there in the wild and though not conventional computers, they can be hacked by alternative methods. From firmware hacks to social engineering, there are tons of ways to break into these little devices. Now, four researchers at the National University of Singapore and one from the University of Maryland have published a new hack to allow audio capture using lidar reflective measurements.
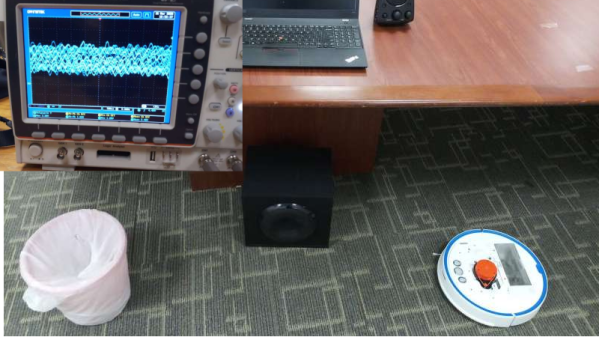
The hack revolves around the fact that audio waves or mechanical waves in a room cause objects inside a room to vibrate slightly. When a lidar device impacts a beam off an object, the accuracy of the receiving system allows for measurement of the slight vibrations cause by the sound in the room. The experiment used human voice transmitted from a simple speaker as well as a sound bar and the surface for reflections were common household items such as a trash can, cardboard box, takeout container, and polypropylene bags. Robot vacuum cleaners will usually be facing such objects on a day to day basis.
The bigger issue is writing the filtering algorithm that is able to extract the relevant information and separate the noise, and this is where the bulk of the research paper is focused (PDF). Current developments in Deep Learning assist in making the hack easier to implement. Commercial lidar is designed for mapping, and therefore optimized for reflecting off of non-reflective surface. This is the opposite of what you want for laser microphone which usually targets a reflective surface like a window to pick up latent vibrations from sound inside of a room.
Deep Learning algorithms are employed to get around this shortfall, identifying speech as well as audio sequences despite the sensor itself being less than ideal, and the team reports achieving an accuracy of 90%. This lidar based spying is even possible when the robot in question is docked since the system can be configured to turn on specific sensors, but the exploit depends on the ability to alter the firmware, something the team accomplished using the Dustcloud exploit which was presented at DEF CON in 2018.
You don’t need to tear down your robot vacuum cleaner for this experiment since there are a lot of lidar-based rovers out there. We’ve even seen open source lidar sensors that are even better for experimental purposes.
Thanks for the tip [Qes]