Overwhelmed By Odd Inputs: The Contest Winners And More

The Odd Inputs and Peculiar Peripherals Contest wrapped up last week, and our judges have been hard at work sifting through their favorite projects. And this was no easy task – we had 75 entries and so many of them were cool in their own right that all we can say is go check them all out. Really.

But we had to pick winners, not the least because Digi-Key put up three $150 gift certificates. So without further ado, here are the top three projects and as many honorable mentions as you have fingers and toes – if you don’t count your thumbs.

The Prize Winners

Keybon should be a mainstream commercial product. It’s a macro keypad with an OLED screen per key. It talks to an application on your desktop that detects the program that you currently have focused, and adapts the keypress action and the OLED labels to match. It’s a super-slick 3D-printed design to boot. It’s the dream of the Optimus Maximus, but made both DIY and significantly more reasonable as a macro pad. It’s the coolest thing to have on your desk, and it’s a big winner!

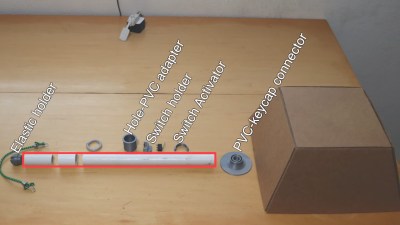
On the ridiculous side of keyboards, meet the Cree-board. [Matt] says he got the idea of using beefy COB LEDs as keycaps from the bad pun in the name, but we love the effect when you press down on the otherwise blinding light – they’re so bright that they use your entire meaty finger as a diffuser. Plus, it really does look like a keypad of sunny-side up eggs. It’s wacky, unique, and what’s not to love about that in a macropad?

Finally, [Josh EJ] turned an exercise bike into a wireless gamepad, obliterating the choice between getting fit and getting high scores by enabling both at the same time. An ESP32-turned-Bluetooth-gamepad is the brains, and he documents in detail how he hooked up a homebrew cadence sensor, used the heart-rate pads as buttons, and even added some extra controls on top. Watching clips of him pedaling his heart out in order to push the virtual pedal to the metal in GRID Autosport, we only wish he were screaming “vroooom”. Continue reading “Overwhelmed By Odd Inputs: The Contest Winners And More”

A Handy Tester For A Mountain Of PS/2 Keybords

The hacking life is not without its challenges, and chief among these is the tendency to always be in acquisition mode. When we come across a great deal on bulk equipment, or see a chance to rescue some obscure gear from the e-waste stream, we generally pounce on it, regardless of the advisability.

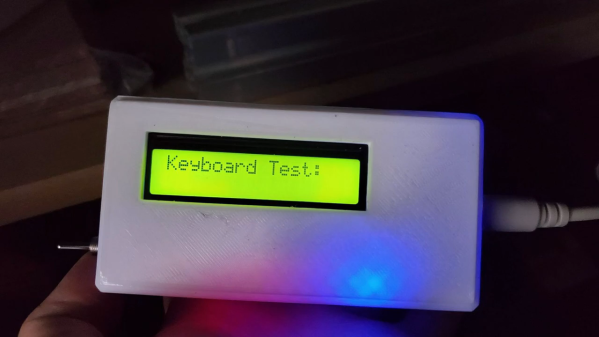
We imagine this is why [Nathan] ended up with a hoard of PS/2 keyboards. Seriously, there are like thousands of the things. And rather than lug a computer to them for testing, [Nathan] put together this handy Arduino-based portable tester to see which keyboards still have some life left in them. The video below goes into detail on the build, but the basics are pretty simple — an Arduino, a 16×2 LCD display, and a few bits and bobs to run it off a LiPo pack and charge it up. Plus, of course, a PS/2 jack to plug in a keyboard and power it up. Interestingly, the 16×2 display is an old Parallax unit, from the days when RadioShack still existed and sold their stuff. That required a little effort to get it working with the Arduino, but in the end it works like a charm — plug in a keyboard and whatever you type shows up on the screen.

Of course, it’s hard to look at something like this, and that mountain of keyboards in the background, and not scheme up ways to really automate the whole test process. Perhaps an old 3D printer with a stylus mounted where the hot end would go could press each key in turn while the tester output is recorded — something like this Wordle-bot, but on a keyboard scale. That kind of goes against [Nathan]’s portability goal, but it’s still fun to think about.

Continue reading “A Handy Tester For A Mountain Of PS/2 Keybords”

Mechanical Keyboards Are Over, This Device Has Won

The desk of any self-respecting technology enthusiast in the 2020s is not complete without a special keyboard of some sort, be it a vintage IBM Model M, an esoteric layout or form factor, or just a standard keyboard made with clacky mechanical switches. But perhaps we’ve found the one esoteric keyboard to rule them all, in the form of [HIGEDARUMA]’s 8-bit keyboard. You can all go home now, the competition has been well and truly won by this input device with the simplest of premises; enter text by setting the ASCII value as binary on a row of toggle switches. No keyboard is more retro than the one you’d find on the earliest microcomputers!

Jokes aside, perhaps this keyboard may be just a little bit esoteric for many readers, but it’s nevertheless a well-executed project. Aside from the row of binary inputs there is a keypress button which sends whatever the value is to the computer, and a stock button that allows for multiple inputs to be stored and sent as one. If you pause for a moment and think how often you use Ctrl-C and Ctrl-V for example, this is an essential function. There’s more information on a Japanese website (Google Translate link), which reveals that under the hood it’s a Bluetooth device running on an ESP32.

We can imagine that with a bit of use it would be possible to memorize ASCII as binary pretty quickly, in fact we wouldn’t be at all surprised to find readers already possessing that skill. But somehow we can’t imagine it ever being a particularly fast text input device. Take a look for yourselves, it’s in the video below the break.

Continue reading “Mechanical Keyboards Are Over, This Device Has Won”

DIY Keyboard Can’t Get Much Smaller

The PiPi Mherkin really, really can’t get much smaller. The diminutive keyboard design mounts directly to the Pi Pico responsible for driving it, has a similar footprint, and is only about 9 mm thick. It can’t get much smaller since it’s already about as small as the Pi Pico itself.

Running on the Pi Pico is the PRK firmware, a keyboard framework that makes the device appear as a USB peripheral, checking the “just works” box nicely. The buttons here look a little sunken, but the switches used are available in taller formats, so it’s just a matter of preference.

We have to admit the thing has a very clean look, but at such a small size we agree it is perhaps more of a compact macropad than an actual, functional keyboard. Still, it might find a place in the right project. Design files are online, if you’re interested.

If you like small, compact keyboards but would prefer normal-sized keys, check out the PiPi Mherkin’s big brother, the PiPi Gherkin which gets clever with dual-function tap/hold keys to provide full functionality from only 30 keys, with minimal hassle.

Keyboards are important, after all, and deserve serious attention, as our own [Kristina Panos] knows perfectly well.

Cityscape Multi-Level Keyboard Really Stacks Up

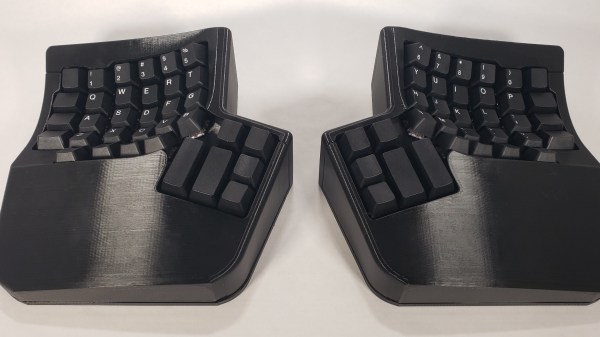
Keyboards with wells like the Maltron, the Kinesis Advantage family, and everything dactyl-esque out there are great. Trust us, we know this firsthand. But if you want to build your own curvy girl, how the heck can you implement that shape without 3D printing, clever woodworking, or access to tooling and plastic molding equipment? Well, there is another way. Over on twitter (translated) (Threadreader: Japanese, English), [tsukasa_metam] has achieved the key well effect by stacking up PCBs to create a skyline of vertically-staggered keys.

The boards of Cityscape are all screwed together for mechanical integrity, but those screws are working overtime, providing electrical connections between the layers as well. We particularly like that there is an impetus for this build other than ‘I thought of it, so let’s do it’ — [tsukasa_metam] tends to typo in the double key press sense, hitting Q for instance at the same time when A was the intended target. Between the 3.2 mm of key travel, the 2.8 mm step height, and those flat F10 keycaps, that is no longer an issue.

Instead of the popular low-profile Kailh choc switches, [tsukasa_metam] went with TTC KS32s, a new switch introduced in 2020. Unlike chocs, they’ll take Cherry MX-style keycaps, as long as they’re wearing short skirts. Cityscape isn’t totally open source, but the idea is now out there nonetheless, and we happen to have an Odd Inputs and Peculiar Peripherals contest running now through July 4th.

Do stacked PCBs seem kinda familiar? Hey, it’s easier than winding transformer coils.

Via KBD #79

Long-Distance Text Communication With LoRa

Affordable and reliable cell phones have revolutionized the way we communicate over the last two decades or so, and this change was only accelerated by the adoption of the smartphone. This is all well and good if you’re living in a place with cellular infrastructure, but if you’re in more remote areas you’ll have to be a little more inventive. This text-based communications device, for example, lets you send text messages without all of that cumbersome infrastructure.

While [Arthur] didn’t create this project specifically for off-grid use, it’s an interesting project nonetheless. The devices use a physical QWERTY keyboard and a small screen, reminiscent of BlackBerry devices from the late 2000s (partially because they are actually using BlackBerry keyboards). One of the other goals for this project was low power consumption, and between polling the keyboard, the memory LCDs, and receiving and transmitting messages using LoRa, [Arthur] was able to get the current draw down to 12 mA.

Between the relatively common nRF52840 and SX1262 chips, plus the fact that [Arthur] made the schematics available, this makes for an excellent off-grid device for anyone who likes to drive off into the wilderness or lives far enough outside of town that cell phone reception is a concern.

Looking for something a little easier to put together before your upcoming camping trip? This similarly styled LoRa communicator from [MSG] uses off-the-shelf modules to greatly reduce the part count. Another option for off-grid communications is to use existing smartphones paired with a LoRa network like we saw in this project.

One Solution, Many Problems

You might think you’re lucky when one of your problems has multiple solutions, and you get to pick and choose, but you’re even luckier when one solution has many problems! This week I stumbled on an old solution in a new place. The project was a fantastic old MIDI guitar build, the Tryndelka by [Aleksandr Goltsov]. And the old solution? Switch matrix diodes.

You see, [Aleksandr] is making an electric guitar where the strings are pulled up to a certain voltage and then make contact with metal frets. Each fret is cut into six pieces, so that the strings can be read out individually, and the microcontroller scans each string in succession to test if it’s pressed down or not. Done, right? Wrong! The problem comes when two or more strings are pressed at once — the electrical path from the string you want will travel through the closed switch on a string that you’re not scanning. The solution is a ton of diodes.

I learned this problem the hard way in wiring up a MAME cabinet, at about 3 A.M. the night before we were going to bring it to Shmoocon. We finally got the whole USB/button code working, so we played some celebratory rounds of Street Fighter. We eventually noticed that hitting one button, or even moving the joystick in a particular direction, would block some of the other buttons from working, or change their function entirely. Quick Internet search later, and we were hand soldering 64 diodes until dawn. Good times!

But the fact that switch matrices need diodes, and exactly why, is forevermore burned in my brain. It’s fun to see it pop up in all sorts of contexts, from DIY keyboards to MIDI guitars, to Charliplexing. (It’s the “D” in LED!) It’s one of the classics — a solution to many problems.