This Binary Keyboard Is For ASCII Purists

So, you’re a keyboard enthusiast. The ‘board that came from Dell, HP, or whoever made your computer is just not for you. You have an ancient IBM, a decal-free Das Keyboard, or another similarly esoteric text input device. Your typing can be heard three blocks away as the unmistakable clack of bent-spring switches reverberates around you, but you don’t care because you’re in the Zone.

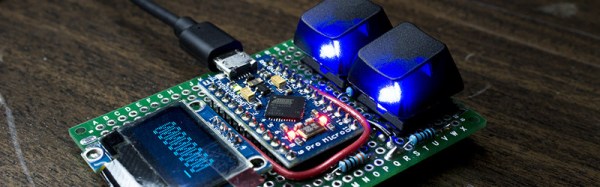
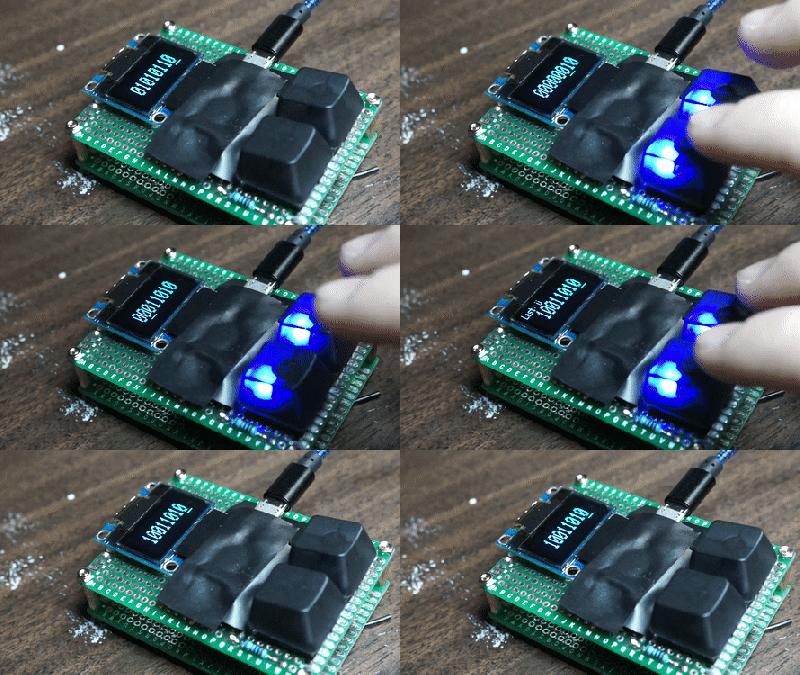
No keyboard can be as high-end as the one you already have, your position in the hierarchy of text entry is assured. But then along comes [Chris Johnston] with his project, and suddenly your desktop looks very cluttered. It’s a binary keypad with only a 0 key, a 1 key, and an OLED display. All input is as a series of binary bytes, so as a hardcore binary typist you’ll need to know your ASCII.
Behind the keys is an Arduino Pro Micro acting in USB HID mode, and running the code you can download from the GitHub link above. It’s a gloriously pointless input device, but we’re sure you’ll agree it has something of the 00110001 00110011 00110011 00110111 about it.

If you think you may have seen this before on Hackaday then you’re not quite right. We have had a binary keypad in the past, but that one had a return key and thus had three keys. This one’s a 2-key ‘board for binary purists.

[via /r/mechanicalkeyboards/]

Pi Zero W Impersonates IPhone, Becomes Terminal

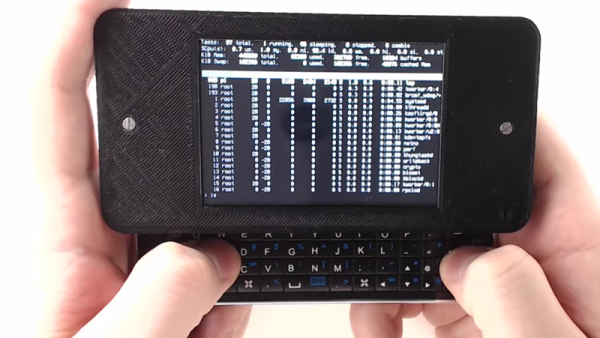
There’s something to be said for economies of scale and few things sell more than cell phones. Maybe that’s why [NODE] took inspiration from an iPhone slide out keyboard case to create this Pi Zero W-based portable terminal. This is actually his third iteration, and in the video below he explains why he has built the new version.

By housing the custom bits in a 3D-printed frame that is size compatible with the iPhone, [NODE] manages to leverage the slick slide out keyboard cases available for the phone. The iPhone in question is an older iPhone 5, so the cases are inexpensive, compared to the latest generation. On the other hand, the iPhone 5 is recent enough that it shouldn’t be hard to find a compatible case.

The circuitry itself is pretty straightforward: a battery, a charge controller, and an LCD display. The only complaint we could see was the lack of a control key on the keyboard.

Continue reading “Pi Zero W Impersonates IPhone, Becomes Terminal” →

The Custom Clicky Shortcut Keypad

You’re not cool unless you have a mechanical keyboard. Case in point: if you were to somehow acquire an identical keyboard to the one I used to type this, it would set you back at least seven hundred dollars. Yes, it’s mechanical (Topre), and yes, I’m cooler than you. Of course, you can’t be as cool as me, but you can build your own mechanical keyboard. [Robin] is, I presume, a pretty cool dude so he built his own keyboard. It’s the amazing shortcut keyboard, and it can be programmed graphically.

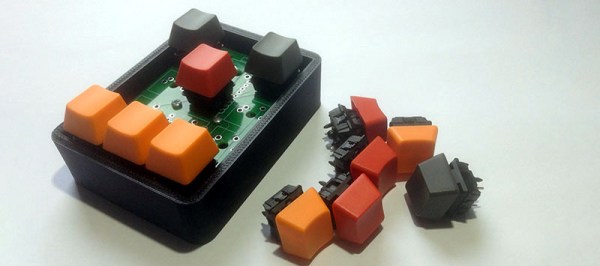
The idea for this keyboard came when [Robin] was studying as an engineer. We assume this is code for wearing out the Escape key on AutoCAD, but many other software packages have the same problem. The solution to [Robin]’s problem was a shortcut keypad, a 3 by 4 matrix of Cherry switches that could be programmed for any task.

The design of this keyboard started out as an Adafruit Trellis matrix keypad. This was combined with some software written in Processing that assigned macros to each button. This was a sufficient solution, but the switches in the Adafruit trellis look squishy. These are not the right switches for someone who craves a soft snap under every fingertip. It’s not the keyboard of someone who desires the subtle thickness of laser etched PBT keycaps. The Adafruit keypad doesn’t have the graceful lines of a fully sculpted set of keycaps. Oh my god, it’s doubleshot.

[Robin]’s completed keyboard has gone through a few revisions, but in the end, he settled on PCB-mounted switches and a very clever 3D printed standoff system to hold an Arduino Pro Micro in place. The enclosure, too, is 3D printed, and the end result is a completely custom keyboard that’s perfect for mashing key combos.

You can check out a video of this keyboard in action below.

Continue reading “The Custom Clicky Shortcut Keypad” →

An Ugly But Functional Pi Laptop

It’s got a face only its mother could love. Or a Hackaday writer, since this ugly e-waste laptop proudly sports a Jolly Wrencher on its back.

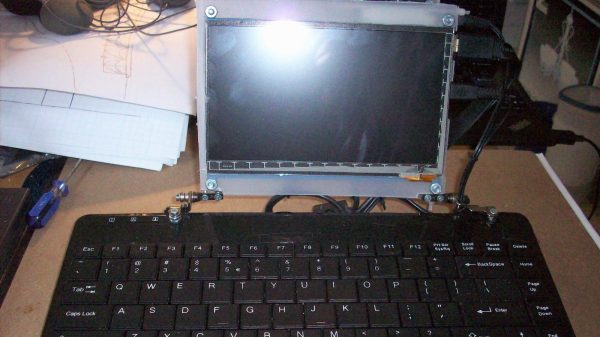
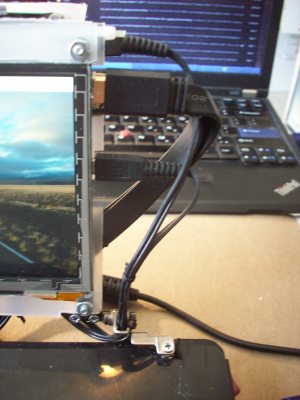
All joking aside, this is a great example of doing what you can with what you’ve got. [starhawk] is limited on funds, and a regular laptop is beyond his means. But being light in the wallet is no reason to go without when you can scrounge parts from friends and family. The base of the laptop is a mini USB keyboard, with the top formed mainly by a 7″ HDMI panel. The back of the display is adorned with a Raspberry Pi 3, a USB hub, a little sound dongle, and the aforementioned Jolly Wrencher. The whole thing is powered by a cast-off power supply brick — no exploding batteries to worry about!

Other Pi-based laptops we’ve covered may be sleeker, but we’ve got to admit that [starhawk]’s keyboard is probably the better choice for working on the next great American novel. And a Linux laptop for next to nothing? That’s a win in our book.

Das Fix

There was a time when the desktop peripherals such as your keyboard and mouse were expensive items that you hung on to and cared for. But several decades of PC commoditization and ever-cheaper manufacturing have rendered each of them to an almost throwaway level, they are so cheap that when one breaks you can simply reach for another without thought.

This is not to say that there is no longer a space for a more costly specialist keyboard. You’ll find enthusiasts still clinging to their treasured vintage IBM Model Ms and Model Fs, or typing on a range of competing high end ‘boards. You might say that a cheap keyboard is pretty high quality these days, but for some people only the feel of a quality switch will do.

[Mac2612] was given a particularly nice example of this class of peripheral, a Das Keyboard 4C complete with trademark missing key decals. There was a snag though, it has suffered a spill at some time in its life, and would issue random keypresses which rendered it useless. His marathon investigation and repair of the fault makes for an interesting read, and gives us some insight into why these keyboards cost the extra money.

“To my dismay, I quickly realized that this was probably an unnecessary endeavor…”

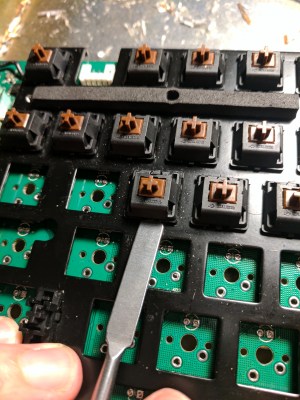
At first it seemed as though corrosion on the board might be the issue, so he gave it a clean with IPA. All to no avail, and so began a succession of further dismantlings and cleanups which culminated in the desoldering of all the key switches. This lengthy task shows us in detail the construction of a high-end ‘board, but sadly it didn’t reveal the fault, and phantom keypresses kept appearing.

Following the board traces back to the microcontroller, he eventually found that moisture had corroded the end of a 10K surface mount resistor, leaving it with a resistance in the MOhms. Since it was a pulldown for one of the keyboard rows, he’d found the source of the problem. Having spent a long time fault-finding a board with an SMD part with a mechanical failure, we feel his pain.

Replacing the SMD parts and reassembly gave him a rather sweet keyboard, albeit for a lot of work.

This is the first Das Keyboard teardown we’ve brought you, but not the first keyboard hack. There are the people remanufacturing the Model F, for example, or the most minimalist keyboard possible.

[Thanks Graham Heath, via /r/MechanicalKeyboards]

Vintage Laptop Keyboard Types Again Through USB

Have you ever had a laptop you just wish you didn’t have to retire when its specification becomes to aged for your needs? Wouldn’t it be great if you could upgrade it and keep using the physical hardware!

[Alpinedelta] has a vintage Toshiba T1000 laptop, roughly a PC-XT clone from the late 1980s. Its 80C88 processor, CGA display, and 512k of memory make it a museum-piece, but he has plans to modernise it using a LattePanda Intel Atom based single board computer.

To make that happen, he has to ensure all the Toshiba’s peripherals will talk to a modern host. Unfortunately back in the 1980s many PC clones were clones in a rather loose sense, and especially so in the laptop arena. Thus there are no handy standard PC interfaces and since USB was several years away at the time, nothing the LattePanda can talk to directly. His solution for the keyboard is to wire its matrix directly to a Teensy microcontroller that then provides a USB interface, and he’s put up a useful step-by-step Instructables guide.

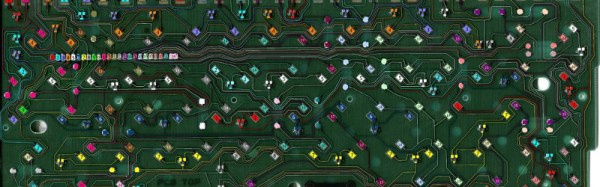
There is no standard for a laptop keyboard matrix, so the first and most tedious task is to unpick its layout.This he did by identifying each trace and assigning a different rainbow colour to it, before noting down which keys appeared on it and collating the results in a spreadsheet. The different colours of wire could then be assigned to the colours of a piece of rainbow ribbon cable, and wired in sequence to the Teensy’s I/O pins. There then follows a step in the software in which he assigns the pin mappings to the lines in his spreadsheet, then the sketch can be compiled and uploaded to the Teensy. Result: a vintage keyboard now talking USB.

Using a Teensy to present a USB keyboard to the world is a well-worn path, we’ve seen it with both newer keyboards and other relics like this one from a DEC VT100.

Thanks [Brent] for the tip.

A Guide For Building Rubber Dome Keyboards

Let’s talk about computer keyboards for a second. The worst keyboards in the world are the cheap ‘rubber dome’ keyboards shipped with every Dell, HP, and whatever OEM your company has a purchasing agreement with. These ‘rubber dome’ keyboards use a resistive touchpad to activate a circuit, and the springiness of the key comes from a flexible rubber membrane. Mechanical keyboards are far superior to these rubber dome switches, using real leaf springs and bits of metal for the click clack happiness that is the sole respite of a soul-crushing existence. MX blues get bonus points for annoying your coworkers.

Mechanical key switches like the Cherry MX, Gateron, or whatever Razer is using aren’t the be-all, end-all mechanical keyswitch. History repeats, horseshoe theory exists, and for the best mechanical keyswitch you need to go back to rubber domes. Torpre switches are surprisingly similar to the crappy keyboards shipped out by OEMs, but these switches have actual springs, turning your key presses into letters through a capacitive touchpad. Is this a superior switch? Well, a keyboard with Torpre switches costs more than a keyboard with Cherry MX switches, so yeah, it’s a better switch.

It seems everyone is building their own mechanical keyboards these days, and the recipe is always the same: get a few dozen Cherry MX (or clone) switches, build a PCB, grab a Teensy 2, and use the tmk keyboard firmware. There’s not much to it. DIY Torpre boards are rare because of the considerations of building a capacitive switching PCB, but now there’s a DIY guide to making the perfect rubber dome keyboard.

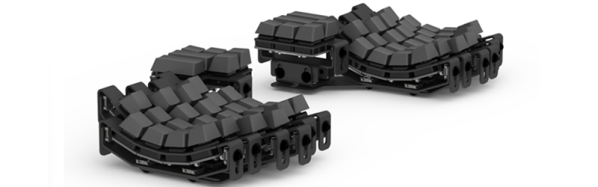
[tomsmalley] put together this guide after reviewing a few amazing projects scattered around the web. Over on Deskthority, [attheicearcade] is building a custom, sculpted, split Torpre board and a split Happy Hacking Keyboard. These are projects worthy of a typing god, but so far there has been no real beginner’s guide for interfacing with these weird capacitive switches.

As far as circuitry goes on these capacitive boards, the PCB is the thing. Each key has a pair of semi-circular pads on the PCB to serve as plates on a capacitor. These pads are connected to a microcontroller through an analog mux, with a little opamp magic thrown into the mix.

With a relatively decent guide to the hardware, [tomsmalley] has also been working on his own firmware for capacitive switches. Shockingly, this firmware is compatible with the Teensy 3.0, which will provide enough horsepower to read a bunch of analog values and spit out USB.

Mechanical keyboards are great, and we really like to see all these hardware creators pushing the state of the art. You can only see so many custom sculpted keycaps or DIY MX boards, though, and we’re really eager to see where the efforts to create a custom Torpre board take us. If you’re building one of these fantastic keyboards, send it in on the tip line.