Custom Mini-Neon Signs In 10 Minutes

Sometimes, you see a project that isn’t a technical powerhouse but just looks so good you can’t help but think about duplicating it. That’s how we felt with the mini-neon signs made by [makerverse]. From an electronics point of view, it is just some filament LEDs and a 3D-printed casing. But, as you’ll see in the video below, these look like little miniature neon signs, and they look great.

Although we might use a different set of tools to get there, the idea is to create your text in DXF, extrude it in CAD, and then print a dark shell with a light or translucent center using a filament change. Glow-in-the-dark filament is also an option. Obviously, if you are handy in any CAD tool, you could easily pull this off.

Continue reading “Custom Mini-Neon Signs In 10 Minutes”

Lamps Double As Secret Surround Sound Speakers

Combined with today’s massive flat panel displays, a nice surround sound system can provide an extremely immersive environment for watching movies or gaming. But a stumbling block many run into is speaker placement. The front speakers generally just go on either side of the TV, but finding a spot for the rear speakers that’s both visually and acoustically pleasing can be tricky.

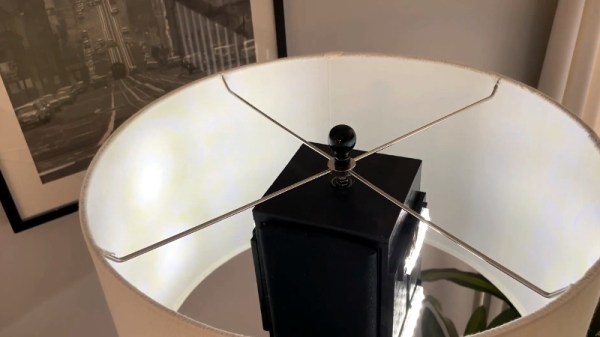
Which is why [Peter Waldraff] decided to take a rather unconventional approach and hide his rear surround sound speakers in a pair of functioning table lamps. This not only looks better than leaving the speakers out, but raises them up off the floor and into a better listening position. The whole thing looks very sleek thanks to some clever wiring, to the point that you’d never suspect they were anything other than ordinary lamps.

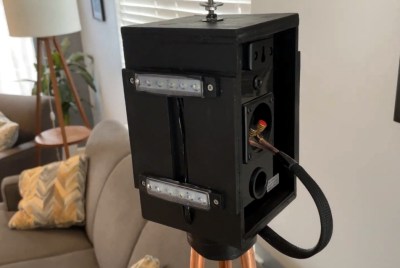
The trick here is the wooden box located at the apex of the three copper pipes that make up the body of the lamp. [Peter] mounted rows of LEDs to the sides of the box that can be controlled with a switch on the bottom, which provides light in the absence of a traditional light bulb. The unmodified speaker goes inside the box, and connects to the audio wires that were run up one of the pipes.

In the base, the speaker and power wires are bundled together so it appears to be one cable. Since running the power and audio wires together like this could potentially have resulted in an audible hum, [Peter] only ran 12 VDC up through the lamp to the LEDs and used an external “wall wart” transformer. For convenience, he also put a USB charging port in the center of the base.

When speakers or surround sound systems pass our way, it’s usually because some hacker has either made  a set from scratch, or has added some new and improved capabilities to their existing gear. This project may be a bit low-tech compared to some that have graced these pages, but it’s undoubtedly a clever and unexpected solution to the problem, and that’s a hack in our book.

Continue reading “Lamps Double As Secret Surround Sound Speakers”

Mini Library For Kids Gets Blinky Lights And Solar Upgrade

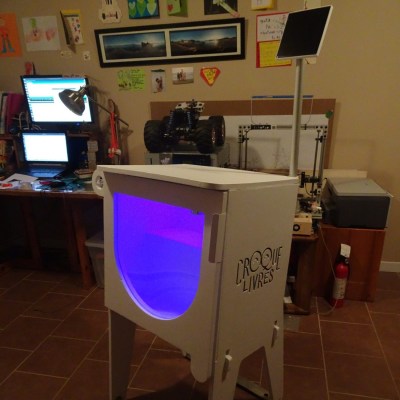
Reading is big in Québec, and [pepelepoisson]’s young children have access to a free mini library nook that had seen better days and was in dire need of maintenance and refurbishing. In the process of repairing and repainting the little outdoor book nook, he took the opportunity to install a few experimental upgrades (link in French, English translation here.)

The mini library pods are called Croque-Livres, part of a program of free little book nooks for children across Québec (the name is a bit tricky to translate into English, but think of it as “snack shack, but for books” because books are things to be happily devoured.)

After sanding and repairs and a few coats of new paint, the Croque-Livres was enhanced with a strip of WS2812B LEDs, rechargeable battery with solar panel, magnet and reed switch as door sensor, and a 3.3 V Arduino to drive it all. [pepelepoisson]’s GitHub repository for the project contains the code and CAD files for the 3D printed pieces.

The WS2812B LED strip technically requires 5 V, but as [pepelepoisson] found in his earlier project Stecchino, the LED strip works fine when driven directly from a 3.7 V lithium-polymer cell. It’s not until around 3 V that it starts to get unreliable, so a single 3.7 V cell powers everything nicely.

When the door is opened, the LED strip lights up with a brief animation, then displays the battery voltage as a bar graph. After that, the number of times the door as been opened is shown on the LED strip in binary. It’s highly visual, interactive, and there’s even a small cheat sheet explaining how binary works for anyone interested in translating the light pattern into a number. How well does it all hold up? So far so good, but it’s an experiment that doesn’t interfere at all with the operation of the little box, so it’s all good fun.

ESP8266 Upgrade Gives IKEA LEDs UDP Superpowers

It can be difficult to resist the impulse buy. You see something interesting, the price is right, and even though you know you should do your research first, you end up putting it in your cart anyway. That’s how [Tobias Girstmair] ended up being the not-so proud owner of a LEDBERG RGB LED strip from IKEA, and what eventually pushed him to replace wimpy original controller with an ESP8266.

So what was the problem with the original controller? If you can believe it, it was incapable of producing white light. When IKEA says an LED is multi-color, they apparently mean it’s only multi-color. A quick check of the reviews online seem to indicate that the white version is sold as a different SKU that apparently looks the same externally and has confused more than a few purchasers.

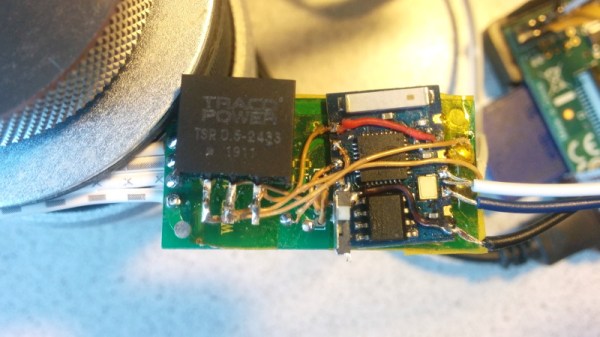
Rather than having to pick one or the other, [Tobias] decided he would replace the original controller with an ESP-03, hoping that would give him granular enough control over the LEDs to coax a suitably white light out of them. He didn’t want to completely start from scratch, so one of the first decisions he made was to reuse the existing PCB and MOSFETs. Some handy test points on the PCB allowed him to hook the digital pins of the ESP right to the red, blue, and green LED channels.

Then it was just a matter of coming up with the software. To keep things simple, [Tobias] decided to create a “dumb” controller that simply sets the LED color and intensity according to commands it receives over a simplified UDP protocol. Anything beyond that, such as randomized colors or special effects, is done with scripts that run on his computer and fire off the appropriate UDP commands. This also means he can manually control his newly upgraded LEDBERG strips from basically anything that can generate UDP packets, such as an application on his Android phone.

It might not be the most robust implementation we’ve ever seen, but all things considered, it looks as though this modification could be a pretty good way to get some cheap network controlled RGB lighting in your life.

Power Generation Modules Mix And Match Wind, Water, And Hand Cranks

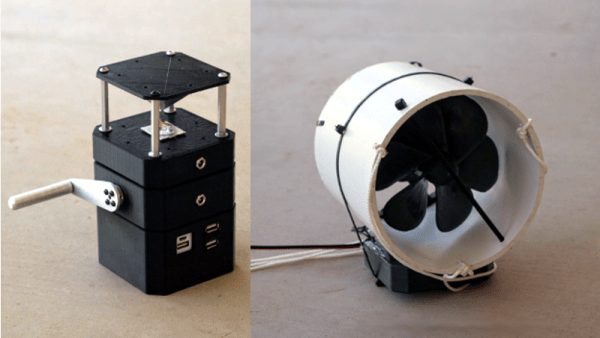
What’s great about the Power Generation Modules project headed by [Cole B] is the focus on usability and modularity. The project is a system for powering and charging small devices using any number and combination of generator modules: wind turbine, hand-crank, and water turbine so far. Power management and storage is handled by a separate unit that acts as a battery bank to store the output from up to six generators at once. There’s also a separate LED lamp module, designed to be capable of being powered directly from any of the generator modules if needed.

Testing the water turbine module

The hand crank is straightforward in concept, but key to usability was selecting a DC gearmotor with a gear ratio that made cranking by hand both comfortable and sustainable; too weak of a crank and it’s awkward, too hard and it’s tiring. The wind turbine has three compact vanes that turn a central shaft, but testing showed the brushless motor it uses as a generator isn’t a good match for the design; the wind turbine won’t turn well in regular wind conditions. The water turbine prototype showed great success; it consists of an epoxy-glazed, 5 inch diameter 3D printed propeller housed in a section of PVC pipe. The propeller drives a brushless motor which [Cole B] says easily outputs between eight to ten volts when testing in a small stream.

The team has plans for other generators such as solar, but this is a great start to an array of modules that can be used to power and charge small devices while off the grid. We’re happy to see them as a finalist for The Hackaday Prize; they were selected as one of the twenty projects to receive $1000 cash each in the Power Harvesting Challenge. The Human-Computer Interface Challenge is currently underway which seeks innovative ideas about how humans and computers can interface with one another, and twenty of those finalists will also receive $1000 each and be in the running for the Grand Prize of $50,000.

New Part Day: A Fake Sun

LED technology has improved by leaps and bounds in recent years, with what was once considered unachievable being common place now. Two of the main parameters of interest, total input power and conversion efficiency have been steadily increasing over the years. An efficacy of 120 lumens/watt is fairly common nowadays, and it may not be improbable to expect double this figure in the near future. Input power ratings have also steadily increased, with single LED units capable of 100 W or more becoming common.

But the Chinese manufacturer Yuji seems to have hit the ball out of the park by introducing their BC-Series, 500 W, high CRI, high Power, COB LED. Single, 500 W COB LED’s are not new and have been available since a couple of years, but their emitting surface areas are quite large. For example, a typical eBay search throws up parts such as this one – 500 W, high Power LED, 60,000 lm, 6000-6500K. It has a large, square emitting area of 47.6 x 47.6 mm. By comparison, the Yuji BC-Series are 27 mm square, with an active emitting area only 19 mm in diameter. This small emitting area makes it easier to design efficient reflector and/or lens units for the LED.

Luminous Flux is between 18,000 to 21,000 for a color temperature of 3200 K, and between 20,000 to 24,000 for the 5600 K type. Further, this high power rating is accompanied with a pretty high color rendering index (CRI) above 95. This allows the LED to faithfully reveal the natural colors of objects due to its wide spectrum. Electrically, it is rated for 12 Amps with input voltage between 35 V to 39 V. This translates to between 420 W ~ 468 W of input electrical power. Some quick math tells us that the efficacy efficiency works out to just a little over 50 lm/W, which isn’t all that great. But with light sources, you can have high-efficacy high-efficiency or high CRI, but not both – that’s just how the physics of it works.

At US $ 500 a pop, these eye blinders do not come cheap and may not find much use for individual hackers. But for some applications, such as studio and theatre lighting or photography, they may be just what the Doctor prescribed. In the video after the break, you can see [Matt] from DIY Perks give a rundown of the LED’s features and take it for a test ride.

Continue reading “New Part Day: A Fake Sun”

The LED Roundsystem

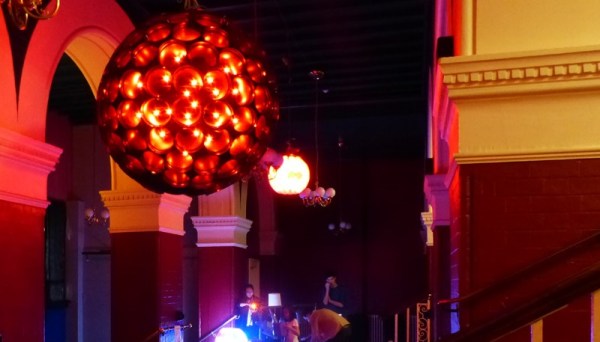
Gavin Morris has been working on his awesome sound responsive LED sculptures for a while. Technically the sculpture is an interesting application of WS2812 RGB LEDs, Raspberry Pis and a load of styrofoam cups and flower pots. However the artistic development, and inspiration for this project is equally interesting. Gavin shares his thoughts and a brief technical description of the project below.

Continue reading “The LED Roundsystem”