Android Controlled Minecraft Ores

[Ryan] has a friend with a birthday coming up, and being inspired by ever 12-year-olds favorite game, he decided to make a Minecraft ore block with RGB LEDs. The block can change from diamonds to emeralds via commands send from an Android phone.

After a few false starts, [Ryan] eventually had his ore cube laser cut at Acess Space, a hackerspace-ish group in Sheffield. The box was constructed out of 3mm MDF, while the windows were laser cut out of frosted acrylic, while the stone pattern on the cube is one giant custom-made sticker.

With the tedious part of the build out of the way, [Ryan] set to work on the electronics. He used a PIC attached to a few very large RGB LEDs, and a Bluetooth module that allows him to connect his phone to an ore block. Dialing in the right colors took some work, but eventually, [Ryan] had an Android-controlled Minecraft ore block, able to transmutate between gold, iron, diamond, emerald, lapis, and redstone.

You can check out a video of [Ryan]’s ore block in action after the break.
Continue reading “Android Controlled Minecraft Ores”

Lighting Up A Workspace Twofer

desks

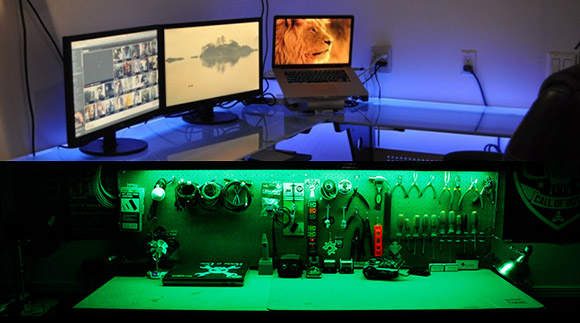
Sometimes a pair of extremely similar builds hit the Hackaday tip line within hours of each other. We’re not one to play favorites, so here’s two projects that put RGB LED strips in a desk and workbench.

[Charles] over at The Makers Workbench has long needed a lighting solution for his workspace. Flourescent lights are alright, but for real geek cred nothing but LED strips will do. He picked up an RGB strip on Amazon for $20 and now has a lighting solution that’s able to change colors above his workstation. Check out the video of his RGB workbench rave.

A computer desk is a workbench too, right? [Will] had the idea of letting people on the Internet control the lighting color of his desk. He’s asking people to head over to this site and asking people to schedule the color of his desk for an entire day. A Raspi pulls each day’s color off the server. With a few transistors, an RGB strip, a custom shield, and faking three PWM channels, [Will] has a new color at his desk every day.

DIY Lighting Solutions

pvc-lights

With daylight savings time starting up, you might not have quite as much need for lighting, but this pair of hacks should keep everything well lit whether outside or indoors.  Check out the videos of both in action after the break.

The first lighting solution comes to us from [Ben]’s Youtube channel. It’s a simple solution, press-fitting a clamp light into a 1 inch PVC Tee to attach the light to a pipe. The base is made with PVC shaped into three feet for a (hopefully) sturdy rest.  Several lights can be used as needed, and would probably work well for making his next video.

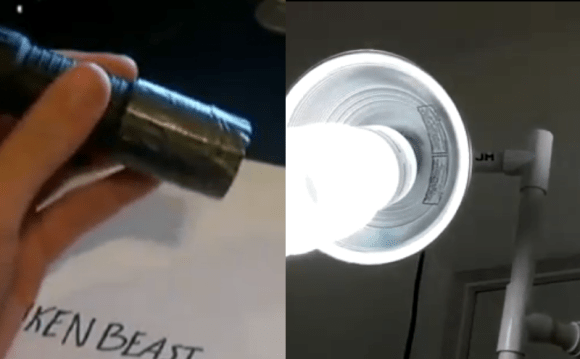
The second light also comes to us from Youtube, and is about converting a stock LED light into one that is much brighter. Skip to around 7:00 to see the outdoor comparison.  You may or may not want to do this exact hack, but you never know when you might want to swap out your blinkenlights for something that will scare the neighbors!
Continue reading “DIY Lighting Solutions”

Add Some Animated Bling To Your GQ Duds

geeky-tie-uses-animated-leds

This tie turned VU meter has us asking: Will anyone be able to look you in the eye during a conversation? It uses an integrated microphone and microcontroller to make a single-column display made of RGB LEDs move to ambient sound.

It shouldn’t be hard to guess that this project is another build from [Becky Stern]. She’s been on fire lately, offering up glowing football helmets and a turn-signal backpack. This uses the same family of components as the latter. A Flora board brings an Arduino to the party. It drives sixteen RGB LED pixels which are addressed using a 1-wire protocol. Sound is measured through a microphone and amplifier breakout board.

Since the hardware gets in the way of a full-windsor, the tie used for the project is a breakaway version which uses velcro. But because you need the needle and (conductive) thread to sew on the components it wouldn’t be hard to alter any tie to perform like this.

Don’t miss the high-quality video tutorial which we’ve embedded after the break.

Continue reading “Add Some Animated Bling To Your GQ Duds”

Building Huge Displays With LED Strips

Building RGB LED displays is one of the most interesting programming and engineering challenges we see here on Hackaday. Not only do the creators of large displays and LED cubes have to deal with the power requirements of driving a whole bunch of LEDs, but there’s also the issue of getting the frame rate high enough to display video. It’s a non-trivial task, but [Paul Stoffregen] has an interesting solution. He wrote an LED strip library that can control eight meter-long LED strips that can also be used on daisy chained Teensy 3.0 microcontrollers for really large displays.

[Paul]’s LED library works with LED strips based on the WS2811 LED controller IC. These chips are the most common controller chips for the individually controllable LED strips you can find at Adafruit or hundreds of Chinese resellers. The library requires DMA transfer to display images, so if you’re looking to build a ginormous RGB LED display, you might want to pick up a few of [Paul]’s Teensy 3.0 boards

[Paul] also created a Processing app that takes a video file and turns it into serial data for his LED strip library. You can check out a video of this app, library, and a 60×32 RGB LED display after the break.

Continue reading “Building Huge Displays With LED Strips”

LED Marquee Uses Discrete Through-hole Lights

through-hole-led-marquee

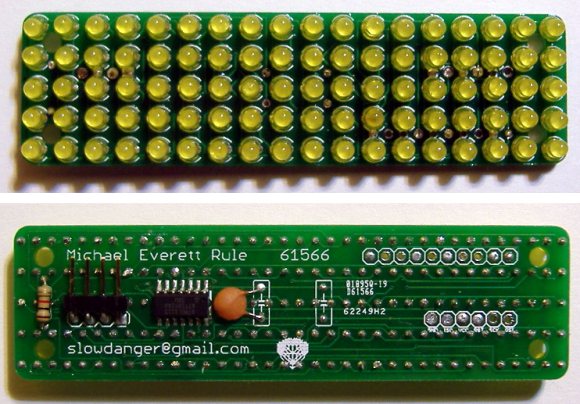
[Michael] built his own LED marquee using individual diodes. Despite his choice to forego the 8×8 or 5×7 modules we often see in these projects, his decision to spin a dedicated PCB saved him a lot of trouble during assembly. Sure, he still had to solder 180 leads on the 9×18 grid of lights, but at least he didn’t have to deal with wiring up the complex display layout.

The chip driving the display is an ATtiny24. You can see that it’s an SMD package and spans one row of the through hole LED footprint. There are way too few pins to drive a multiplexed display of this size. Instead of adding a separate driver IC he decided to design the display to use Charlieplexing. We didn’t see a schematic for the project, but judging from the board images all of the I/O pins are used by either the display itself, or the serial connection provided by that right angle pin header.

Wall-wart Retrofitted With A High-power LED Supply Circuit

high-power-LED-wall-wart-supply

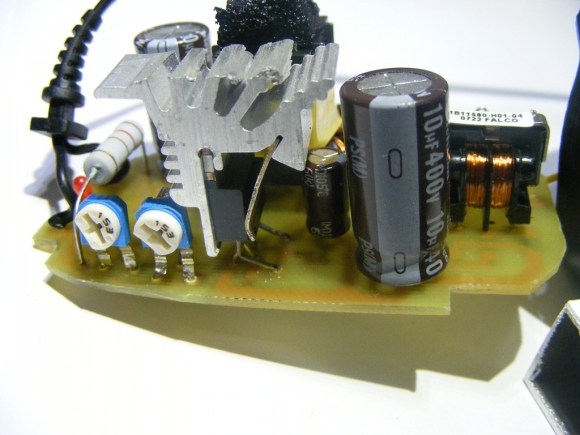
This custom circuit board picks up some of the pieces from a wall wart to drive a high-power LED.  The basic concept is to keep the high-voltage components and swap out the low voltage ones for parts that will be able to drive the 10W load.

The PCB is custom designed, but you can see that it was shaped to match the wall wort’s original board. To the right is the original 500mA transformer. The low-voltage side uses an LM393 because of its dual-comparators. This provides feedback for both current and voltage and is a perfect compliment for the TOP242. We haven’t seen that part before, but [Mincior] says that it’s nice for this application as it has safety features that lock down the chip if power or temperature are above spec. Once the replacement is nestled inside of the plastic case it looks stock and makes sure that your custom LED fixtures will stand the test of time safely.