Here at Hackaday we’re no strangers to the colorful glow of LEDs. But what if there was more to appreciate beneath the surface? Back in 2011 [Windell] over at Evil Mad Scientist dug into a certain variety of LED and discovered they had a song to sing.
Over the last couple decades, you’ve likely encountered the flickering “candle flame” variety of LED. Often found embedded in small plastic candle simulacra they are shaped like typical through hole “gumdrop” style LEDs, but pack some extra magic which causes them to flicker erratically. Coupled with a warm white color temperature the effect isn’t entirely dissimilar to the flickering of a candle flame.
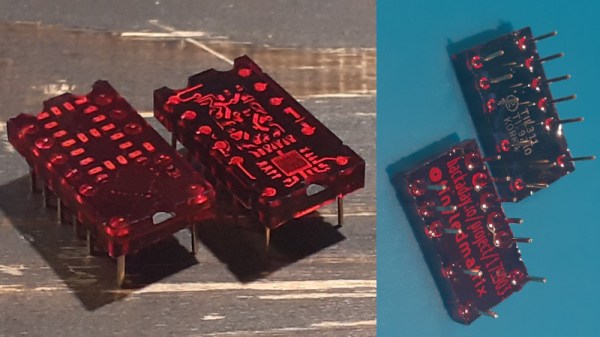
To the Hackaday reader (and [Windell]) the cause of the flickering may be fairly clear, there is an IC embedded in the lens of the LED. See photo at top for an example of how this might look, helpfully magnified by the lens of the LED itself. Looking through the lens the captive die is visible, as well as the bond wires connecting it to the legs and light emitting diode itself. [Windell]’s observation is that together this assembly makes for a somewhat strange electrical component; from the perspective of the circuit it appears to randomly vary the current flowing through the LED.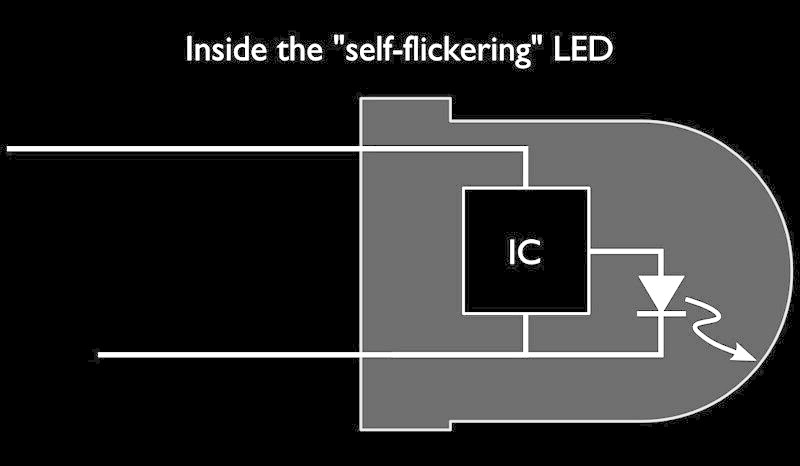
He includes two interesting demos. One is that by attaching the flickering LED to a BJT he can turn it into a current amplifier and successfully drive a much more powerful 1W LED with the same effect. The other is that with the power of the amplifier the same flickering LED can drive a buzzer as well. The effect is surprisingly pleasant, though we’d hesitate to call it musical.
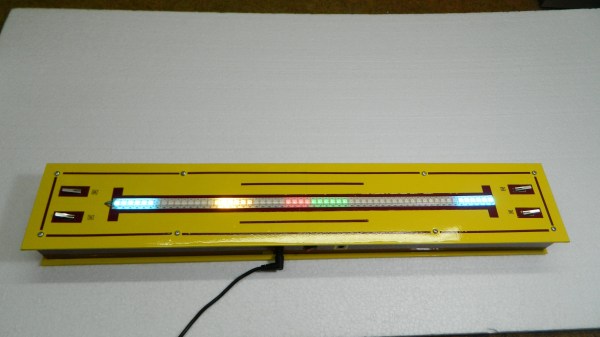
For a more recent example of a similar phenomenon with a very different sound, check out out [Emily Velasco]’s playback of a similarly constructed RGB color changing LED, embedded below. We’ve seen optical tools used to decode LED flickers into data streams, but not for audio playback! We have also covered some LED flicker reverse engineering that spills more of the mystery sealed up in these specialized diodes.
Continue reading “Sounding The Humble LED” →


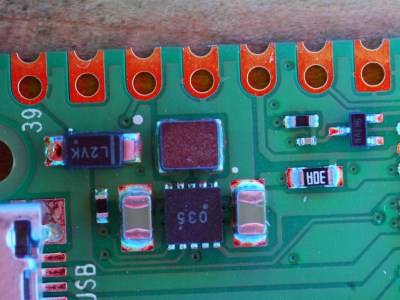 The principle behind this tool is as unexpected and simple as it is clever; by having different colours of light from different elevations of the dome it ensures that each different angle of the solder joint surface reflects a different colour. Thus a colour photograph shot from directly above the board allows visual inspection of the quality of the solder joints by the rainbow of colours that appears around their edges. This process can even be automated with OpenCV or similar, hence the process is referred to as Automated Optical Inspection, or AOI.