The Design Process For A Tiny Robot Brain

As things get smaller, we can fit more processing power into devices like robots to allow them to do more things or interact with their environment in new ways. If not, we can at least build them for less cost. But the design process can get exponentially more complicated when miniaturizing things. [Carl] wanted to build the smallest 9-axis robotic microcontroller with as many features as possible, and went through a number of design iterations to finally get to this extremely small robotics platform.

Although there are smaller wireless-enabled microcontrollers, [Carl] based this project around the popular ESP32 platform to allow it to be usable by a wider range of people. With that module taking up most of the top side of the PCB, he turned to the bottom to add the rest of the components for the platform. The first thing to add was a power management circuit, and after one iteration he settled on a circuit which can provide the board power from a battery or a USB cable, while also managing the battery’s charge. As for sensors, it has a light sensor and an optional 9-axis motion sensor, allowing for gesture sensing, proximity detection, and motion tracking.

Of course there were some compromises in this design to minimize the footprint, like placing the antenna near the USB-C charger and sacrificing some processing power compared to other development boards like the STM-32. But for the size and cost of components it’s hard to get so many features in such a small package. [Carl] is using it to build some pretty tiny robots so it suits his needs perfectly. In fact, it’s hard to find anything smaller that isn’t a bristlebot.

Continue reading “The Design Process For A Tiny Robot Brain”

You Can Use LEDs As Sensors, Too

LEDs are a wonderful technology. You put in a little bit of power, and you get out a wonderful amount of light. They’re efficient, cheap, and plentiful. We use them for so much!

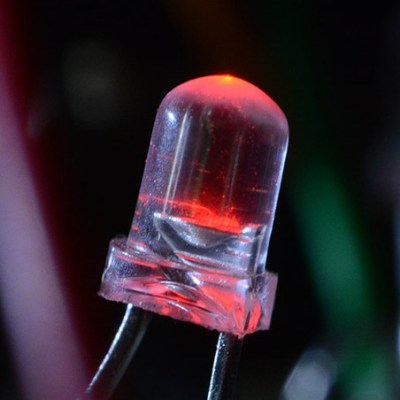
What you might not have known is that these humble components have a secret feature, one largely undocumented in the datasheets. You can use an LED as a light source, sure, but did you know you can use one as a sensor?

Continue reading “You Can Use LEDs As Sensors, Too”

Light-Tracking BEAM Robot Can See The Light

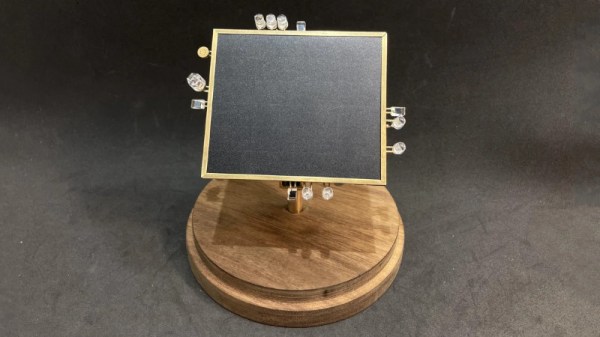
BEAM robotics, which stands for Biology, Electronics, Aesthetics, and Mechanics, is an ethos that focuses on building robots with simple analog circuits. [NanoRobotGeek] built a great example of the form, creating a light-tracking robot that uses no batteries and no microcontrollers.

The robot aims to track the brightest source of light it can see. This is achieved by feeding signals from four photodiodes into some analog logic, which then spits out voltages to the two motors that aim the robot, guiding it towards the light. There’s also a sound-detection circuit, which prompts the robot to wiggle when it detects a whistle via an attached microphone.
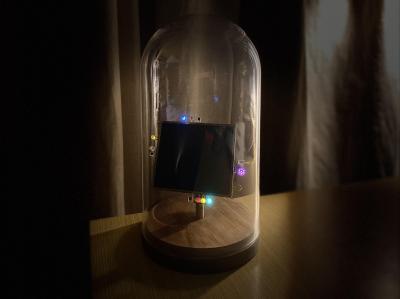
The entire circuitry is free-formed using brass wire, and the result is an incredibly artful build. Displayed in a bell jar, the build looks like some delicate artifact blending the past and future. Neither steampunk nor cyberpunk, it draws from both with its combination of vintage brass and modern LEDs.

It’s a great build that reminds us of some of the great circuit sculptures we’ve seen lately. Video after the break.

Continue reading “Light-Tracking BEAM Robot Can See The Light”

LED Brightness Adjustment Uses Itself As Sensor

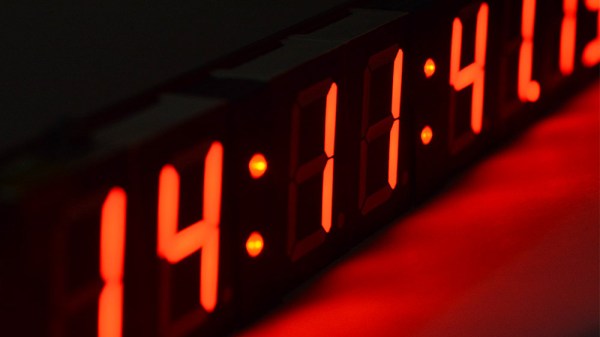
This is a story about a successful system that nevertheless failed to make the cut. An experimental LED brightness adjustment is something [Mitxela] explored in a project for a high-precision clock; one that shows time down to the nearest millisecond, and won’t flicker or otherwise look weird when photographed with a high-speed camera. To pull this off means reinventing many things about a clock display, including how to handle brightness adjustment elegantly. Now, to be clear, the brightness adjustment idea described here is something that did not end up being used, but it’s interesting enough that [Mitxela] wrote it up and we’re very glad he did.

The idea was to have a smooth and seamless automatic brightness adjustment, ideally with no added components. Since LEDs can be used as light sensors, [Mitxela] saw an opportunity to use elements of the clock displays themselves as sensors. This is how it works: a charge in the p-n junction that makes up an LED will decay at a rate proportional to the amount of light hitting the junction. By measuring the speed of this decay, it’s therefore possible to tell how much light is hitting the LED. It’s effective and elegant, but there are a few practical issues to deal with.

The first failed idea was to employ as sensors the unused decimal points in the seven-segment LED modules, but that turned out to have issues. One was the common-cathode wiring of the display modules; this makes them very convenient to drive as displays, but made using the decimal point as a light sensor impractical. The other issue was that the built-in diffuser that makes the displays easier to read absorbs a lot of ambient light. A much better option was to use the LEDs in the colon separators between digits, since they’re independent. Naturally they still have to light up in addition to being used as sensors, but [Mitxela] made a successful prototype by performing the necessary measurements in between the LEDs being driven by PWM.

Despite how clever and efficient the solution was, in the end what sank it was the fact that the LEDs just don’t do a very good job of sensing ambient light for this purpose. The LEDs are simply too directional. Even after sanding away the top (lens) part of the LEDs, they still had a very narrow field of view. As [Mitxela] describes it, tilting the clock towards the ceiling could send it to full brightness, and the shadow of one’s head falling across the clock would plummet it into “night mode” dimness. In short, it responded to what was directly in front of it, rather than the ambient light level as a whole.

It’s a reminder that sometimes a solution simply won’t tick all the right boxes, and it can happen for unexpected reasons. Still, LEDs are versatile things. Not only can they sense light, but as the name implies they’re also diodes. As diodes can be used as temperature sensors that means LEDs can as well.

Serving The Feline Masters: A Chair To Follow The Sunny Spot

Terry Pratchett once wrote, “In ancient times cats were worshipped as gods; they have not forgotten this”. [Jonathan]’s cat has clearly not forgotten, and makes it loudly known whenever her favorite chair needs to be moved to stay in the spot of sunlight. He was looking for a fun hack anyway, so he decided to give in to her majesty’s demands, and automated the task.

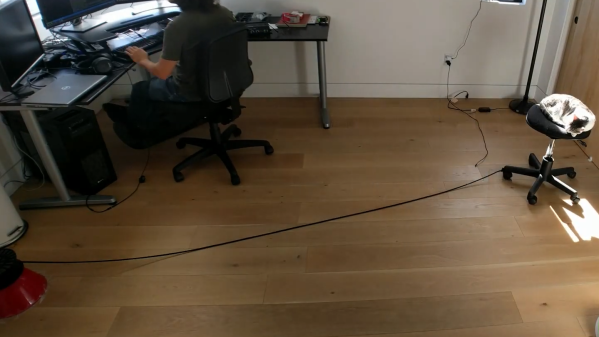
[Jonathan] first considered adding motorizing the chair itself, but decided to keep it simple and just drag the chair across the room with a spool attached to a motor. The rope spool was attached to a small geared DC motor, mounted on a salad bowl base, and connected to an ESP8266 via a motor driver. The ‘8266 is running  NodeMCU with a web server that accepts simple motor commands through a RESTful API. This setup can’t reset the chair to it’s starting position at the end of the day, but this is a small price to pay for simplicity. The motor was a bit underpowered, but it only needed to move the chair in small distances at a time, so [Jonathan] removed the chair’s back to reduce the weight, and upped the motor voltage.

Determining when and how far to move the chair is the second part of the challenge. [Jonathan] considered a simple lookup table for the time of day, but the motor’s movement wasn’t consistent enough. The final solution was a set of three BH1750 digital ambient light sensors to give feedback. A pair of sensors on the chair determines its position relative to the sunny spot, by comparing light levels to a reference sensor mounted in the window. These light sensors are also attached to NodeMCUs, and send movement commands to the winding unit as necessary.

Continue reading “Serving The Feline Masters: A Chair To Follow The Sunny Spot”

See If Someone Has Been In Your Drawers With This Simple Alarm

There’s a spy movie – probably from the [James Bond] franchise – in which our hero is staying in a fancy hotel. It’s crawling with enemies, naturally, and eager to see if one has been snooping in his room while he’s out for martinis, he sticks a hair across the gap in the door. When he comes back and finds the hair missing, he knows the game is afoot.

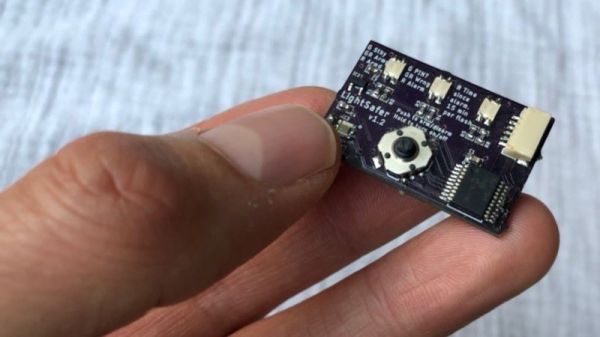
This hotel safe intrusion detector is what [Q] might have thought up for such a job if he’d had access to PIC microcontrollers and SMD LEDs. [Andy]’s “LightSafer” is a silent alarm for hotel safes, drawers, closets, or even the refrigerator – anywhere where the transition from dark to light indicates an unwanted visit. It’s tiny – only 33 x 21 mm – and is powered by a CR2032 coin cell. A Broadcom APDS-9300 light sensor watches for openings while the PIC monitors a joystick control for the correct PIN entry. There’s no audible alarm; rather, an LED blinks to indicate an unauthorized intrusion and blinks once for every 15 minutes since the event.

LightSafer is simple but effective, with a clever UI that keeps the current draw low and the battery life long. [Andy] used a similar technique for this low-draw cat tracking collar that we featured a while back.

Arduino One Pixel Camera Sees All (Eventually)

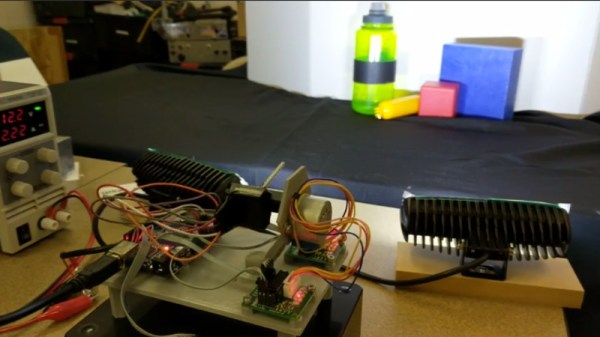
Taking pictures in the 21st century is incredibly easy. So easy in fact that most people don’t even own a dedicated camera; from smartphones to door bells there are cameras built into nearly electronic device we own. So in this era of ubiquitous photography, you might think that a very slow and extremely low resolution camera wouldn’t be of interest. Under normal circumstances that’s probably true, but this single pixel camera built by [Tucker Shannon] is anything but normal.

Continue reading “Arduino One Pixel Camera Sees All (Eventually)”