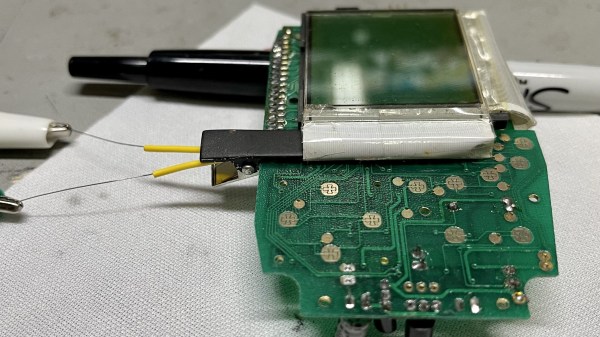
The hairclip-embedded tool being used on a Tiger 99x game console, clipped onto a spot where the plastic ribbon meets the LCD panel itself, heating it up

World’s Smallest Hair Straightener For Fixing Old LCD Ribbons

[Stephen] writes to us about an LCD repair tool he has created. We’ve all seen old devices with monochrome LCDs connected by thin film, where connections between the PCB and the LCD have deteriorated and the LCD would no longer show parts of the picture. This is a connection heating gadget, that [Stephen] affectionately dubs as World’s Smallest Hair Straightener, made specifically to bring cool old tech back to life.

A resin-printed mold houses a coil of Kanthal wire, easy to source and simple to make. He reuses a hair clip as a housing for the heating element, which also provides pressure needed to squish the film-printed conductive traces into the LCD as the adhesive melts. High-temperature epoxy brings the two together, and with a variable power supply, this tool successfully brought an old Tiger 99x handheld back to life.

This hack was made possible, in part, because of [JohnDevin Duncan] in Hackaday comment section sharing his experience on repairing LCD ribbons back in 2015, giving valuable insights on the problem that we initially thought would be solve-able with a soldering iron. The knowledge shared was distilled by [Stephen] into a tool that we all can now use when we encounter a device we really, really want to revive.

Last time we covered this topic, quite a few hackers popped up with their stories and suggestions. Old game console fix stories are a staple here on Hackaday, a few pop to mind – this high-effort trace repair of a water-damaged GameBoy cartridge, a badly designed NES cartridge socket reinvention, and this GameBoy LCD sunburn damage restoration guide.

Repairing A Sunburned Game Boy Screen

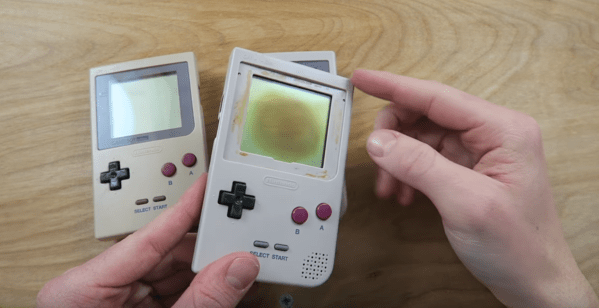
The original Game Boy is a classic. Sure, it had no backlight, but there is something special about playing on that classic green screen. Unfortunately, some of these older systems are suffering a terrible fate — screen burn. Game Boy’s played best with lots of light — especially out in the sun. But that same sun did terrible things to the screen. A black splotch in the center of the LCD is the telltale sign of a burned Game Boy. You might think that screen replacement is the only option, but [The Retro Future] shows us how to repair this issue.

A reflective LCD is a layer cake made up of polarizers, two panes of glass, and a reflector. The burns often seen on Game Boy screens usually are in the polarizer and the optically clear glue which attaches the plastic polarizer to the glass. We’re guessing these burns happen when someone leaves their Game Boy out in the sun. Between the sun rays directly striking the top polarizer and the rays bounced back from the reflector at the rear of the screen, that poor polarizer doesn’t stand a chance.

Repairing the burn is a delicate operation, as one false move could crack the thin LCD glass. The first step is to carefully peel off the burned polarizer. This leaves a mess of dried glue, which can be scraped off or dissolved with alcohol. A new linear polarizer can then be placed on the front of the screen. [The Retro Future] chose not to glue the polarizer, but we’re betting some UV cure LOCA (Liquid Optically Clear Adhesive) from a cell phone screen protector would do the trick.

If you love the look of the classic Game Boy, but want to play just about any classic game, grab a Raspberry Pi zero, and build a retro Pi Boy.

Continue reading “Repairing A Sunburned Game Boy Screen”

How To Make A Custom LCD From Scratch

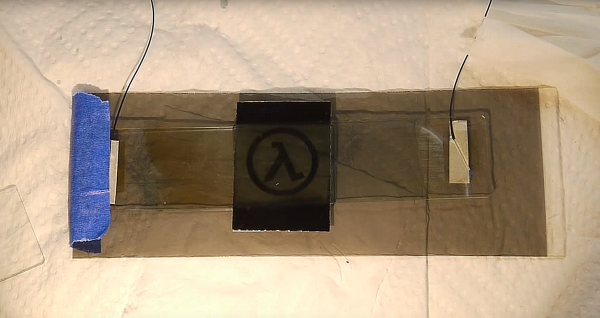
If you have ever wondered what it took to make your own custom graphic LCD from scratch, this video from [Applied Science] is worth a watch. It’s concise and to the point, while still telling you what you need to know should you be interested in rolling your own. There is also a related video which goes into much more detail about experimenting with LCD technology.

[Applied Science] used microscope slides and parts purchased online to make an LCD that displays a custom graphic when activated. The only step that home experimenters might have trouble following is coating the glass slides with a clear conductive layer, which in the video is done via a process called sputtering to deposit a thin film. You don’t need to do this yourself, though. Pre-coated glass is readily available online. (Search for Indium-Tin Oxide or ‘ITO’ coated glass.)

The LCD consists of a layer of liquid crystal suspended between two layers of conductive glass. An electrical field is used to change the orientation of crystals in the suspension, which modulate the light passing through them. Polarizing filters result in a sharp contrast and therefore a visible image. To show a particular shape, some of the conductive coating is removed from one of the layers in the shape of the desired image. The process [Applied Science] uses to do this is nearly identical to etching a custom PCB. Continue reading “How To Make A Custom LCD From Scratch”

Case Modder Builds LCD Window; Causes LSD Flashbacks

lcd-casemod

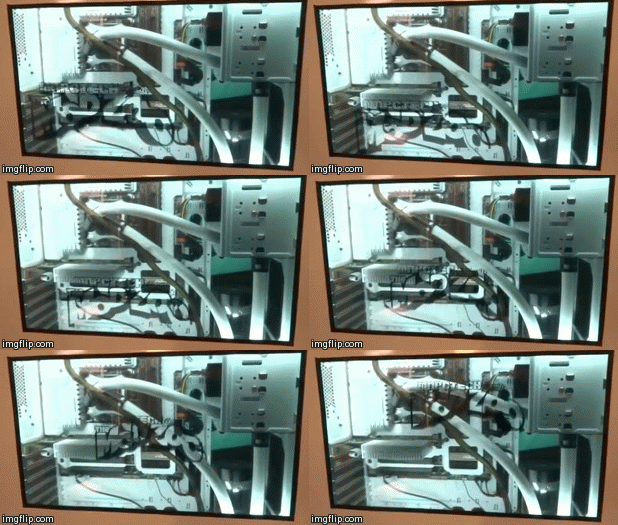
[Chris, aka Mosquito’s Mods]  is well-known for some awesome PC case mods. He’s outdone himself this time with an embedded LCD panel as his case window. This use of an LCD is becoming common on arcade games and slot machines. [Chris] was inspired by an arcade game he saw at a local Dave & Buster’s. He started with an off the shelf 16″ USB LCD monitor from AOC. [Chris] then stripped off the back light, diffuser, and reflectors. Left with  the bare panel and polarizers, he then created an LCD sandwich of sorts. First a layer of 2mm acrylic. Then the LCD and panel, along with 4 strips of acrylic forming a frame around the LCD. The frame strips are in blue in the image after the break. Continue reading “Case Modder Builds LCD Window; Causes LSD Flashbacks”

Crafting A Liquid Crystal Display

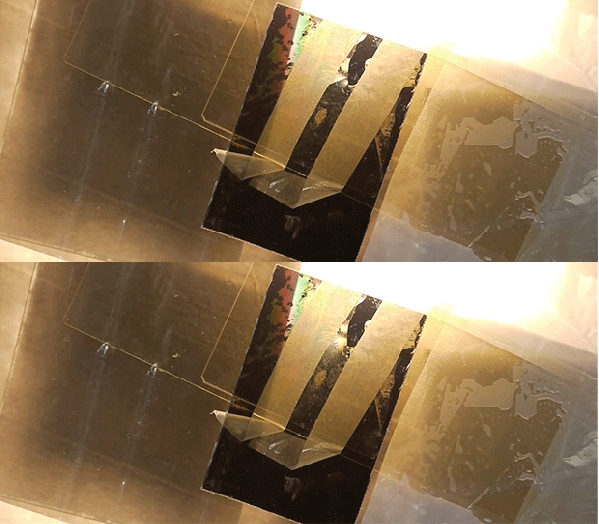
Throughout the 1960s, the management at RCA thought LCD displays were too difficult to commercialize and sent their engineers and researchers involved in LCDs off into the hinterlands. After watching [Ben Krasnow]’s efforts to build a liquid crystal display, we can easily see why the suits thought what they did. It’s an amazing engineering feat.

Before building his own version of an LCD (seen above in action), he goes through the mechanics of how LCDs operate. Light enters the display, goes through a polarizer, and is twisted by a liquid crystal material. The first successful LCDs used two types of liquid crystals – chiral and nematic. By combining these two types of molecules in the right proportion, the display can ‘twist’ the polarized light exactly 90 degrees so it is blocked by the second piece of polarizing film in the display.

Besides getting the right crystals and engineering processes, another major hurdle for the development of LCDs displays is transparent electrically conductive traces. [Ben], along with every other LCD manufacturer, uses a thin layer of indium tin oxide, or ITO. By embedding these clear electrodes in the display, segments can be built up, like the seven segment displays of a calculator or a bunch of tiny dots as found in a TV or computer monitor.

In the end, [Ben] was able to build an extremely simple single-segment LCD display out of a pair of microscope slides. It does modulate light, just barely. With a lot of work it could be made in to a calculator type display but for now it’s an awesome demonstration of how LCDs actually work. Continue reading “Crafting A Liquid Crystal Display”

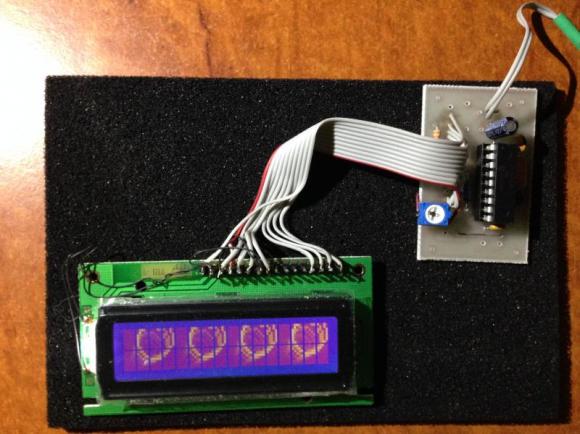
Teach An Old LCD New Tricks

pic-lcd

[Art] has done some amazing work with character LCDs. He started with a classic character LCD. These LCDs are typically controlled by Hitachi HD447XXX compatible controllers. Hitachi’s controllers allow several custom characters to be defined. We’ve used those characters in the past for applications like spinners and bar graphs. [Art] took things to a whole new level. He created a double buffered LCD graphics library which allows these old LCDs to perform tricks usually reserved for graphical LCDs. Even more impressive is the fact the whole thing runs on a Microchip PIC16F628A programmed mostly in PICBASIC.

According to [Art’s] thread on the PICBASIC forum, he is using the custom character memory as a framebuffer. The LCD is set to display all 8 custom characters. Each frame is then in the PIC’s RAM. The completed frames are then pushed to the custom character memory of the Hitachi LCD controller. The result is a very smooth update rate on the LCD. [Art] wrapped the whole example up in a video reminiscent of the C64 demoscene.

Continue reading “Teach An Old LCD New Tricks”

Reverse Engineering An LG Cell Phone Display

andy-cell

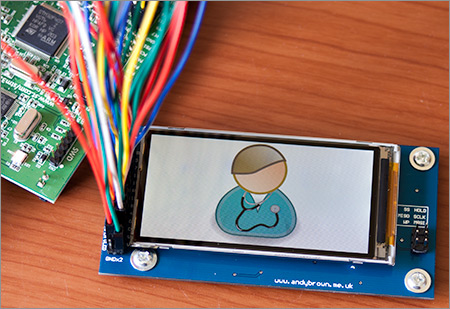
[Andy] has done a great job reverse engineering the LG KF700 cell phone display. LG’s KF700 is a 2008 era cell phone — that’s about 300 years old in cell phone years. The phone was somewhat novel in that it used a 3” diagonal 2:1 480×240 widescreen format. While the phone itself may be a memory, its screen lives on through the magic of Ebay.

Obtaining the LCD is the easy part – the hard part is figuring out how to interface to it. LG is very helpful in that regard by publishing detailed service manuals and schematics on their cell phones. We’re not sure if these manuals are supposed to be public domain, but Google is your friend here. With the help of the service manual, [Andy] was able to determine the LCD has an on board controller (Himax HX8352), making it much easier to interface to. He was also able to find out information about the LCD connector pin out, and even a connector part number.

Continue reading “Reverse Engineering An LG Cell Phone Display”