Visualizing Eddy Currents

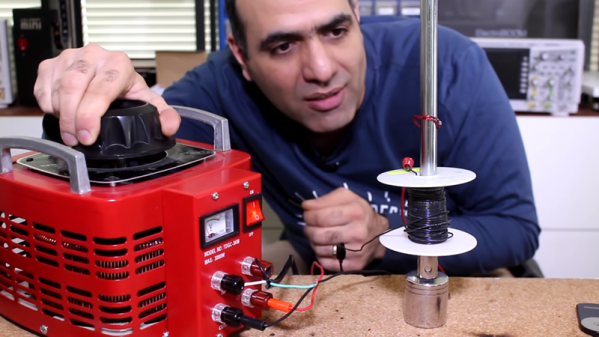
If [Electroboom] gives up making videos and decides to become a lounge lizard in the Poconos, we hope he adopts the stage name Eddy Currents. However, he is talking about eddy currents in his recent video post that you can see below.

We know he doesn’t really think he can get the magnet to slow down with one sheet of aluminum foil and that he stages at least most of his little electric accidents, but we still enjoy watching it. Meanwhile, he also has a good explanation of why a copper pipe will slow down a magnet and how eddy current affects transformer efficiency.

Continue reading “Visualizing Eddy Currents”

The Magnetic Rubik’s Cube

Ernő Rubik has much to answer for when it comes to the legacy of his namesake cube. It has both enthralled and tormented generations, allowing some to grandstand in the playground while others are forced to admit defeat in the face of a seemingly intractable puzzle. It just so happens that [Tom Parker] has been working on a Rubik’s cube with a novel magnetic design.

Yes, that’s right – [Tom]’s cube eschews the traditional rotating and sliding mechanism of the original cube, instead replacing it all with magnets. Each segment of the cube, along with the hidden center piece, is 3D printed. Through using a fused deposition printer, and pausing the print at certain layers, it’s possible to embed the magnets inside the part during the printing process.

[Tom] provides several different versions of the parts, to suit printers of different capabilities. The final cube allows both regular Rubik’s cube movements, but also allows for the player to cheat and reassemble it without having to throw it forcefully against the wall first like the original toy.

It’s an interesting build, and a great one to get to grips with the techniques involved in embedding parts in 3D prints. It may not be capable of solving itself, but we’ve seen another build that can pull off that impressive feat. Video after the break.

Continue reading “The Magnetic Rubik’s Cube”

Biodegradable Implants Supercharge Nerve Regeneration

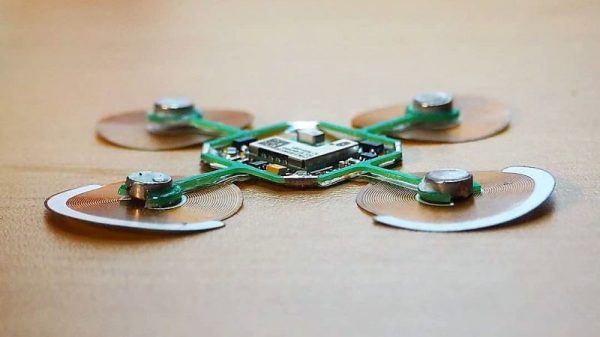
Controlled electrical stimulation of nerves can do amazing things. It has been shown to encourage healing and growth in damaged cells of the peripheral nervous system which means regaining motor control and sensation in a shorter period with better results. This type of treatment is referred to as an electroceutical, and the etymology is easy to parse. The newest kid on the block just finished testing on rat subjects, applying electricity for one, three, or six days per week in one-hour intervals. The results showed that more treatment led to faster healing. The kicker is that the method of applying electricity was done through unbroken skin on an implant that dissolves harmlessly.

The implant in question is, at its most basic, an RFID tag with leads that touch the injured nerves. This means wireless magnetic coupling takes power from an outside source and delivers it to where it is needed. All the traces on are magnesium. There is a capacitor with silicon dioxide sandwiched between magnesium, and a diode made from a doped silicon nanomembrane. All this is encased in a biodegradable substrate called poly lactic-co-glycolic acid, a rising star for FDA-approved polys. Technologically speaking, these are not outrageous.

These exotic materials are not in the average hacker’s hands yet, but citizen scientists have started tinkering with the less invasive tDCS and which is applying a small electrical current to the brain through surface electrodes or the brain hacking known as the McCollough effect.

Via IEEE Spectrum.

Magnets And Printed Parts Make Quick-Disconnect Terminals

The Apple MagSafe power connector is long gone from their product line, but that doesn’t mean that magnetic connectors aren’t without their charms. It just takes the right application, and finding one might be easier with these homebrew magnetic connectors.

We’ll admit that the application that [Wesley Lee] found for his magnetic connectors is perhaps a little odd. He’s building something called Linobyte, a hybrid art and electronics project that pays homage to computing history with very high-style, interactive core memory modules. The connectors are for the sense wire that is weaved through the eight toroids on each module, to program it with a single byte. Each connector has a 3D-printed boot that holds a small, gold-plated neodymium magnet with the sense wire soldered to it. A socket holds another magnet to the underside of a PCB. The magnet in the boot sticks to the PCB and makes contact with pads, completing the circuit. We know what you’re thinking: heating a magnet past the Curie point is a great way to ruin it. [Wesley] admits that happens, but it just makes the connection a little weaker, which works for his application. The short video below shows how he puts them together.

We can think of a couple of ways these connectors would be useful, and we really like the look of the whole project. It’ll be interesting to see where it goes, but in the meantime, brushing up on how magnets work could be fun. Continue reading “Magnets And Printed Parts Make Quick-Disconnect Terminals”

The Diaphragm Is The Coil In These Flexible PCB Speakers

Speakers used to be largish electromechanical affairs, with magnets, moving coils, and paper cones all working together to move air around in a pleasing way. They’ve gotten much smaller, of course, small enough to screw directly into your ears or live inside the slimmest of smartphones and still delivery reasonable sound quality. The basic mechanism hasn’t changed much, but that doesn’t mean there aren’t other ways to make transduce electrical signals into acoustic waves.

Take these speakers made from flexible printed circuit boards, for instance. While working on his flexible PCB soft actuators, [Carl Bugeja] noticed that the PWM signals coursing through the coils on the thin PCB material while they were positioned over a magnet made an audible beeping. He decided to capitalize on that and try to make a decent speaker from the PCBs. An early prototype hooked to a simple amplifier showed promise, so he 3D-printed a ring to support the PCB like a diaphragm over a small neodymium magnet. The sound quality was decent, but the volume was low, so [Carl] experimented with a paper cone attached to the PCB to crank it up a bit. That didn’t help much, but common objects acting as resonators seemed to work fairly well. Check out the results in the video below.

This is very much a work in progress, but given [Carl]’s record with PCB creations from robotic fish to stepper motors built right into the PCB, we’d say he’ll make substantial improvements. Follow his and others’ progress in the Musical Instruments Challenge part of the 2018 Hackaday Prize.

Continue reading “The Diaphragm Is The Coil In These Flexible PCB Speakers”

Modular Keyboards For CAD, Gaming, And Video Editing

Of all the input devices, the keyboard is the greatest. This comes at a cost, though: there were times back in the Before Days, when video and music editing applications came with custom keyboards. There were Pro Tools keyboards, Final Cut keyboards, and innumerable Adobe keyboards. What’s the solution to this problem? More keyboards, obviously, and this time we’ll make them modular.

For his Hackaday Prize entry, [Cole B] is building modular, programmable USB keyboards. It’s got everything: a standard 3×3 keypad, a keyboard that’s just four potentiometers, a keyboard that’s a rotary encoder, and a keyboard that’s a set of faders.

The design of these keyboards is inherently modular, and that means there needs to be a way to connect all these modules together, preferably without a bunch of USB cables strewn about. Right now, the best idea [Cole] is working with is pogo pins and magnets. It’s a great idea although Apple Thinks Differently™ and probably wouldn’t be too keen on seeing the whole ‘magnets and pins’ idea stolen out from under them.

Nevertheless, it’s an excellent project that shows how far you can go with manufacturing on a limited budget. These are fantastic keyboard modules already, and the connector scheme already pushes this project into the upper echelon of keyboard hacks.

OpenSCAD Handles The Math In 3D Printed Holder For Magnetic Spheres

3D printed holder mounted to bike wheel, fitting precisely 38 magnetic spheres around its perimeter. Tedious math? Not if you make OpenSCAD do it.

Off-the-shelf components are great; the world and our work simply wouldn’t be the same without. But one of the constraints is that one has to design around them, and that’s what led [Antonio Ospite] to create a parametric design in OpenSCAD for a 3D printed holder which snugly fits a number of magnetic spheres around its diameter.

If that sounds a bit esoteric, it will become much clearer in the context of [Antonio]’s earlier work in making a DIY rotary encoder out of a ring of magnetic spheres. He found that such a ring in front of two Hall effect sensors was low in cost, high in precision, and thanks to 3D printing it also had a lot of potential for customizing. But hampering easy design changes was the need for the spheres to fit snugly around whatever shape was chosen for the hardware, which meant constraints on the encoder diameter.

In this case, [Antonio] wished to create an encoder that could be attached to a bicycle wheel but needed to know what outer diameter would best fit a ring of magnetic balls perfectly, given that the balls were each 5 mm. OpenSCAD did the trick, yielding a design that fit the bike wheel and spokes while perfectly nestling 38 magnetic balls around the outside edge with a minimum of wasted space.

OpenSCAD is a CAD program that’s really more like a programming language than anything else. For those who are not familiar with it, [Brian Benchoff] walked through how to make a simple object in OpenSCAD, and [Elliot] has sung the praises of a few advanced functions. Now that this project makes DIY encoders easier, perhaps they could be used to add intuitive new controls to OpenSCAD itself.