[Martin Rothfield] and other amateur radio operators from San Francisco High Altitude Ballooning (SF-HAB) treated conference attendees to the 2022 Hackaday Supercon to the launch of two High Altitude Balloons (HABs). On the morning of November 6th, the two balloons were launched from a park across the street from Supplyframe DesignLab in Pasadena, California.
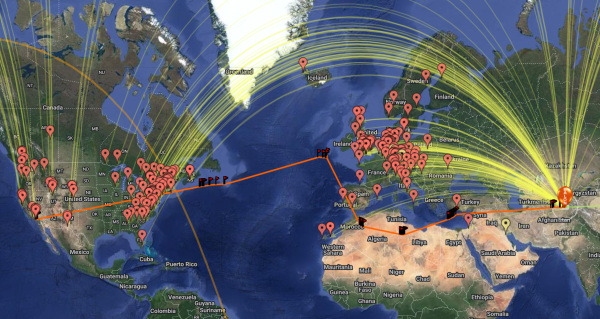
Seven days after its launch from Southern California, one of the balloons was over Tajikistan cruising eastward at an altitude of 42,000 feet (12,800 meters). Balloon W6MRR-26 was already approaching China where it will continue its wonderful world tour to parts unknown. The second balloon (call sign W3HAC-11) landed in northern Arizona where it has continued transmitting whenever it receives power from the sun.
Each balloon carries a tiny payload — a printed circuit board powered only by small photovoltaic cells. The board includes a microcontroller, a GPS module, and a Weak Signal Propagation Reporter (WSPR) radio transmitter. The transmitted operates on the 20 meter amateur radio band at around 14 MHz.
WSPR beacons can provide time, altitude, and location information. The WSPR telemetry is then relayed via WSPRgates using Automatic Packet Reporting System (APRS) onto the Internet. The collected information can be viewed and mapped on websites such as aprs.fi.
Continue reading “Supercon Balloon W6MRR-26 Continues Its World Tour”


 [Harry Gill] has you covered with