Op Amps Combine Into Virtual Ball In A Box

What happens when you throw a ball into a box? In the real world, the answer is simple – the ball bounces between the walls and the floor until it eventually loses energy and comes to rest. What happens when you throw a virtual ball into a virtual box? Sounds like something you might need a program running on a digital computer to answer. But an analog computer built with a handful of op amps can model a ball in a box pretty handily too.

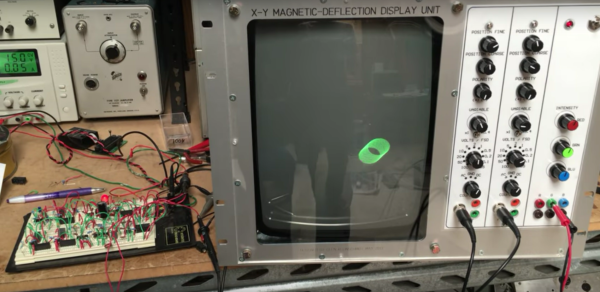
OK, it takes quite a large handful of op amps and considerable cleverness to model everything in this simple system, as [Glen Kleinschmidt] discovered when he undertook to recreate a four-decade-old demonstration project from AEG-Telefunken. Plotting the position of an object bouncing around inside the virtual box is the job of two separate circuits, one to determine the Y-coordinate and bouncing off the floor, and one to calculate the X-coordinate relative to the walls. Those circuits are superimposed by a high-frequency sine-cosine pair generator that creates the ball, and everything is mixed together into separate outputs for an X-Y oscilloscope to display. The resulting simulation is pretty convincing, with the added bonus of the slowly decaying clicks of the relay used to change the X direction each time a wall is hit.

There’s not much practical use, but it’s instructional for sure, and an impressive display of what’s possible with op amps. For more on using op amps as analog computers, check out [Bil Herd]’s “Computing with Analog” article.

Continue reading “Op Amps Combine Into Virtual Ball In A Box”

Optimizing The Spread: More Spreadsheet Circuit Design Tricks

Last time I showed you how to set up a reasonably complex design in a spreadsheet: a common emitter bipolar transistor amplifier. Having the design in a spreadsheet makes it easy to do “what if” scenarios and see the effects on the design almost immediately.

Another advantage that spreadsheets offer is a way to “solve” or optimize equations. That can be very useful once you have your model. For Excel, you need to install the Solver add-in (go to the Excel Options dialog, select Manage Add-Ins, and select the Solver Add-In). You might also enjoy OpenSolver. You can even get that for Google Sheets (although it currently lacks a non-linear solver which makes it less useful for what we need).

Continue reading “Optimizing The Spread: More Spreadsheet Circuit Design Tricks”

Droolworthy Animatronic Stargate Horus Helmet

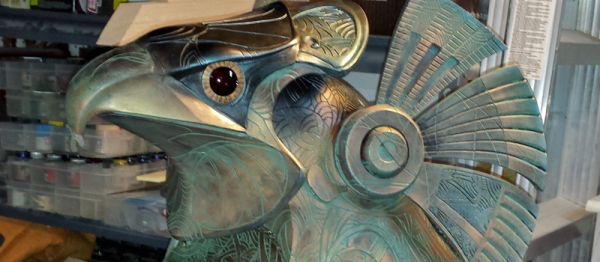
It’s incredibly likely that, unless you own one of the original movie props, your Stargate Horus helmet is not as cool as [jeromekelty]’s. We say this with some confidence because [jerome] got access to the original molds and put in an incredible amount of time on the animatronics. (See his latest video embedded below.)

Surprisingly, a number of the parts for this amazing piece were bought off the shelf. The irises that open and close they eyes, for instance, were bought on eBay. This is not to downplay the amount of custom design, though. The mechanism that moves the feathers is a sight to see, and there’s a lot of hand-machined metal holding it all together. But the payoff is watching the thing move under remote control. The eye dimming and closing, combined with the head movements, make it look almost alive.

Continue reading “Droolworthy Animatronic Stargate Horus Helmet”

Soviet-Era Tank Gets The 3D Printed Treatment

3D printers are celebrated for their capacity to replace missing or broken parts. How about an entire T-62 tank?

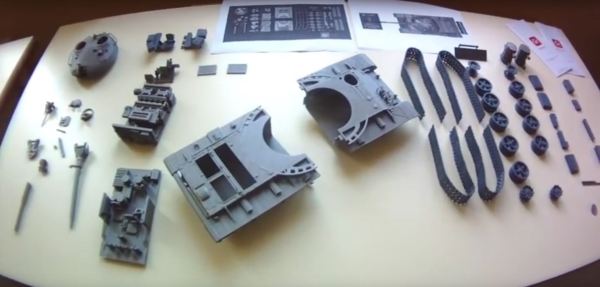
Now hold on a second — this is only a model replica. It is, however another expression of the myriad uses for 3D printers. Designed in Maya and requiring almost three weeks to print all 62 parts from about 70 meters of PLA filament.  The assembly is not terribly involved, made easier by printing a few large sections such as the crew section and hull while the parts don’t get much smaller than the turret hatches. Nonetheless, he final product is about as true to life as you can get when designing the parts from scratch.

Continue reading “Soviet-Era Tank Gets The 3D Printed Treatment”

R/C Hot Rod Built Completely From Scratch

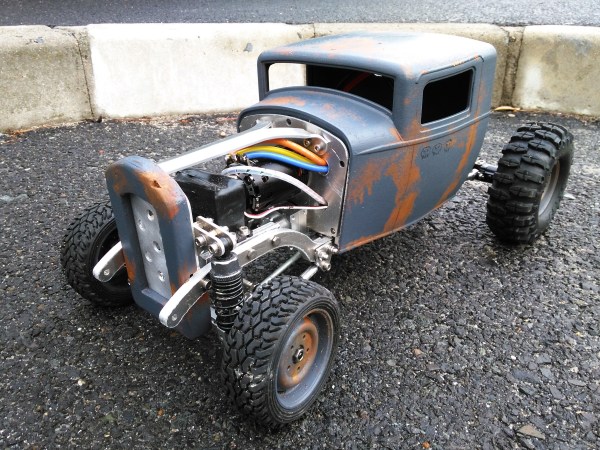
[ossum]’s R/C hot rod shows what’s possible when a talented hacker takes full advantage of all the modern resources available to them. The results are stunning.

[ossum] had a stack of Amazon and Shapeways credits lying around after winning a few competitions. He had this dream of building an R/C car for a while, and decided now was the time. After ordering all the needed parts from Amazon, he made an extremely nice model of the car in Fusion 360. The CAD model is a great learning resource. If you want to learn how to use reference photos, parts, and more to build a detailed and useful CAD model we recommend downloading it as a Fusion archive and scrubbing through the timeline to see how he did it.

Some of the parts were sent off for laser cutting. Others were 3D printed. The rest he made himself. Thanks to his model, they all went together well. You can see his R/C rod racing in the video after the break.

Continue reading “R/C Hot Rod Built Completely From Scratch”

The Raspberry Pi Infinity+ Is A Fully Functional Huge Raspberry Pi

It wasn’t an easy weekend for the rest of the world’s hackers and makers, that of the Bay Area Maker Faire. Open your social media accounts, and most of your acquaintances seemed to be there and having a great time, while the rest were doing the same at the Dayton Hamvention. Dreary televised sports just didn’t make up for it.

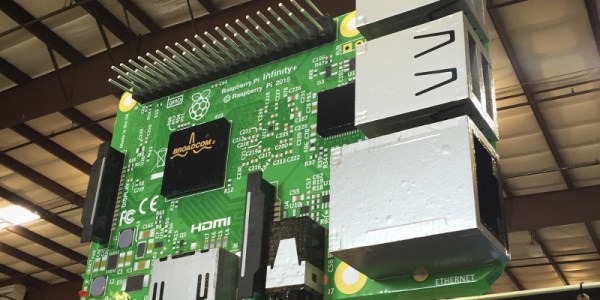
MCM Electronics had the Maker Faire booth next to that of the Raspberry Pi Foundation, and since they needed both a project to show off and a statement item to draw in the crowds, they came up with the idea of a 10x scale reproduction of a Raspberry Pi above the booth. And since it was Maker Faire this was no mere model; instead it was a fully functional Raspberry Pi with working LEDs and GPIO pins.

The project started with a nearly faithful (We see no Wi-Fi antenna!) reproduction of a Raspberry Pi 3 in Adobe Illustrator. The circuit board was a piece of MDF with a layer of foam board on top of it with paths milled out for wiring and the real Pi which would power the model, hidden under the fake processor. The LEDs were wired into place, then the Illustrator graphics were printed into vinyl which was wrapped onto the board, leaving a very two-dimensional Pi.

The integrated circuits and connectors except for the GPIO pins were made using clever joinery with more foam board, then wrapped in more printed vinyl and attached to the PCB. A Pi camera was concealed above the Broadcom logo on the processor model, to take timelapse pictures of the event. This left one more component to complete, the GPIO pins which had to be functional and connected to the pins on the real Pi concealed in the model. These were made from aluminium rods, which were connected to a bundle of wires with some soldering trickery, before being wired to the Pi via the screw terminals on a Pi EZ-Connect HAT from Alchemy Power.

Is the challenge now on for a range of compatible super-HATs to mate with this new GPIO connector standard?

We previously covered the 2012 Maker Faire exhibit that inspired this huge Pi. The Arduino Grande was as you might well guess, a huge (6x scale) fully functional Arduino. In fact, the world seems rather short of working huge-scale models of single board computers, though we have featured one or two working small-scale computer models.

Thanks [Michael K Castor] and [Christian Moist] for sharing their project with us.

Self-Driving Cars Get Tiny

There’s a car race going on right now, but it’s not on any sort of race track. There’s a number of companies vying to get their prototype on the road first. [Anurag] has already completed the task, however, except his car and road are functional models.

While his car isn’t quite as involved as the Google self driving car, and it doesn’t have to deal with pedestrians and other active obstacles, it does use a computer and various sensors to make decisions about how to drive. A Raspberry Pi 2 takes the wheel in this build, taking input from a Pi camera and an ultrasonic distance sensor. The Pi communicates to another computer over WiFi, where a neural network operates to make decisions about how to drive the car. It also makes decisions based on a database of pictures of the track, so it has a point of reference to go by.

The video of the car in action is worth a look. It’s not perfect, but it’s quite an accomplishment for this type of project. The possibility that self-driving car models could drive around model sets like model railroad hobbyists create is intriguing. Of course, this isn’t [Anurag]’s first lap around the block. He’s already been featured for building a car that can drive based on hand gestures. We’re looking forward to when he can collide with model busses.

Continue reading “Self-Driving Cars Get Tiny”