Bendy Straws

Compliant Mechanisms Hack Chat

Join us on Wednesday, January 26 at noon Pacific for the Compliant Mechanisms Hack Chat with Amy Qian!

When it comes to putting together complex mechanisms, we tend to think in a traditional design language that includes elements like bearings, bushings, axles, pulleys — anything that makes it possible for separate rigid bodies to move against each other. That works fine in a lot of cases — our cars wouldn’t get very far without such elements — but there are simpler ways to transmit force and motion, like compliant mechanisms.

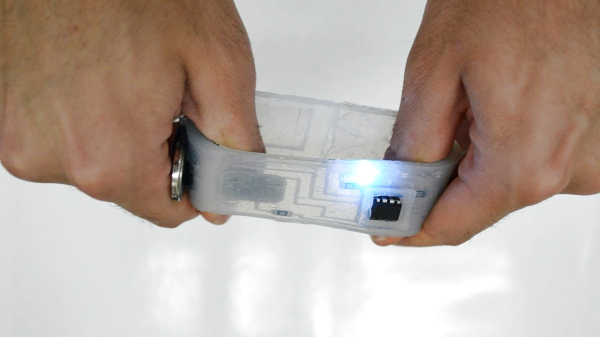
Compliant mechanisms show up in countless products, from the living hinge on a cheap plastic box to the nanoscale linkages etched into silicon inside a MEMS accelerometer. They reduce complexity by putting the elasticity of materials to work and by reducing the number of parts it takes to create an assembly. And they can help make your projects easier and cheaper to build — if you know the secrets of their design.

join-hack-chatAmy Qian, from the Amy Makes Stuff channel on YouTube,  is a mechanical engineer with an interest in compliant mechanisms, so much so that she ran a workshop about them at the 2019 Superconference. She’ll stop by the Hack Chat to share some of what she’s learned about compliant mechanisms, and to help us all build a little flexibility into our designs.

Our Hack Chats are live community events in the Hackaday.io Hack Chat group messaging. This week we’ll be sitting down on Wednesday, January 26 at 12:00 PM Pacific time. If time zones have you tied up, we have a handy time zone converter.


Continue reading “Compliant Mechanisms Hack Chat”

Silicone Devices: DIY Stretchable Circuits

Flexible circuits built on polyimide film are now commonplace, you can prototype with them at multiple factories, at a cost that is almost acceptable to your average hacker. Polyimide film is pretty tough for something so thin, but eventually it will tear, and with larger components, bend radii are quite restricted. But what about stretchable circuits, as in circuits you can flex, twist and stretch? Let us introduce silicone devices. A research group from Hasselt University, Belgium, have been prototyping making truly flexible, silicone-based circuit substrates, managing to integrate a wide range of SMT component types with a dual layer interconnect, with vias and external contacts.

It should be possible to reproduce the process using nothing more special than your average Makerspace CO2 laser cutter, and a couple of special tools that can be easily made — a guide for that is promised — it is purely a matter of gathering a few special materials, and using off-cuts you have lying around for the rest. The interconnect uses Galinstan, which is a low melting point alloy of gallium, indium, and tin. Unfortunately, this material is fairly expensive and cannot be shipped by air due to the gallium content, without specialised handling, at considerable expense. But that aside, other than some acrylic sheets, some vinyl, copper foil and a few sprays, nothing is beyond reach.

The construction process is reverse to what we normally see, with the components and copper contact plates placed first, on to a primed vinyl sheet. This sheet is laser marked with the component outlines to enable them to be corrected placed. Yes, that’s right, they’re using a laser cutter to mark vinyl, a chlorine-containing plastic. Hold on to that thought for a bit.

Insulating layers and substrate layers are constructed by blade-coating with a layer of clear silicone. Interconnect layers are formed by sticking a fresh vinyl sheet onto the exposed contacts and laser cutting just though it to expose the pads and the interconnect traces. Next the fancy Galinstan is applied by brush and the vinyl stencil removed. Rinse and repeat for the next layer of insulating silicone, more circuit traces, then use the laser cutter to precisely etch through the via regions to allow more metalisation to be added. Finally a coating of silicone is applied over the whole assembly, the laser is again used to etch the silicone away from the contact pads, and with a little solder tinning of these, you’re done. Simple, if only our Makerspaces didn’t have rules against laser cutting vinyl.

This was clearly a very brief overview, here is a very detailed instructables guide ready for you, as well as a formal research paper, detailing why this came about and why you might want to try this yourself.

If you’re into custom wearables, you might remember this earlier piece about silicone circuits, and this one weird organic-looking thing from the same time-frame.

Continue reading “Silicone Devices: DIY Stretchable Circuits”

Over-Engineered Bottle Opener Takes The Drudgery Out Of Drinking

Some projects take but a single glance for you to know what inspired them in the first place. For this over-engineered robotic bottle opener, the obvious influence was a combination of abundant free time and beer. Plenty of beer.

Of course there are many ways to pop the top on a tall cold one, depending on the occasion. [Matt McCoy] and his cohorts selected the “high-impulse” method, which when not performed by a robot is often accomplished by resting the edge of the cap on a countertop and slapping the bottle down with the palm of one’s hand. This magnificently pointless machine does the same thing, except with style.

The bottle is placed in a cradle which grips it, gently but firmly, and presents it to the opening mechanism in a wholly unnecessary motion-control ballet. Once in place, a lead screw moves a carriage down, simultaneously storing potential energy in a bundle of elastic surgical tubing while tripping a pawl on the edge of the cap. A lever trips at the bottom of the carriage’s travel, sending the pawl flying upward to liberate the libation, giving the robot a well-deserved and sudsy showers. Behold the wonderful interplay of 190 custom parts — and beer — in the video below.

Hats off to [Matt] et al for their tireless efforts on behalf of beleaguered beer-openers everywhere. This seems like the perfect accessory to go along with a game of mind-controlled beer pong.

Continue reading “Over-Engineered Bottle Opener Takes The Drudgery Out Of Drinking”

Palm-Sized Gatling Gun Has 32 Mini Elastics With Your Name On Them

One thing 3D printers excel at is being able to easily create objects that would be daunting by other methods, something that also allows for rapid design iteration. That’s apparent in [Canino]’s palm-sized, gatling-style, motorized 32-elastic launcher.

The cannon has a rotary barrel driven by a small motor, and a clever sear design uses the rotation of the barrels like a worm gear. The rotating barrel has a spiral formation of hooks which anchor the stretched elastic bands. A small ramp rides that spiral gap, lifting ends of stretched bands one at a time as the assembly turns. This movement (and therefore the firing control) is done with a small continuous rotation servo. While in theory any motor would do, using a servo has the advantage of being a standardized shape, and therefore easy to integrate into the design. A video is embedded below in which you can see it work, along with some close-ups of the action.

Continue reading “Palm-Sized Gatling Gun Has 32 Mini Elastics With Your Name On Them”

Stretching My Skills: How (and Why) I Made My Own Compression Sleeves

Have you ever noticed how “one size fits all” often means “one size poorly fits all”? This became especially clear to me when I started using a compression sleeve on my arm. Like any hacker, this seemed like something I could fix, so I gave it a shot. Boy, did I learn a lot in the process.

A little over a year ago, I started dropping things. If I was holding something in my left hand, chances were good that it would suddenly be on the ground. This phenomenon was soon accompanied by pain and numbness, particularly after banging on a keyboard all day.

At best, my pinky and ring fingers were tired all the time and felt half dead. At worst, pain radiated from my armpit all the way to my fingertips. It felt like my arm had been electrocuted. Long story short, I saw a neurologist or two, and several co-pays later I had a diagnosis: cubital tunnel syndrome.

Continue reading “Stretching My Skills: How (and Why) I Made My Own Compression Sleeves”

Cardboard And Paper Gun Shows Off Clever Construction

This project by [blackfish] shows off a cardboard lookalike of an MP5 that loads from a working magazine, has a functional charging handle, and flings paper projectiles with at least enough accuracy to plink some red party cups. It was made entirely from corrugated cardboard, paper, rubber bands, and toothpicks.

In the video (embedded below) you can see some clever construction techniques. For example, using a cyanoacrylate adhesive to saturate areas of wood, cardboard, or paper to give them added strength and rigidity. The video is well-edited and worth a watch to see the whole process; [blackfish] even uses a peeled piece of cardboard — exposing the corrugated part — as a set of detents (6:56) to retain the magazine.

Continue reading “Cardboard And Paper Gun Shows Off Clever Construction”

Op Amps Combine Into Virtual Ball In A Box

What happens when you throw a ball into a box? In the real world, the answer is simple – the ball bounces between the walls and the floor until it eventually loses energy and comes to rest. What happens when you throw a virtual ball into a virtual box? Sounds like something you might need a program running on a digital computer to answer. But an analog computer built with a handful of op amps can model a ball in a box pretty handily too.

OK, it takes quite a large handful of op amps and considerable cleverness to model everything in this simple system, as [Glen Kleinschmidt] discovered when he undertook to recreate a four-decade-old demonstration project from AEG-Telefunken. Plotting the position of an object bouncing around inside the virtual box is the job of two separate circuits, one to determine the Y-coordinate and bouncing off the floor, and one to calculate the X-coordinate relative to the walls. Those circuits are superimposed by a high-frequency sine-cosine pair generator that creates the ball, and everything is mixed together into separate outputs for an X-Y oscilloscope to display. The resulting simulation is pretty convincing, with the added bonus of the slowly decaying clicks of the relay used to change the X direction each time a wall is hit.

There’s not much practical use, but it’s instructional for sure, and an impressive display of what’s possible with op amps. For more on using op amps as analog computers, check out [Bil Herd]’s “Computing with Analog” article.

Continue reading “Op Amps Combine Into Virtual Ball In A Box”