Hamsters are great pets, especially for those with limited space or other resources. They are fun playful animals that are fairly easy to keep, and are entertaining to boot. [Kim]’s hamster, [Mr. Fluffbutt], certainly fits this mold as well but [Kim] wanted something a little beyond the confines of the habitat and exercise wheel and decided to send him on a virtual journey every time he goes for a run.
The virtual hamster journey is built on an ESP32 microcontroller which monitors the revolutions of the hamster wheel via a hall effect sensor and magnet. It then extrapolates the distance the hamster has run and sends the data to a Raspberry Pi which hosts a MQTT and Node.js server. From there, it maps out an equivalent route according to a predefined GPX route and updates that information live. The hamster follows the route, in effect, every time it runs on the wheel. [Mr Fluffbutt] has made it from the Netherlands to southeastern Germany so far, well on his way to his ancestral home of Syria.
This project is a great way to add a sort of augmented reality to a pet hamster, in a similar way that we’ve seen self-driving fish tanks. Adding a Google Streetview monitor to the hamster habitat would be an interesting addition as well, but for now we’re satisfied seeing the incredible journey that [Mr Fluffbutt] has been on so far.
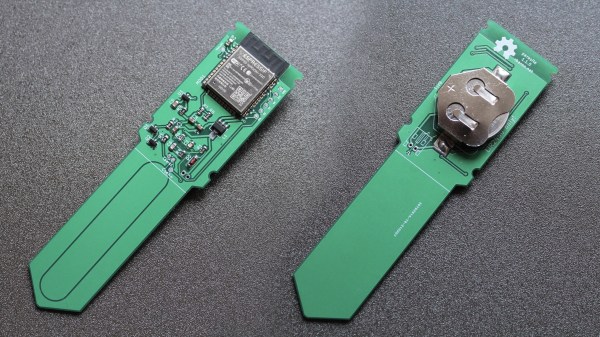
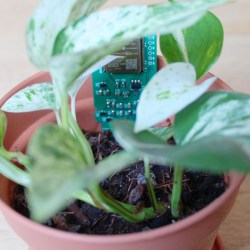
We have all been stuck inside for too long, and maybe that’s why we have recently seen a number of projects attempting to help humans take better care of their housemates from Kingdom Plantae. To survive, plants need nutrients, light, and water. That last one seems tricky to get right; not too dry and not drowning them either, so [rbaron’s] green solder-masked w-parasite wireless soil monitor turns this responsibility over to your existing home automation system.
Like this low-power soil sensor project and the custom controller for six soil sensors, [rbaron’s] w-parasite uses a “parasitic capacitive” moisture sensor to determine if it’s time to water plants. This means that unlike resistive soil moisture sensors, here the copper traces are protected from corrosion by the solder mask. For those wondering how they work, [rbaron]’s Twitter thread has a great explanation.
The “w” in the name is for WiFi as the built-in ESP-32 module then takes the moisture reading and sends an update wirelessly via MQTT. Depending on the IQ of your smart-home setup, you could log the data, route an alert to a cellphone, light up a smart-bulb, or even switch on an irrigation system.
[rbaron] has shared a string of wireless hacks, controlling the A/C over Slack and a BLE Fitness Tracker that inspired more soldering than jogging. We like how streamlined this solution is, with the sensor, ESP-32 module, and battery all in a compact single board design. Are you asking yourself, “but how is a power-hungry ESP-32 going to last longer than it takes for my geraniums to dry out?” [rbaron] is using deep sleep that only consumes 15uA between very quick 500ms check-ins. The rechargeable LIR2450 Li-Ion coin cell shown here can transmit a reading every half hour for 90 days. If you need something that lasts longer than that, use [rbaron]’s handy spreadsheet to choose larger batteries that last a whole year. Though, let’s hope we don’t have to spend another whole year inside with our plant friends.
We may never know why the weeds in the cracks of city streets do better than our houseplants, but hopefully, we can keep our green roommates alive (slightly longer) with a little digital nudge.
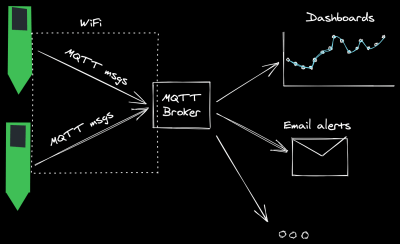
Five years ago, I wrote a series on getting started with your own MQTT-based home information/automation network. Five years is a long while in Hackaday time. Back then, the ESP8266 was a lot newer, and the 8266 Arduino port wasn’t fully in shape yet, and the easiest software framework to get MQTT up and running was NodeMCU; so that’s what I used for the article series, and as a consequence a handful of devices around my house run minor modifications of that basic “hello world”, but doing useful stuff.
Since then, NodeMCU has changed a bunch of its libraries and the ESP32 has replaced the ESP8266 in my parts drawer. If you tried to run my code, you’d find that it won’t run on an ESP8266 without porting or compiling an old version of NodeMCU for yourself anyway, and it won’t run on an ESP32 at all. When [Chris Lott] tried to follow my guide, he discovered that Micropython is probably a better language choice in 2021. To minimize lines of code, I’d agree, although the Arduino and Espressif’s own native IDF have grown into the job just about as well. In short, anything but NodeMCU.
Built in an hour, survived for five years.
But my home automation system doesn’t care. Those little guys are running 24/7, flipping bits like it was still 2016. Thermometers, light sensors, and power meters haven’t changed much in five years, and although I’ve revamped the databasing, display, and user control a number of times since then, using a fixed communication transport protocol means that they’re still talking the same language. Indeed, even if NodeMCU is dead to me, the MQTT content of my original series is all still valid, and installing a broker on a Raspberry Pi has only become easier in the intervening five years.
So I’ve got a bunch of legacy code running within the walls of my own home, and it makes me nervous. If the devices fail, or maybe when they eventually fail, it’s not going to be “just flash another ESP8266 and replace it”, because even though I have some ancient NodeMCU binaries sitting around, I know when to throw in the towel. But there’s no good reason to pull them down and start reflashing either. Except that it makes me a little bit itchy, just knowing that there’s orphaned, dead-end code running all around me. Surrounding me. Staring deep into my hacker’s heart.
I know better than to tear down a running system, even though I could do it one device at a time, and each module would surely be a simple, independent fix; even though I’d love the excuse to play around with Micropython and its MQTT implementation on the ESP8266, or maybe even swap some of them out for ESP32s; even though these were all temporary quick hacks that have somehow served for five (5!) years. I certainly know better, right? (Right?)
This article is part of the Hackaday.com newsletter, delivered every seven days for each of the last 200+ weeks. It also includes our favorite articles from the last seven days that you can see on the web version of the newsletter.
Want this type of article to hit your inbox every Friday morning? You should sign up!
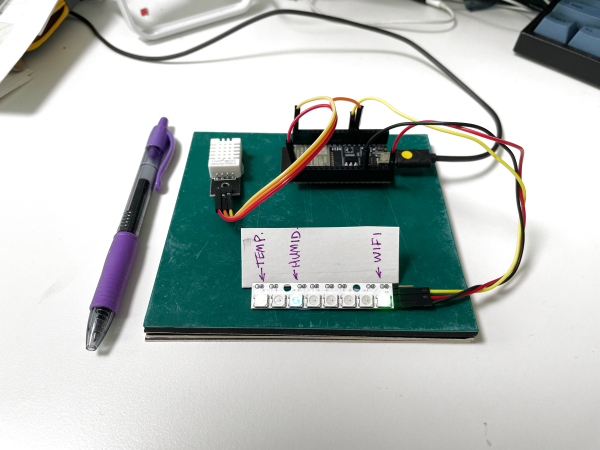
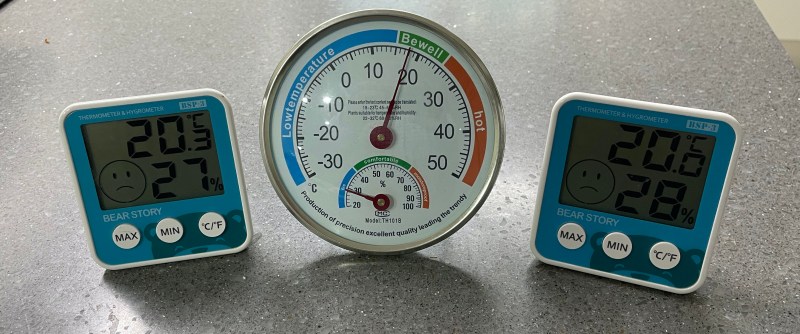
I have been meaning to play around with MQTT for some time now, and finally decided to take the plunge one evening last week. I had three cheap home temperature and humidity sensors, and was bothered that they often didn’t agree. Surprisingly, while the analog one had a calibration adjustment in the back, I have no idea how to calibrate the two digital ones. I took this as a sign that it was time to learn MQTT and be able to install my own, accurate sensors. Of course, I began by ordering the cheapest sensors I could find, but I can always upgrade later on.
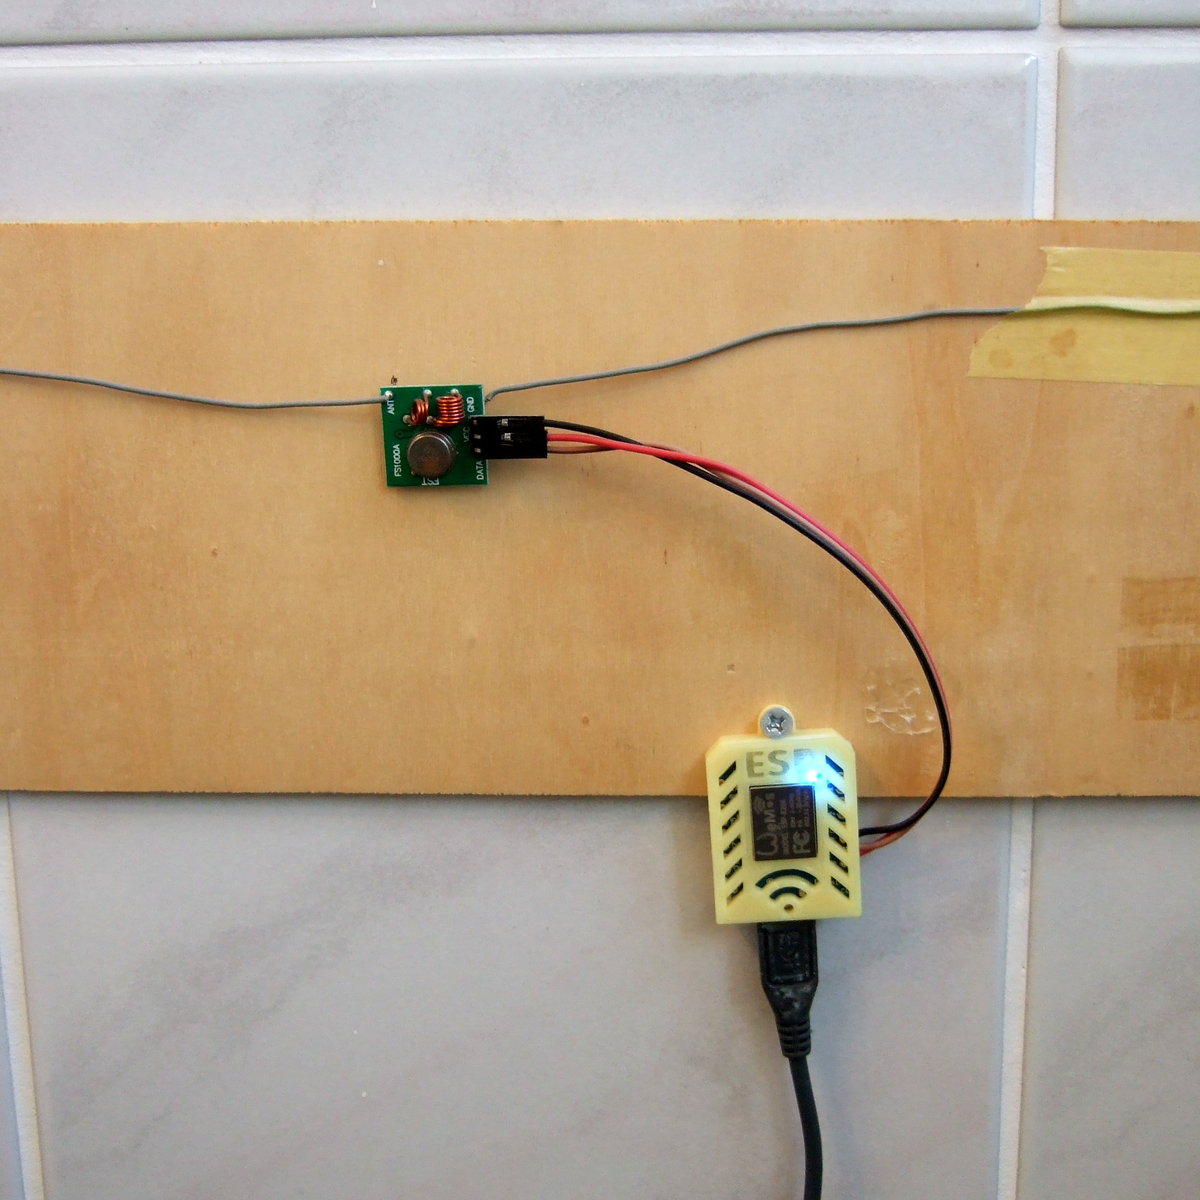
[WJCarpenter]’s gas water heater uses a small pilot light that needs to stay burning permanently to ignite the main burners as required. Four or five times a year, the pilot light goes out and needs to be manually lit. This involves an expedition from the upstairs bathroom to the basement, always in the early morning, after having spent a few fruitless minutes waiting for hot water. Having grown tired of this exercise, [WJCarpenter] built Water Watcher, a pilot light monitoring system with some ESPs and a light sensor.
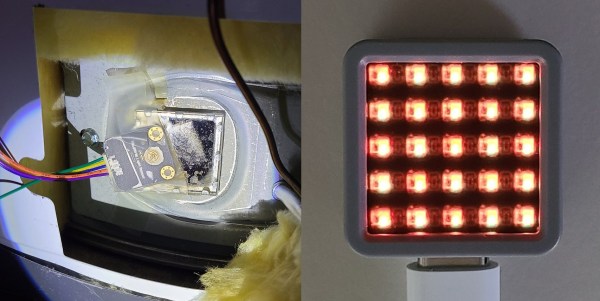
Water Watcher consists of an ESP8266 connected to a light sensor taped to the inspection window of the water heater. It reports the status of the pilot light over MQTT to an ESP32-based M5 Atom Matrix in the main bedroom, which displays it using a 5×5 RGB matrix, as demonstrated after the break. Both ESPs run ESPHome, so programming is as easy as giving it a YAML config file. [WJCarpenter] tested a few different light sensors, until he found the TSL2591, which is sensitive to the right wavelengths and has enough dynamic range for watching a pilot light.
This might not be a complicated hack, but we do not doubt that it reduces frustration a bit on those fateful mornings. Be sure to check out the Water Watcher project page, it’s an entertaining read! Continue reading “Keeping An Eye On The Water Heater Pilot Light”→
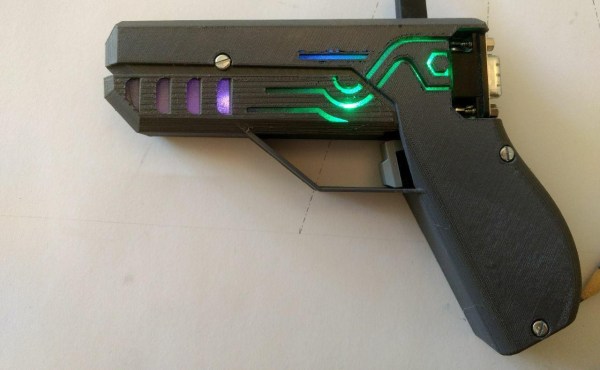
While VR is becoming really immersive, it still can’t compete with a game of good old laser tag to get the blood pumping and spending quality time with friends. [Xasin] has been working on a DIY laser tag system for a while now, and it has grown to include an impressive array of features and customizability.
Named LZRTag, the project started back in 2018 with simple ATmega328 based prototypes on breadboards. It has since evolved to a fully-featured system with ESP32s in the 3D printed pistol communicating with a Raspberry Pi/Linux game server over MQTT. Each pistol also features an accelerometer, I2S audio amp and speaker for game sounds, and WS2812 RGP LEDs for light effects. IR Lasers are used as emitters to target wearable IR receivers with more RGB LEDs wired to the pistol.
A Ruby server on a Linux machine takes care of all the communications, game management, shot validation, and scoring. It can handle up to 255 players and is designed to be extremely customizable for game modes, weapons classes, or any other feature you would like to have. [Xasin] has also created IR beacons to add even more possibilities, such as capture the flag, safe zones, and revive zones.
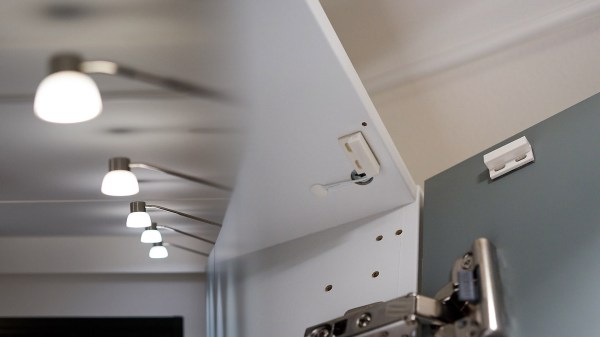
What’s the point of smart home automation? To make every day tasks easier, of course! According to [Tomasz Cybulski], that wasn’t the case when he installed IKEA smart lights in his closet. It’s handy to have them in a common switch, in this case a remote control, but having to look for it every time he needed the lights could use some improvement. Enter his project to make smart bulbs smarter, through the use of a simple ESP8266.
While hooking a door switch to the lights’ power supply could provide a quick solution, [Tomasz]’s wife wanted to keep the functionality of the remote control, so he had to look elsewhere. These light bulbs use the simple Zigbee protocol, so arranging for other devices was rather trivial. A USB dongle to interface with the protocol was configured for his existing Raspberry Pi automation controller, while an ESP8266 served as the real-world sensor by connecting it to reed switches installed in the closet doors.
With all the hardware sorted out, it’s a simple matter of making it all talk to each other. The ESP8266, using the Tasmota firmware, sends a signal to an MQTT server running on the Raspberry Pi, which in turn translates it to a remote trigger on the Zigbee frequency with the dongle. The lights turn on when the door opens, and off again once it closes. And since there were no further modifications to the lights themselves, the original IKEA controller still works as expected, which we’re sure [Tomasz]’s wife appreciates!

 [rbaron] has shared a string of wireless hacks,