Nintoaster: The Next Generation

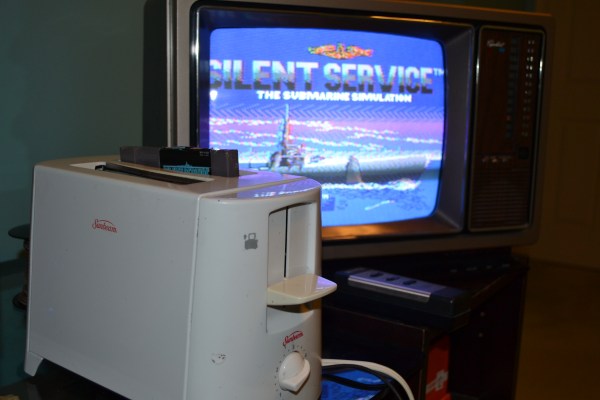
The original Nintendo Entertainment System is affectionately called “the toaster” due to the way the cartridge is inserted. [MrBananaHump] decided to take things a bit literally and installed a NES inside an actual toaster. This isn’t [MrBananaHump’s] design, the Nintoaster comes to us from [vomitsaw], who also built the SuperNintoaster. Since [vomitsaw] was kind enough to document his original build, [MrBananaHump] was able to build upon it.

The target toaster for this build was a plastic Sunbeam model found at a thrift store for $5. [MrBananaHump] gutted the toaster and cleaned out years of toast crumbs. The Nintendo mainboard would fit perfectly inside a toaster, except for two things – the RF Modulator and the expansion port. The expansion port was never used in the US version of the NES so it can be desoldered and removed. The RF also needs to be desoldered and relocated.

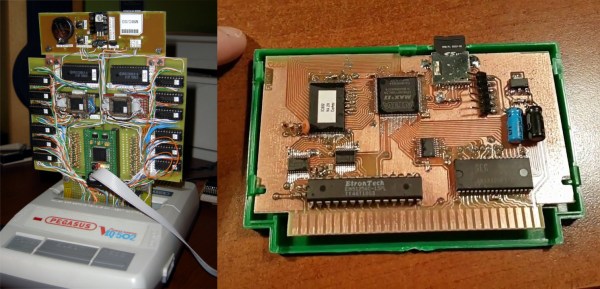
By far the biggest job in this casemod is hand-wiring each of the 72 pins for the cartridge port. It’s a tedious job, and it probably won’t look pretty. Keep your wires short, and things will probably work thanks to the relatively low clock speed of the NES.

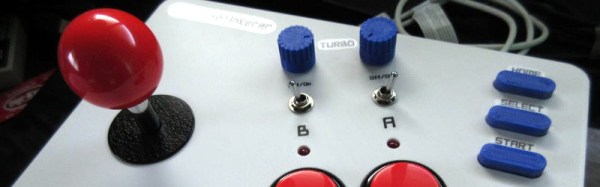
The cartridge goes in one toast slot. [MrBananaHump] mounted his controller ports, power and reset buttons in the second slot. A bit of expanded metal grid completes the slot. Sure, it’s not exactly pretty inside, but with the case on, this becomes a rather nice looking build.

We’ve seen numerous Nintendo casemods over the years, just one other example is this N64 in an N64 controller.

A DIY NES Advantage Controller For The NES Classic

If you were a child of the ’80s, there is a good chance that you had a Nintendo console in your youth, the classic 8-bit NES. And if you were one of those NES owners, it’s therefore probably that the peripheral you lusted after was Nintendo’s arcade-inspired Advantage controller. This replaced the game pad with a full-size arcade joystick and buttons, and has become an expensive and sought-after accessory in the years since.

[Bbtinkerer] has a NES Classic, and having gone through more than one joystick that just wasn’t up to the pressures of intensive gaming, decided to have a go at building one himself. The Advantage was the obvious model to copy, and thanks to the Wii Retropad Adapter project, he was able to do so.

Faithful to the original in its layout, the new Advantage clone features a Turbo mode for rapid fire, though rather than the buttons you’d have had in the ’80s this model features a toggle switch. The joystick mechanism used was a Sanwa JLF, and the buttons were Sanwa OBSF-30s. He’s posted a video showing the finished item being put through its paces.

Continue reading “A DIY NES Advantage Controller For The NES Classic”

Giant Solderless LEGO NES Controller Gives Everyone Tiny Hands

If you were thinking “I should spend $130 on LEGO bricks and build a giant USB NES controller just to see what that would be like,” but you were afraid of spending that much money, [BrownDogGadgets] has you covered. He built a giant NES controller out of LEGO. The controller is designed in LEGO Digital Designer, which lets you create a virtual model, then get a full list of parts which can be ordered online.

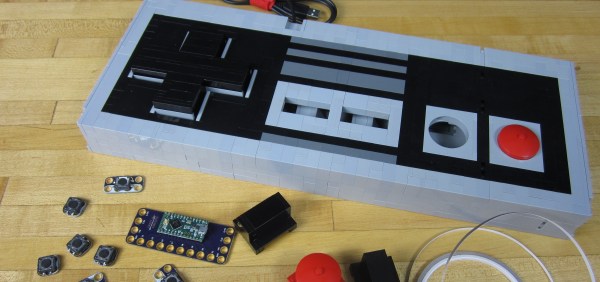
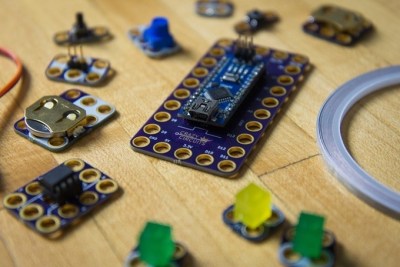
The electronics are based on a Teensy LC programmed to appear as a USB keyboard, and the buttons are standard push buttons. The insides are wired together with nylon conductive tape. LEGO was an appropriate choice because the Teensy and switches are built on top of LEGO compatible PCBs, so components are just snapped in place. The system is called Crazy Circuits and is a pretty neat way to turn electronics into a universal and reusable system.

If that controller is too big, they’ve also used the same circuit with some laser cut parts for your own controller. If you do want to go even bigger, take a look at [Baron von Brunk’s] LEGO NES controller, which used the electronics from a real controller.

Continue reading “Giant Solderless LEGO NES Controller Gives Everyone Tiny Hands”

Discontinued Nintendo Consoles And Raspberry Pis

Nintendo has discontinued a Classic gaming console. It’s a pity, yes, but with the release of Nintendo’s new gaming console, they probably have bigger fish to fry. That doesn’t mean these discontinued Nintendo consoles will die a slow, miserable death locked away in a closet; at least one of them will live on with the heart of a Raspberry Pi.

This is a project [Liam] has been working on since 2012, just after he got the first edition of the Raspberry Pi. While some people were figuring out how to stuff the Pi inside a Nintendo Entertainment System or a Super Nintendo Entertainment System, [Liam] decided to embed the Pi inside a console of a more recent vintage: the Nintendo GameCube.

The first phase of this project was simply to get the Pi running inside the enclosure of the non-working GameCube he picked up. The power supply in this console was well designed, and after a quick perusal through some online documentation, [Liam] found a stable 5V with enough amps to power the Pi. After ripping out the internals of this console with the help of a quickly hacked together ‘Nintendo screwdriver’, [Liam] had a perfectly functional Pi enclosed in a Nintendo chassis.

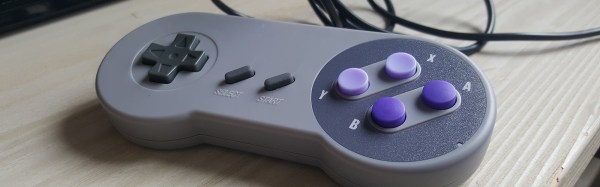
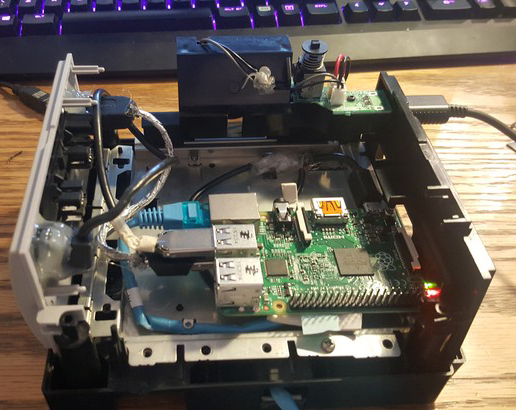
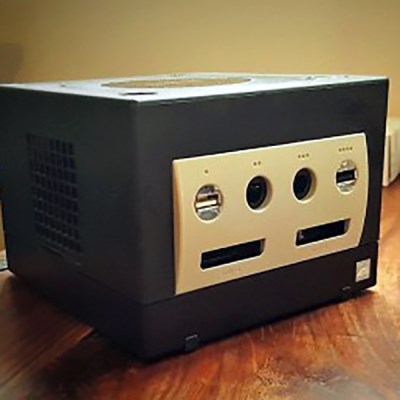
Time marches on, and after a while, the Raspberry Pi 2 was released. By this time, retro emulation was hitting the big time, and [Liam] decided it was time for an upgrade. He disassembled this Nintendo console again, routed new wires and inputs to the original controller ports, and used a Dremel to route a few holes for the HDMI and SD card slot.

With the addition of a few SNES-inspired USB controllers, RetroPi, and a few ROMs, [Liam] has a wonderful console full of classic emulation goodness, packaged in an enclosure Nintendo isn’t making any more.

FPGA Emulates NES Cart; Prototype So Cyberpunk

By now, most of us have had some experience getting ROMs from classic video games to run on new hardware. Whether that’s just on a personal computer with the keyboard as a controller, or if it’s a more refined RetrioPie in a custom-built cabinet, it has become relatively mainstream. What isn’t mainstream, however, is building custom hardware that can run classic video games on the original console (translated). The finished project looks amazing, but the prototype blows us away with it’s beauty and complexity.

[phanick]’s project is a cartridge that is able to run games on the Polish Famicon clone called the Pegasus. The games are stored on an SD card but rather than run in an emulator, an FPGA loads the ROMs and presents the data through the normal edge-connector in the cartridge slot of the console. The game is played from the retro hardware itself. It takes a few seconds to load in each ROM, but after that the Pegasus can’t tell any difference between this and an original cartridge.

The original prototype shown here was built back in 2012. Since then it’s been through a few iterations that have reduced the size. PCBs were designed and built in-house, and the latest revision also includes a 3D-printed case that is closer to the size of the original Famicon cartridges.

Even if you don’t have an interest in classic video games or emulation, the video below is worth checking out. (Be sure to turn on the subtitles if you don’t speak Polish.) [phanick] has put in a huge amount of time getting all of the details exactly right, and the level of polish shows in the final product. In fact, we’ve featured him before for building his own Famicom clone.

Continue reading “FPGA Emulates NES Cart; Prototype So Cyberpunk”

How To Add More Games To The NES Classic

The hype around the NES Classic in 2016 was huge, and as expected, units are already selling for excessively high prices on eBay. The console shipped with 30 games pre-installed, primarily first-party releases from Nintendo. But worry not — there’s now a way to add more games to your NES Classic!

Like many a good hack, this one spawned from a forum community. [madmonkey] posted on GBX.ru about their attempts to load extra games into the console. The first step is using the FEL subroutine of the Allwinner SOC’s boot ROM to dump the unit’s flash memory. From there, it’s a matter of using custom tools to inject extra game ROMs before reburning the modified image to the console. The original tool used, named hakchi, requires a Super Mario savegame placed into a particular slot to work properly, though new versions have already surfaced eliminating this requirement.

While this is only a software modification, it does come with several risks. In addition to bricking your console, virus scanners are reporting the tools as potentially dangerous. There is confusion in the community as to whether these are false positives or not. As with anything you find lurking on a forum, your mileage may vary. But if you just have to beat Battletoads for the umpteenth time, load up a VM for the install process and have at it. This Reddit thread (an expansion from the original pastebin instructions) acts as a good starting point for the brave.

Only months after release, the NES Classic is already a fertile breeding ground for hacks — last year we reported on this controller mod and how to install Linux. Video of this ROM injection hack after the break.

Continue reading “How To Add More Games To The NES Classic”

Anti-Emulation Tricks On GBA-Ported NES Games

Emulation is a difficult thing to do, particularly when you’re trying to emulate a complex platform like a game console, with little to no public documentation available. Often, you’ll have to figure things out by brute force and dumb luck, and from time to time everything will come unstuck when a random piece of software throws up an edge case that brings everything screeching to a halt.

The Classic NES series was a handful of Nintendo Entertainment System games ported to the Game Boy Advance in the early 2000s. What makes them unique is a series of deliberately obtuse programming decisions that make them operate very differently from other titles. These tricks utilize advanced knowledge of the way the Game Boy Advance hardware operates and appear to have been used to make the games difficult to copy or emulate.

The games use a variety of techniques to confuse and bamboozle — from “mirrored memory” techniques that exploit addressing anomalies, to putting executable code in video RAM and writing to the audio buffers in unusual manners.

Even more confusingly, these techniques only appear to have been used in the Classic NES series of games, and not other Game Boy Advance titles. It’s not obvious why Nintendo went to special effort to protect these ports over other titles; perhaps the techniques used were for other reasons than just an attempt at copy protection. Speculate amongst yourselves in the comments.

This isn’t the first time we’ve discussed emulation of Nintendo systems — check out this effort to reverse engineer the Sony Pocketstation.

[Thanks to [[[Codifies]]] for sending this in!]