Making A 1940s Radio Digital With Nixies

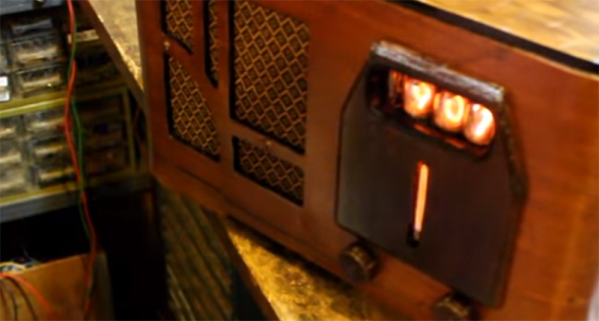
Classix Philly One Oh Seven Nine is your home for Philly soul right at the top of the dial. That phrase, ‘top of the dial’ doesn’t mean much these days because we all have radios with a digital display and seek buttons. There was a time when radios actually had dials, but [glasslinger] is in a class all by himself. He’s adding a digital display to a 1940s radio, and he’s doing it with Nixie tubes.

The circuitry for the digital display for this AM radio requires getting the frequency the radio is tuned to. This is done by counting the oscillator frequency, then subtracting the IF. [glasslinger] is doing this with an Arduino (hey, it’s a legitimate engineering choice) and a 4040 12-bit binary counter as a pre-scaler. The Arduino does the math and then drives a few 74141 Nixie drivers, which then display the frequency of the receiver in beautiful glass tubes. Add in a single neon bulb for the thousands digit, and you have a four-digit display that will tell you the frequency you’re tuned to on an old AM radio.

The rest of the build consists of fixing up an old radio and gluing the veneer down again with modern glues that will last another seventy years. The finished cabinet was sanded, a bezel for the display was added, and since [glasslinger] has the equipment, he made a new, long neon tube to light up with the volume of the radio. And you thought a cat’s eye detector was cool.

This build is a tour de force, and something that is so incredibly modern but at the same time built on vintage technology. If you’ve got an hour and a half, we highly recommend checking out the build video below.

Continue reading “Making A 1940s Radio Digital With Nixies”

Hackaday Links Column Banner

Hackaday Links: March 3, 2019

In this week’s edition of, ‘why you should care that Behringer is cloning a bunch of vintage synths’, I present to you this amazing monstrosity. Yes, it’s a vertical video of a synthesizer without any sound. Never change, Reddit. A bit of explanation: this is four Behringer Model Ds (effectively clones of the Moog Minimoog, the Behringer version is called the ‘Boog’) stacked in a wooden case. They are connected to a MIDI keyboard ‘with Arduinos’ that split up the notes to each individual Boog. This is going to sound amazing and it’s one gigantic wall of twelve oscillators and it only cost $800 this is nuts.

Tuesday is Fastnacht day. Fill your face with fried dough.

The biggest news this week is the release of a ‘folding’ phone. This phone is expensive at about $3000 list, but keep in mind this is a flagship phone, one that defines fashion, and an obvious feature that will eventually be adopted by lower-cost models. Who knows what they’ll think of next.

It’s a new Project Binky! This time, we’re looking at cutting holes in the oil sump, patching those holes, cutting more holes in an oil sump, patching those holes, wiring up a dashcam, and putting in what is probably the third or fourth radiator so far.

Here’s a Kickstarter for new Nixie tubes. It’s a ZIN18, which I guess means an IN18, a tube with a 40mm tall set of numbers. This is the king of Nixie clocks, and one tube will run you about $100. Nah, you can also get new Nixies here.

The Sipeed K210 is a RISC-V chip with built-in neural networks. Why should you care? Because it’s RISC-V. It’s also pretty fast, reportedly 5 times as fast as the ESP32. This is a 3D rendering test of the K210, with all the relevant code on the Github.

I’m not sure if everyone is aware of this, but here’s the best way to desolder through-hole parts. Heat the solder joint up and whack it against a table. It never fails. Hitting things is the best way to make them do what you want.

Test PCBs On A Bed Of Nails

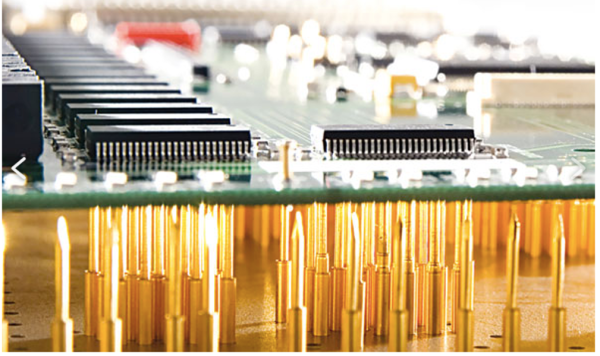
While it might be tempting to start soldering a circuit together once the design looks good on paper, experience tells us that it’s still good to test it out on a breadboard first to make sure everything works properly. That might be where the process ends for one-off projects, but for large production runs you’re going to need to test all the PCBs after they’re built, too. While you would use a breadboard for prototyping, the platform you’re going to need for quality control is called a “bed of nails“.

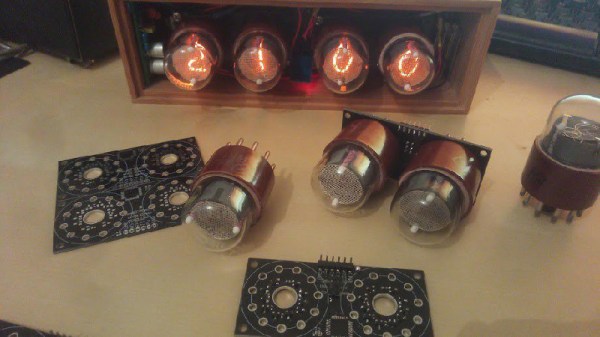
This project comes to us by way of [Thom] who has been doing a large production run of circuits meant to drive nixie tubes. After the each board is completed, they are laid on top of a number of pins arranged to mate to various points on the PCB. Without needing to use alligator clamps or anything else labor-intensive to test, this simple jig with all the test points built-in means that each board can be laid on the bed and tested to ensure it works properly. The test bed looks like a bed of nails as well, hence the name.

There are other ways of testing PCBs after production, too, but if your board doesn’t involve any type of processing they might be hard to implement. Nixie tubes are mostly in the “analog” realm so this test setup works well for [Thom]’s needs.

Pocket High Voltage Generator Becomes Great Test Tool

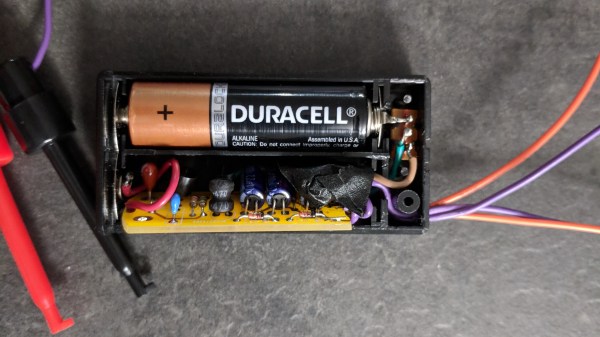
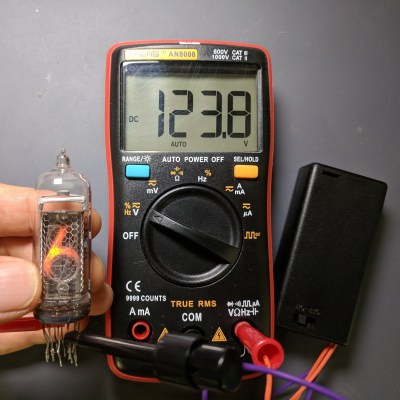
[The LED Artist] often found a need for a relatively high voltage (100 to 200 Volt) but low current DC power supply, and it turns out that a small HV generator that uses a single AA cell only took about an hour to make. The device ended up being a pretty handy tool for testing things like LED filaments (which have a forward voltage of over 60 V), or even neon and nixie tubes.

The device’s low current means that nixie and neon elements won’t light up very brightly, but they will light up enough to verify function and operation. [The LED Artist] reports that touching the output terminals of the generator only causes a slight tingling sensation.


Open-circuit voltage generated from a single AA cell is about 200 V, but that voltage drops rapidly under any kind of load. Even regular LEDs can be safely lit with the circuit, with less than a milliamp being supplied at the two to three volts at which most regular LEDs operate.

[The LED Artist] fit the device into a two-AA battery holder, with a single AA cell on one side and the circuit in the other, and says it’s one of the more useful tools they’ve ever made. LED filaments are fairly common nowadays, but if they intrigue you, don’t forget that [Mike Harrison] covered everything you need to know about experimenting with them.

This Nixie Device Is Useless, But Pretty

Nixie clocks, they’re a bit of a cliché, aren’t they? But still, they’re pretty to look at.

[Marcin Saj] has completely got our number, and with his Useless Nixie Device has stripped away any pretence of functionality from his Nixie  and concentrated solely on the looking pretty part. It’s a box that steps through the display on any Nixie tube through the use of a set of pluggable socket modules, and it’s encased in an extremely attractive lase-cut acrylic enclosure. Internally it’s an extremely simple device, with a trusty 555 oscillator clocking a 4518 counter that in turn feeds 74141 driver. There is a MAX1771 boost converter in there too to create some high voltage for the tubes.

So it’s a pretty device and you can plug almost any Nixie into it given the right adapter. We guess it might be useful if you have a warehouse full of Nixies to test, but beyond that it’s a pretty desk toy. Still, it’s nice to see a Nixie project that’s not just another clock.

Hand-Forged Cases Make Nixie Clocks Into Works Of Art

Both “Nixie” and “Steampunk” are getting a bit overused. It’s hard to count the number of clock projects we’ve seen recently that combine the two, and normally we’d be loath to feature yet another variation on that theme without a good reason. This is a good reason.

The single-digit Nixie clocks that [Claes Vahlberg] built are, simply put, works of art. There’s a small version of the clock, featuring a single IN-16 Nixie, and a larger version that uses a Dalibor Farny custom Nixie, a work of art in its own right. Each clock has features like time and date, temperature and barometric pressure, and even days remaining in the current lunar cycle. The cases for the clocks, though, are the real treat. Hand forged from steel, they remind us of steam whistles on top of a boiler.

[Claes] doesn’t have many details on the build process — we’ve been in contact and he says he’s working on documentation — but it doesn’t matter. As if all that weren’t enough, the clocks are controlled by a remote, which has its own IN-16 tube and is motion controlled. The last bit is a nice touch since there are no buttons to distract from the smooth lines of the hammered metal case.

We gush, but we think this one really shines. That’s not to take anything away from previous Nixie-steampunk mashups, like this single-digit clock or this solar power meter. But these clocks are a step beyond.

Continue reading “Hand-Forged Cases Make Nixie Clocks Into Works Of Art”

Better Ways To Drive Nixie Tubes

Ah, Nixie tubes. You’re not cool unless you have a few Nixie tubes sitting around, and you’re not awesome unless you’ve built your own Nixie tube clock. That’s what [Thomas] is doing for his entry into the Hackaday Prize, and he’s come up with a very low-cost way of doing it.

For the high voltage supply of this build, [Thomas] is turning to one of the standard circuits based on the MC34063 that’s simple enough and good enough to make everything work. There are really no surprises with the power supply here. This is all a project about turning on different digits inside the Nixie, though, and for that [Thomas] spun his own board capable of driving a pair of IN-1 Nixies with a single ATMega8.

These two-Nixie boards are daisy chained together through a UART connection, where each board passes digits down the line. For example, the first board receives, 12, 30, and 59, displays 59, and passes 12 and 30 down to the next boards. The second board then displays 30 and passes 12 to the last board.

Of course, if you’ve designed a Nixie driver, the next thing to do is to build a clock. [Thomas] had the rather clever idea of making an enclosure for this clock out of concrete, using a 3D printed interior mold. Everything seemed to be going well until it was time to pull the interior mold out, and a few light taps resulted in some fairly large cracks. That’s disappointing, but with a slight redesign and some more fibers in the concrete mix, this is going to turn out to be a weighty win.