It Ain’t Broke, But Should I Fix It?

Five years ago, I wrote a series on getting started with your own MQTT-based home information/automation network. Five years is a long while in Hackaday time. Back then, the ESP8266 was a lot newer, and the 8266 Arduino port wasn’t fully in shape yet, and the easiest software framework to get MQTT up and running was NodeMCU; so that’s what I used for the article series, and as a consequence a handful of devices around my house run minor modifications of that basic “hello world”, but doing useful stuff.

Since then, NodeMCU has changed a bunch of its libraries and the ESP32 has replaced the ESP8266 in my parts drawer. If you tried to run my code, you’d find that it won’t run on an ESP8266 without porting or compiling an old version of NodeMCU for yourself anyway, and it won’t run on an ESP32 at all. When [Chris Lott] tried to follow my guide, he discovered that Micropython is probably a better language choice in 2021. To minimize lines of code, I’d agree, although the Arduino and Espressif’s own native IDF have grown into the job just about as well. In short, anything but NodeMCU.
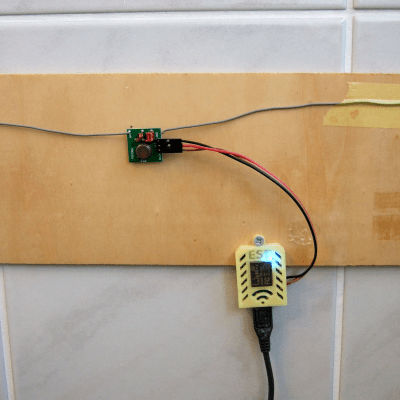
Built in an hour, survived for five years.

But my home automation system doesn’t care. Those little guys are running 24/7, flipping bits like it was still 2016. Thermometers, light sensors, and power meters haven’t changed much in five years, and although I’ve revamped the databasing, display, and user control a number of times since then, using a fixed communication transport protocol means that they’re still talking the same language. Indeed, even if NodeMCU is dead to me, the MQTT content of my original series is all still valid, and installing a broker on a Raspberry Pi has only become easier in the intervening five years.

So I’ve got a bunch of legacy code running within the walls of my own home, and it makes me nervous. If the devices fail, or maybe when they eventually fail, it’s not going to be “just flash another ESP8266 and replace it”, because even though I have some ancient NodeMCU binaries sitting around, I know when to throw in the towel. But there’s no good reason to pull them down and start reflashing either. Except that it makes me a little bit itchy, just knowing that there’s orphaned, dead-end code running all around me. Surrounding me. Staring deep into my hacker’s heart.

I know better than to tear down a running system, even though I could do it one device at a time, and each module would surely be a simple, independent fix; even though I’d love the excuse to play around with Micropython and its MQTT implementation on the ESP8266, or maybe even swap some of them out for ESP32s; even though these were all temporary quick hacks that have somehow served for five (5!) years. I certainly know better, right? (Right?)

Minimal MQTT With Micropython

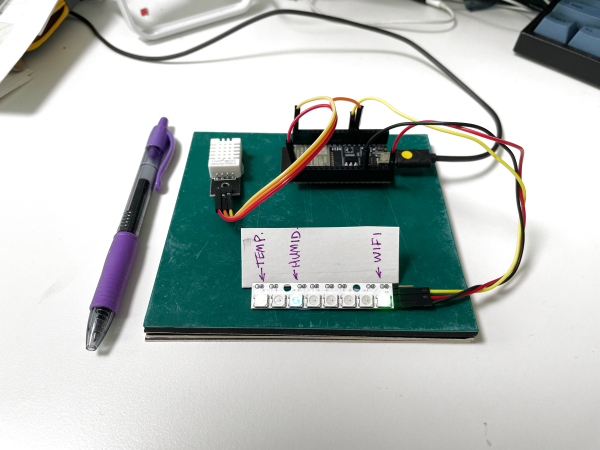
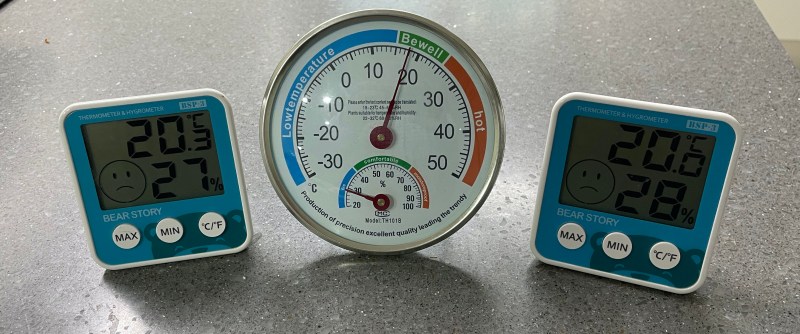
I have been meaning to play around with MQTT for some time now, and finally decided to take the plunge one evening last week. I had three cheap home temperature and humidity sensors, and was bothered that they often didn’t agree. Surprisingly, while the analog one had a calibration adjustment in the back, I have no idea how to calibrate the two digital ones. I took this as a sign that it was time to learn MQTT and be able to install my own, accurate sensors. Of course, I began by ordering the cheapest sensors I could find, but I can always upgrade later on.

Three Cheap Sensors

While we have written quite a bit about MQTT in Hackaday, I had to go all the way back to 2016 to find this introductory four-part series by Elliot Williams. Five years is a long time in the tech world, but I decided to give it a try anyway. Continue reading “Minimal MQTT With Micropython”

IKEA Shelf Becomes Kid Friendly MP3 Player

IKEA’s flatpack furniture has long been popular among makers for its modular nature and low cost, making it ideal for whacky experiments and custom builds. [Claus] is one such person, and built a fun MP3 player for his kids out of a basic LACK shelf.

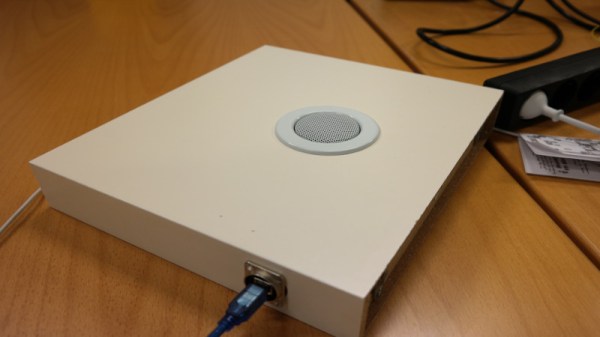
The music is handled by an NodeMCU ESP8266, working in concert with a VS1053 audio board. The VS1053 is a highly capable chip, capable of decoding a variety of raw and compressed audio formats as well as MIDI, but here it’s used to read SD cards and play MP3s. An RC522 is used to read RFID cards to trigger various tracks, allowing kids to choose a song by simply placing a tag on the shelf. A cheap PAM8302 amplifier and speaker are used to output the music. All the hardware is installed neatly inside the LACK shelf, an easy job thanks to the primarily cardboard construction.

RFID cards are more fun than we normally give them credit for, and we’ve seen a few builds along similar lines to this one. Video of [Claus’s] child rocking out after the break.

Continue reading “IKEA Shelf Becomes Kid Friendly MP3 Player”

Serving The Feline Masters: A Chair To Follow The Sunny Spot

Terry Pratchett once wrote, “In ancient times cats were worshipped as gods; they have not forgotten this”. [Jonathan]’s cat has clearly not forgotten, and makes it loudly known whenever her favorite chair needs to be moved to stay in the spot of sunlight. He was looking for a fun hack anyway, so he decided to give in to her majesty’s demands, and automated the task.

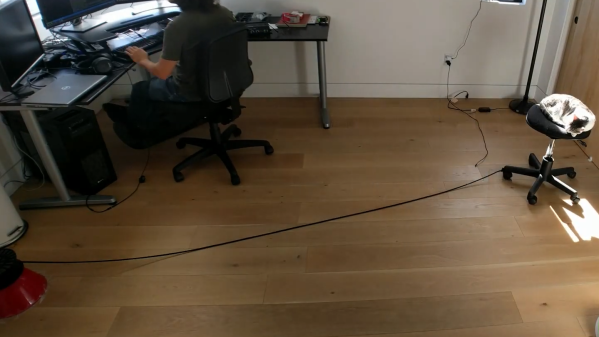
[Jonathan] first considered adding motorizing the chair itself, but decided to keep it simple and just drag the chair across the room with a spool attached to a motor. The rope spool was attached to a small geared DC motor, mounted on a salad bowl base, and connected to an ESP8266 via a motor driver. The ‘8266 is running  NodeMCU with a web server that accepts simple motor commands through a RESTful API. This setup can’t reset the chair to it’s starting position at the end of the day, but this is a small price to pay for simplicity. The motor was a bit underpowered, but it only needed to move the chair in small distances at a time, so [Jonathan] removed the chair’s back to reduce the weight, and upped the motor voltage.

Determining when and how far to move the chair is the second part of the challenge. [Jonathan] considered a simple lookup table for the time of day, but the motor’s movement wasn’t consistent enough. The final solution was a set of three BH1750 digital ambient light sensors to give feedback. A pair of sensors on the chair determines its position relative to the sunny spot, by comparing light levels to a reference sensor mounted in the window. These light sensors are also attached to NodeMCUs, and send movement commands to the winding unit as necessary.

Continue reading “Serving The Feline Masters: A Chair To Follow The Sunny Spot”

Weather Display Is Cloudy With A Chance Of ESP8266

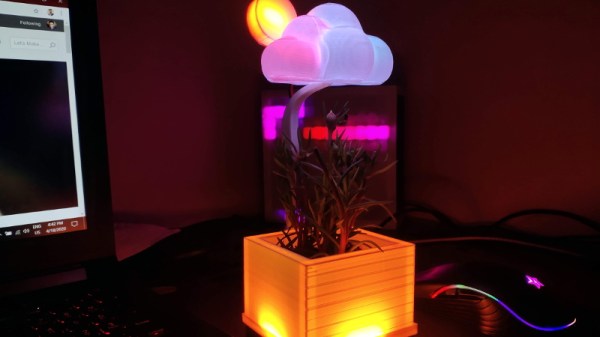
[Mukesh Sankhla] writes in to share this unique weather display that looks to be equal parts art and science. Rather than show the current conditions with something as pedestrian as numbers, this device communicates various weather conditions to the user with 25 WS2812B LEDs embedded into the 3D printed structure. It also doubles as a functional planter for your desk.

So how does this potted plant tell you if it’s time to get your umbrella? Using a NodeMCU ESP8266 development board, it connects to openweathermap.org and gets the current conditions for your location. Relative temperature is conveyed by changing the color of the pot itself; going from blue to red as things heat up. If there’s rain, the cloud over the plant will change color and flash to indicate thunder.

[Mukesh] has made all of the STL files for the printed components available, as well as the source code for the ESP8266. You’ll need to provide your own soil and plant though, there’s only so much you can send over the Internet. Incidentally, if the clever way he soldered these WS2812B modules together in the video catches your eye, you’ll really love his “RGB Goggles” project that we covered earlier.

Continue reading “Weather Display Is Cloudy With A Chance Of ESP8266”

Clear Some Space And Build A Cosmo Clock

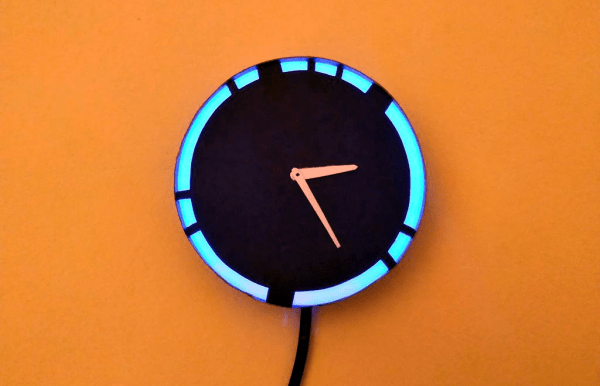
Like many of us, [Artistikk] is inspired by astronauts and space travel in general. To keep the inspiration coming, he made the Cosmo Clock — a sleek little clock that changes color whenever an astronaut is launched into space.

As awesome as space is, we’re inspired by the amount of Earth-saving reuse going on in this project. The actual time-telling is coming from a recycled wristwatch movement. [Artistikk] cut a bigger set of hands for it out of a plastic container, and used the lid from another container for the clock’s body.

The launch inquiries are handled by an ESP8266, which uses a Blynk app and some IFTTT magic to get notified whenever NASA yeets an astronaut into space. Then the ESP generates random RGB values and sends them to a single RGB LED. The clock body is small enough that a single LED is bright enough to light up all the parts that aren’t blacked out with thick paper. In case you’re wondering, the pattern around the edge isn’t random, it’s Morse code for ‘sky’, but you probably already knew that, right? Make a dash past the break to take the tour.

Clocks that wind up in space are much more complicated. Check out this tear-down of the clock from a late-90s Soyuz spacecraft.

Continue reading “Clear Some Space And Build A Cosmo Clock”

Viewing Countrywide Weather At A Glance

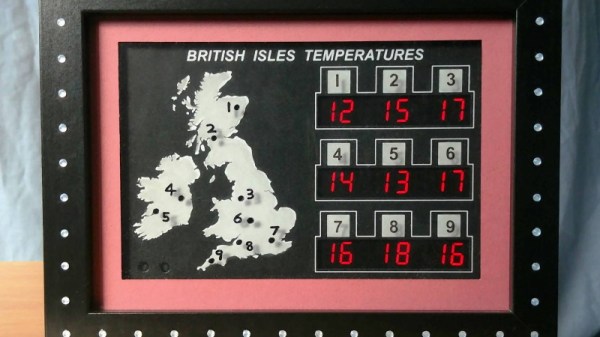
For his latest project, weather display aficionado [Richard] has put together a handsome little device that shows the temperatures recorded at nine different airports located all over the British Isles. Of course the concept could be adapted to wherever it is that you call home, assuming there are enough Internet-connected weather stations in the area to fill out the map.

The electronics are fairly minimal, consisting of a NodeMCU ESP8266 development board, a few seven segment LED display modules, and a simple power supply knocked together on a scrap of perfboard. As you might expect, the code is rather straightforward as well. It just needs to pull down the temperatures from an online API and light up the displays. What makes this project special is the presentation.

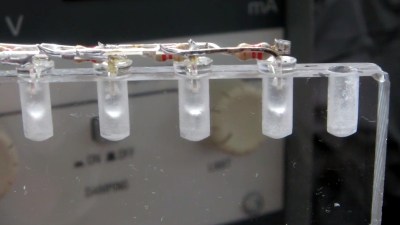
As [Richard] shows in the video after the break, the key is a sheet of acrylic that’s been sanded so it diffuses the light of 42 LEDs that have been painstakingly installed in holes drilled around the edge of the sheet. Combined with a printed overlay sheet, this illuminates the map and its legend in low-light conditions. It’s a simple technique that not only looks fantastic, but makes the display easy to read day or night. Definitely a tip worth mentally filing away, as it has plenty of possible applications outside of this particular build.

With his projects, [Richard] has shown himself to be a master of unique and data-rich weather displays, and a great lover of the iconic seven segment LED display. While his particular brand of climate data overload might not be for everyone, you’ve got to admire his knack for visualizing data.

Continue reading “Viewing Countrywide Weather At A Glance”