A Touch Scroll Wheel Via OpenSCAD

touch

Recent experiments with the Arduino CapSense library led [Bryan] around the Internet looking for interesting applications. He hit upon a very cool touch scroll wheel made entirely with PCB traces, but the geometry – three interleaved zig zags is impossible to build in the decidedly ungeometric Eagle PCB package. One thing leads to another and now [Bryan] has a cap touch wheel Eagle part designed entirely in OpenSCAD.

The touch scroll wheel implementation [Bryan] found came from an ST touch controller datasheet and used oddly-shaped patterns to create a capacities sensor. Eagle is terrible for designing anything that isn’t laid out at a 45 degree angle, so he fired up OpenSCAD to draw these triangles. Importing into Eagle was another challenge, but a quick Ruby script to convert a DXF file into a set of coordinates for Eagle’s POLYGON command made everything very easy.

If OpenSCADing touch sensors isn’t your thing, there’s also an Eagle library full of them – something we found last week.

OpenSCAD Is For Use With 2D Machine, Not Just 3D Printing

openscad-for-2d-machining

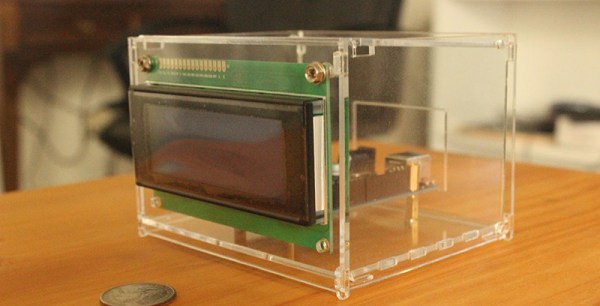
Here’s an enclosure which was designed with OpenSCAD and cut out on a CNC router. [Matthew Venn] wrote about the project because he sees tons of 3D printing hacks that use the software, but almost never hears about it as a tool for laser cutting or CNC router/mill work. When we read that we thought we must have seen a lot of 2D hacks but a search of Hackaday’s previous offerings proved us wrong. Just this week we heard about the software in use with the Makerbot. Or you could go back about a year and read about creating 3D molds. But nothing on 2D work.

His post is a quick read and shows off the bare bones of the case designs he’s been working with for a few years. By referencing the code itself, and playing with how it changes the render in OpenSCAD he makes a strong case for quick and easy enclosure design. If you use this technique make sure to document your experience because we want to hear about it!

Custom 3D Printed Designs With Makerbot’s Customizer

custom

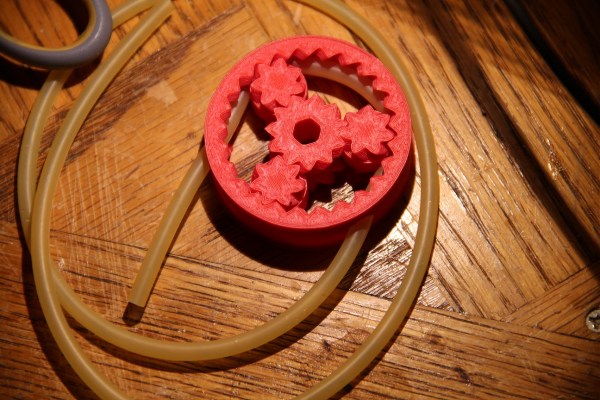
Although having a 3D printer means you can create custom object of your own design, that doesn’t change the fact that most object printed on Makerbots and RepRaps are copies, or slight derivations, of already existing object. If you need a gear, just go grab an OpenSCAD file for a gear, and a custom smart phone case can be easily made by modifying an already existing one. The problem with this approach, though, is you’ll need to learn OpenSCAD or another 3D design tool. Enter the Makerbot Customizer, a web app that allows you to create custom versions of other people’s work right in your browser.

The idea behind Customizer is simple: someone creates an OpenSCAD file with a few variables like the number of teeth on a gear or the number of turns on a screw. Customizer takes this OpenSCAD file, puts sliders and radio buttons on a web page, and allows you to create custom objects based on user-created templates.

Already we’ve seen a lot of Hackaday readers send in some pretty cool customizable things, like [Bryan]’s coil form for DIY inductors and [Greg]’s customizable PVC pipe couplers. If you already know OpenSCAD, it’s easy to create your own objects that are customizable by anyone on the Internet.

Signing Your 3D Prints

print

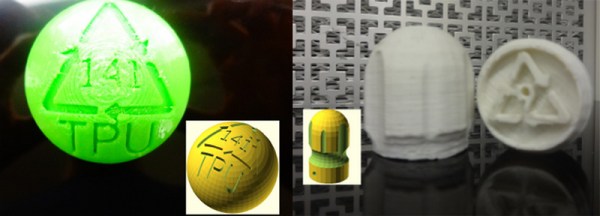
For all the 3D models out on the Internet, including the STL files on Thingiverse that are copied by other makers every day, there hasn’t been a good way to put your John Hancock on a three-dimensional piece of plastic you’ve designed. [Chris] has been thinking about the fact that an STL file released on the Internet is completely out of the creator’s hands for a while now, and he finally came up with a good solution to signing 3D prints.

[Chris] had been looking into ‘stamping’ a maker’s mark on the first few layers of a print, but this wasn’t always practical. Sometimes the bottom of a print needs to be a smooth surface, so [Chris] moved his initials up a few layers into the main body of the print.

By subtracting a 1.0 mm-thick version of his initials from the interior of a print, [Chris] is able to put his maker’s mark on the inside of a 3D object, visible only for a short time during the production process.

The signature isn’t impossible to remove, but it does give a little bit of credit to the original designer, all without some strange DRM scheme or metadata attached to an STL file.

You can check out [Chris]’ printer laying down a few layers of his logo after the break.

Continue reading “Signing Your 3D Prints”

Printing Puzzles With Plastic Parts

A decade or so ago, a line of jigsaw puzzles called Puzz3D brought the joys of fitting pieces of cardboard together into three dimensions. If you’ve ever put one together, you’ll remember being slightly disappointed at these 3D puzzles – they were made of two-dimensional foam board and only lived up to their expectations on the vertices of their 3D objects. Now that just about every hackerspace in the land has a 3D printer, it might just be time to create better 3D puzzles, and [Rich Olson]’s OpenSCAD library is up to the task.

There are a few other tools that cut 3D models up into smaller objects, but none of these had the features [Rich] wanted. He created a library that is able to position the puzzle cuts anywhere on the X and Y axes, adjusts the kerf for a tighter or looser fit, and exports one piece at a time for 3D printers with a smaller build area.

Right now the library is limited to generating up to four interlocking pieces, but [Rich] says the code should be easy to modify for a truly absurd 500-piece puzzle of the Taj Mahal,

Zeppelin On The Fisher Price Record Player Now Thanks To A 3D Printer

[Fred Murphy] went ahead and revised his method of making custom records for a Fisher Price toy record player. He’s now able to 3D print the discs. The toy works much like a music box, with a comb in the “cartridge” of the record player and notches in the record that pluck the fingers of the comb as it turns. He had previously developed a subtractive method that let him mill records out of a solid piece of plastic. But this additive method means less waste.

The music creation portion of the project is the same as the previous version. That’s because it’s pretty hard to outdo the C# software he wrote which serves as a composition studio. The difficulty comes in getting a clean print for the disk. The ridges on the discs are 0.7mm so you’re going to need a well-aligned printer with fine resolution. [Fred] printed in both ABS and what he calls “Vero clear” plastic. The former works but he got better results with the latter.

Rendering OpenSCAD In The Browser

If you haven’t heard of it, OpenSCAD is a really wonderful tool for 3D modeling.  While it doesn’t have the traditional graphical interface of AutoCAD – it’s basically a programming language for 3D models – OpenSCAD is able to create very complex parts with only a few lines of code.

That’s all well and good, but what if you wanted to edit OpenSCAD parts in your browser? Enter OpenJsCAD, an OpenSCAD interpreter written entirely in Javascript and able to be embedded in a web page.

OpenSCAD allows for two types of modeling – constructive solid geometry, or taking 3D primitives and stretching, scaling, and intersecting them to create a 3D shape, or extrusion from a 2D outline. Quite a few RepRap parts were designed in OpenSCAD, and the lightweight interface and open source nature means it’s perfect for designing stuff to print on your Makerbot.

Tip ‘o the hat to [Gordon] for sending this one in, and we really have to commend him for writing his own online scriptable CAD exporter before finding out about OpenJsCAD. He may be a little late to the online OpenSCAD party, but we have to agree with him that an online 3D solid editor would be an awesome feature for Thingiverse to roll out.