Home Monitoring, Without All The Sensors

Smart homes come with a lot of perks, not least among which is the ability to monitor the goings-on in your home, track them, and make trends. Each piece of monitoring equipment, such as sensors or cameras, is another set of wires that needs to be run and another “thing” that needs to be maintained on your system. There are sometimes clever ways of avoiding sensors, though, while still retaining the usefulness of having them.

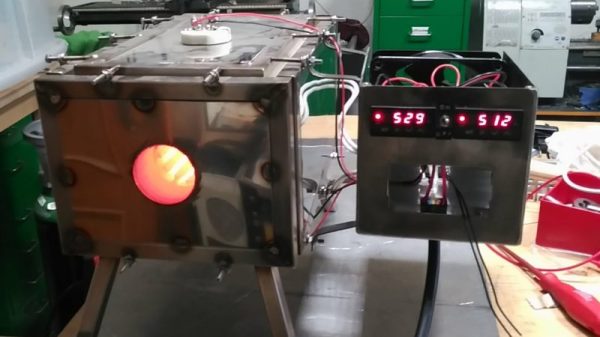
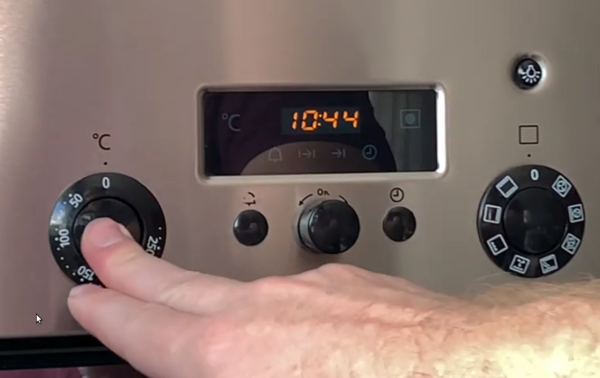
In this build, [squix] uses existing sensors for electricity metering that he already had in order to alert him when his oven is pre-heated. The sensor is a Shelly 3EM, and the way that it interfaces with his home automation is by realizing that his electric oven will stop delivering electricity to the heating elements once it has reached the desired temperature. He is able to monitor the sudden dramatic decrease in electricity demand at his house with the home controller, and use that decrease to alert him to the fact that his oven is ready without having to install something extra like a temperature sensor.

While this particular sensor may only be available in some parts of Europe, we presume the idea would hold out across many different sensors and even other devices. Even a small machine learning device should be able to tell what loads are coming on at what times, and then be programmed to perform functions based on that data.

Continue reading “Home Monitoring, Without All The Sensors”

With PowerCore And FluxLamp, Reflow Is Possible

[nathan] sends in this combo of projects which combine to make a very interesting reflow oven.

First is PowerCore which has two microcontrollers, an ATmega and a ESP8366 working in tandem to turn the AC on and off at set intervals. A GLCD displays the current profiles and WiFi allows for remote control as well. Input is handled by a momentary switch rotary controller. He decided to go this route after reading forums on the commercial controllers and deciding they needed too much fiddling and weren’t hacker friendly enough.

The PowerCore then attaches to a halogen work light. He took the front glass off the halogen light and covered it in aluminum foil. This becomes the base of the oven. The PowerCore and a sensor are attached to the back. Using the lighting element as a heating one makes sense and, as we can see from the curves, appears to provide a very accurate response.

On top of all this [nathan] has documented the project beautifully. The small size and great control bump it way up in our list of reflow builds to recommend.

DIY Reflow Oven Is Heavily Documented

[DJ Legion] decided he wanted a reflow oven so he bought a toaster oven and an assortment of parts including a solid state relay, a Teensy, a display, and a thermocouple. What makes this a different project is the amount of video documentation. The four videos below encompass about 50 minutes of information and he’s promising more to come.

We haven’t found his software — probably because he’s still working on it, but we’re watching his GitHub page expectantly. We really liked the 3D printed faceplate that integrated the controller into the oven. It almost looks like a commercial unit. The use of the woodgrain paper over the 3D printed parts was a nice touch.

[DJ] is not done, though. He wants to increase the heat up time and possibly add convection. He’s also planning on a new video that will show actually making a board and how he has refined the calibration curves.

We are impressed but would have been tempted to just grab a Reflowduino. The work’s already done, and you get wireless control and lots of other goodies. Of course, we also get the urge to do it yourself, so we can’t really throw stones. If you don’t want to mess with an oven, you can always raid the hair salon.

Continue reading “DIY Reflow Oven Is Heavily Documented”

Is Baking A Raspberry Pi The Recipe For Magic Smoke?

No, Hackaday hasn’t become a baking blog. We’re just here to give you a bit of advice: if [MickMake] ever offers you one of his fresh-baked Pis, proceed with caution. While we have no doubt that there will be some interesting smells wafting out of his kitchen, these aren’t the tasty pies you’re looking for. There’s no delicious home-baked treat when that timer dings, just a handful of Raspberry Pis that have had an exceptionally hard day.

To properly explain the odd sight of some Raspberry Pis laid out on a cookie sheet, we need to take a step back. [MickMake] originally set out to see how everyone’s favorite Linux SBC would handle the harsh Australian heat, and thought that setting them up on his car’s dashboard would be a suitable torture test. But as luck would have it, a storm rolled in while he was making the video which brought temperatures down to a “cool” 30 C (86 F); basically jacket weather at the bottom of the world. So naturally, he decided to put them in his oven instead.

Placed on an insulating sheet and with a thermocouple between them to get an accurate idea of the temperature they were experiencing, an original Pi, a Pi 2, and a pair of Pi 3s were sent on the ride of their lives. In addition to monitoring them over the network, he also added a “heartbeat” LED to each Pi so he’d be able to tell at a glance if any of them had given up the ghost. As if these poor little Pis didn’t have it bad enough already, [MickMake] decided to take things a step farther and run sysbench on them while they took their trip through Hades.

The Pis are actually rated for temperatures up to 85C, and all the participants of the experiment hit that point without any issues. At 87.3 C (~190 F) the original Pi dropped off the network, but its LED was seen bravely blinking on. At 105.7 C (~222 F) it finally breathed its last, followed by the pair of Pi 3s tapping out at 112 C (233 F). The Pi 2 fought on, but it fell right at the 119 C (246 F) mark.

But what about when they cooled off? Somewhat surprisingly, [MickMake] successfully powered all four back up and was unable to find any damage to the Pis, either physically or operationally. Even the SD cards survived, and the Pis popped right back onto the network and were ready for another round of Silicon Chef. Not bad considering they were subjected to temperatures three times higher than the official limit.

Testing electronics in your home oven might seem a bit suspect, and admittedly we’d probably turn down a slice of the next few frozen pizza’s [MickMake] runs through it, but it’s not really so far removed from how proper reliability testing is performed.

Continue reading “Is Baking A Raspberry Pi The Recipe For Magic Smoke?”

Stove Alarm Keeps The Kitchen Safe

Gas cooktops have several benefits, being able to deliver heat near-instantly, while also being highly responsive when changing temperature. However, there are risks involved with both open flames and the potential of leaving the gas on with the burner unlit. After a couple of close calls, [Bob] developed a simple solution to this safety issue.

The round PCB sits neatly behind the knobs, affixed with double-sided tape.

Most commercial products in this space work by detecting the heat from the cooktop, however this does not help in the case of an unlit burner being left on. [Bob]’s solution was to develop a small round PCB that sits behind the oven knobs. Magnets are placed on the knobs, which hold a reed switch open when the knob is in the off position. When the knob is turned on, the reed switch closes, powering a small microcontroller which beeps at regular intervals to indicate the burner is on.

It’s a tidy solution to a common problem, which could help many people – especially the elderly or the forgetful. It integrates neatly into existing cooktops without requiring major modification, and [Bob] has made the plans available if you wish to roll your own.

On the other end of the scale, you might want an alarm on your freezer, too.

A Clay Oven For Perfect Pizza Every Time

Perhaps your taste for pizza has never taken you beyond your local fast-food chain or a frozen pizza from the supermarket, but there are some people for whom only the most authentic will do. A wood-fired clay oven and nothing less is their pre-requisite, and lesser methods of pizza preparation simply aren’t good enough.

[Jan] is one of these pizza perfectionists, and his wood-fired oven is an interesting one because it eschews the traditional dome for a cylinder. His very detailed write-up gives us an interesting insight into its construction. He’s taken the bottom half of an oil drum as his base, and built and fired the clay oven itself around a wooden former. We see his early attempts at a former which distorted under the weight of clay, and we hear about how the clay required reinforcement with chicken wire and straw. Finally, we see the structure being dried out, before an impressive display when firing for the first time. The oven receives a coat of Rockwool insulation but [Jan] has a way to go to learn the oven’s characteristics. Still, this is an oven that will last to refine the perfect morsel given a bit of time.

We like the cylindrical design as an alternative to domed ovens, which can be a bit tricky to build. An oven may be a bit low-tech compared to some of Hackaday’s usual fare, but they can be no less difficult to get right. We’re no stranger to novel flame-based cookery, perhaps you might like to also take a look at this rocket grill.

DIY Tube Oven Brings The Heat To Homebrew Semiconductor Fab

Specialized processes require specialized tools and instruments, and processes don’t get much more specialized than the making of semiconductors. There’s a huge industry devoted to making the equipment needed for semiconductor fabrication plants, but most of it is fabulously expensive and out of reach to the home gamer. Besides, where’s the fun in buying when you can build your own fab lab stuff, like this DIY tube oven?

A tube oven isn’t much more complicated than it sounds — it’s just a tube that gets hot. Really, really hot — [Nixie] is shooting for 1,200 °C. Not just any materials will do for such an oven, of course, and this one is built out of blocks of fused alumina ceramic. The cavity for the tube was machined with a hole saw and a homebrew jig that keeps everything aligned; at first we wondered why he didn’t use his lathe, but then we realized that chucking a brittle block of ceramic would probably not end well. A smaller hole saw was used to make trenches for the Kanthal heating element and the whole thing was put in a custom stainless enclosure. A second post covers the control electronics and test runs up to 1,000°C, which ends up looking a little like the Eye of Sauron.

We’ve been following [Nixie]’s home semiconductor fab buildout for a while now, starting with a sputtering rig for thin-film deposition. It’s been interesting to watch the progress, and we’re eager to see where this all leads.