Dampen Workshop Noise With Paper Pulp And Kool-Aid — OH YEAH!

noise dampener

If you’re fortunate enough to have a garage and a workshop, you probably also have neighbors. The truly blessed must work within the confines of an HOA that restricts noise, porch couches, and most types of fun. [Mike] is among the truly blessed, and when he decided to design a cabinet for his CNC equipment, he took noise dampening into consideration.

[Mike]’s design isn’t a blanket noise dampener; it’s specifically designed for the high-pitch symphony of his router, compressor, and vacuum. He also sought to avoid vibrating the cabinet. To achieve this, the sound-dampening panels are hung on eye hooks with a 1/2″ gap between them and the frame. The backer boards are cut from 3/4″ plywood. [Mike] considered using cement board, but thought it might be overkill since he plants to shell the cabinet in a layer of 3/4″ plywood.

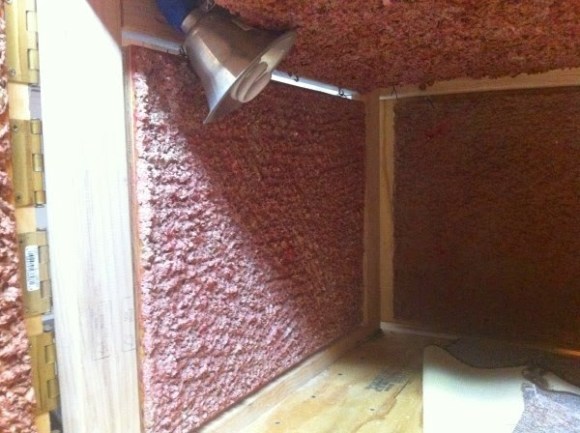
The deadening material is paper pulp made from various shredded papers. After soaking the shreds in water and blending the mixture to an oatmeal consistency, he drained most of the water through a cloth bag. Then he added just enough wood glue to hold the pulpy goo together. The tropical punch Kool-Aid powder isn’t just for looks; it provides visual confirmation of even glue distribution.

[Mike] made some tape walls around the edge of his backer boards to hold the mixture in place and painted on some wood glue to hold the pulp. He spread the tropical concoction to 1/2″ thickness with a tiling trowel to avoid compressing it. The peaks and valleys help scatter any sound that isn’t absorbed. Pudding awaits you after the jump.

Continue reading “Dampen Workshop Noise With Paper Pulp And Kool-Aid — OH YEAH!”

Roboartist Draws What It Sees

roboartist-vector-image-machine

The perfect balance of simplicity and complexity have been struck with this automated artist. The Roboartist is a vector drawing robot project which [Niazangels], [Maxarjun], and [Ashwin] have been documenting for the last few days. The killer feature of the build is the ability to process what is seen through a webcam so that it may be sketched as ink on paper by the robotic arm.

The arm itself has four stages, and as you can see in the video below, remarkably little slop. The remaining slight wiggle is just enough to make the images seem as if they were not printed to perfection, and we like that effect!

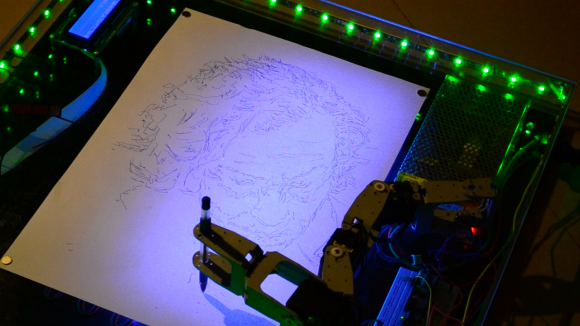
Above is a still of Roboartist working on a portrait of [Heath Ledger] in his role as Joker from The Dark Knight. The image import feature was used for this. It runs a tweaked version of the Canny Edge Detector to determine where the pen strokes go. This is an alternative to capturing the subject through the webcam. For now MATLAB is part of the software chain, but future work seeks to upgrade to more Open Source tools. The hardware itself uses an Arduino Mega to take input via USB or Bluetooth and drives the quartet of servo motors accordingly.

Continue reading “Roboartist Draws What It Sees”

An Elegant Timepiece From Paper And A Fistful Of Servos

papercraftClock

Segments rise from a sheer white surface to reveal the time in this papercraft digital / analog clock build by [Jacky Mok].

New York-based designer [Alvin Aronson] is responsible for the original, titled “D/A Clock,” which he built as a student at RISD using Corian instead of paper. [Aronson]’s design is also massive in comparison. It measures one meter wide by a half meter tall. Without access to either a 3D printer or to a laser cutter, [Jacky] instead reduces the scale of his interpretation and relies on cardstock as the primary construction material. His experience with papercraft typography leads to a design that anyone with an Exacto knife and a slice of patience should find manageable. [Jacky] ignores the Exacto option, however, and cuts his pieces with a tool we saw earlier this year: the Silhouette Portrait.

The clock’s electronics include an Arduino Uno, a servo motor controller, twenty-eight servos and an RTC breakout board that handles timekeeping. Each servo drives its own segment by sliding a paperclip forward or backward inside a small, hollow aluminum rod. Though we’re still holding out for a video of the finished papercraft build, you can watch a video of Aronson’s original clock after the break and see what inspired [Jacky’s] design.

Need another clock to envy? Last month’s build by [ebrithil] uses twenty-two servos to individually spin the segments. If you prefer that your clocks light up, [Aaron’s] o-scope transformation has you covered.

Continue reading “An Elegant Timepiece From Paper And A Fistful Of Servos”

Draw Your Own Vinyl Beats


The Dyskograf lets you make music with a magic marker. The musical installation looks much like a turntable for playing vinyl records. But instead of a spiraling groove containing the sounds, this uses marks on a paper disk to play sound samples.

You can see the light outline of several tracks on the paper disc shown above. By adding black marks the optical input of the Dyskograf knows when to start and end each sound. This is best illustrated in the video demonstration after the break.

The marker-based setup makes a lot of sense, and we think it would be perfect if the disc was a dry-erase board. It certainly makes it a lot easier to lay down new beats than this other optical turntable which required holes to be drilled in a vinyl record to play the sounds. While we’re on the topic you may also find this coin-based turntable sequencer of interest.

Continue reading “Draw Your Own Vinyl Beats”

Hacking A Brother Thermal Printer To Use Non-OEM Continuous Rolls

You can get your hands on a Brother thermal label printer for $65-75. But if you don’t want to buy the Brother branded continuous feed paper for it you’re out of luck. Unless you pull off this hack which lets you use any thermal paper you want with a Brother QL-500 printer.

The printer is tied to the OEM paper because of a pattern printed on the back of the roll. It’s basically an encoder strip made up of black rectangles spaced at regular intervals. Surely there are other brands that come with this pattern on them, but if you want to use paper without it the secret is in moving the sensor that reads that strip.

The brilliant solution is to use one of the white feed-gears as an encoder wheel. [CheapSkateVideo] used a magic marker to paint two opposite quarters of the gear black. He then removed the optical sensor and placed it on the side of the case facing the wheel. It needs to be adjusted along the radius of that gear until the timing is just right, but once it is you’re ready to go. The sensor is a safety feature to ensure there is media in the printer. If there’s not you can burn up the print head so keep that in mind. See the explanation in the video after the break.

Continue reading “Hacking A Brother Thermal Printer To Use Non-OEM Continuous Rolls”

Gold Leaf Circuit Board

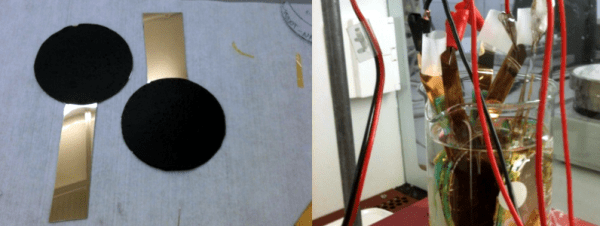
Ah, the glitter of gold… or fake gold, we’re not really sure. But [Mike Hogan] and [PJ Santoro] have been working with faux gold leaf as a conductor on circuit boards. The device you see above is mounted on metal-covered paper substrate and it really works.

They started by applying spray adhesive to heavy paper to make the gold-clad they needed. This was cut down into hexagons in homage to their hackerspace, Hive76 in Philadelphia. From there the shape of the microcontroller (an MSP430 G2211 in this case) to prevent shorts under the chip. The leads were flattened to interface well with the gold contacts, and a hobby knife was used to score the traces. Some careful soldering made up the final connections, and they were in business.

Oh, wait; chip on board but nothing on chip. They forgot to program it first! Since there’s no header they needed an easy way to interface with the board. The clever guys used the power of magnets to hold alligator clips in place. See how they did that in the demo video after the break.

They’re also working on some boards that use conductive ink similar to this hack but we haven’t seen a write-up from these two about those experiments… yet.

Continue reading “Gold Leaf Circuit Board”

Printable Solar Cells That Can Be Folded Up When Not In Use

Here’s a photovoltaic cell that can be printed onto paper. The manufacturing technique is almost as simple as using an inkjet printer. The secret is in the ink itself. It takes five layers deposited on the paper in a vacuum chamber. But that’s a heck of a lot easier than current solar cell fabrication practices. In fact, is sounds like the printing process is very similar to how potato chip bags are made. This is significant, because it could mean a fast track to mass production for the technology.

It isn’t just the easy printing process that excites us. Check out the video after the break where a test cell is placed on top of a light source while being monitored by a multimeter. It’s been folded like a fan and you can see a researcher sinch up the cell into a small form for storage. It’s a little counter-intuitive; for instance, you wouldn’t want to make a window shade out of it because it would have to be down during the day to get power. Be we think there’s got to be some great use for these foldable properties. Continue reading “Printable Solar Cells That Can Be Folded Up When Not In Use”