How To Retrofit A Pick And Place Machine For OpenPnP, In Detail

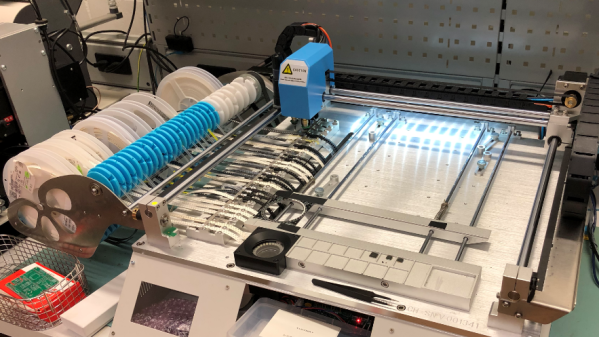
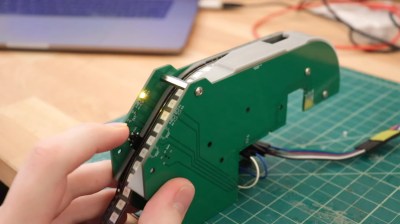
[Erich Styger] owns a Charmhigh CHM-T36VA pick and place machine, which he describes as well-built and a great value of hardware for the money. However, the software end is less impressive, with a proprietary controller that is functional but not great. The good news is that it is possible to retrofit the machine to use the OpenPnP framework, which is open-source and offers more features. Even better, [Erich] has already done and documented all the hard parts!

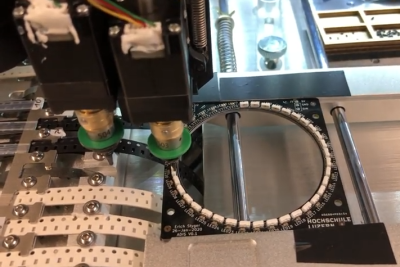
The CHM-T36VA has two heads, vision system, and uses drag feeders.

The conversion requires upgrading a few hardware parts such as the cameras, replacing the controller’s firmware, then installing and configuring OpenPnP (which runs on an attached PC.)

[Erich] does not recommend this conversion for anyone who is not very familiar with electronics, or has any worries about voiding warranties. Barring that, he suspects the conversion could be done in about a day or two’s worth of focused work. It took him two weeks, including time spent fine-tuning the first production job. He says the bulk of the time was spent on configuration, but he has shared his configuration on GitHub in the hopes that it will save a lot of time for anyone using the same hardware.

After populating some 300 boards and placing over 7000 parts, he’s very happy with the results. The machine places between 600 and 700 parts per hour, so speed might not be amazing but it’s perfectly serviceable. [Erich] finds that while the machine runs a little slower than it did with the original controller, it also runs much smoother and quieter overall. In return he gets what he truly wanted: a pick and place machine whose operation and configuration is entirely open and accessible. You can see it in action in the video, embedded below.

Continue reading “How To Retrofit A Pick And Place Machine For OpenPnP, In Detail”

Hackaday Podcast 068: Picky Feeders, Slaggy Tables, Wheelie Droids, And Janky Batteries

Hackaday editors Elliot Williams and Mike Szczys ride the rails of hackerdom, exploring the sweetest hacks of the past week. There’s a dead simple component feeder for a pick and place (or any bench that hand-stuffs SMD), batteries for any accomplished mixologist, and a droid build that’s every bit as cool as its Star Wars origins. Plus we gab about obsolescence in the auto industry, fawn over a frugal microcontroller, and ogle some old iron.

Take a look at the links below if you want to follow along, and as always, tell us what you think about this episode in the comments!

Direct download (60 MB or so.)

Continue reading “Hackaday Podcast 068: Picky Feeders, Slaggy Tables, Wheelie Droids, And Janky Batteries”

Hackaday Podcast 067: Winking Out Of IoT, Seas Of LEDs, Stuffing PCBs, And Vectrex Is Awesome

Hackaday editors Mike Szczys and Elliot Williams explore the coolest hacks of the past 168 hours. The big news this week: will Wink customers pony up $5 a month to turn their lights on and off? There’s a new open source design for a pick and place machine. You may not have a Vectrex gaming console, but there’s a scratch-built board that can turn you oscilloscope into one. And you just can’t miss this LED sign technology that programs every pixel using projection mapping.

Take a look at the links below if you want to follow along, and as always, tell us what you think about this episode in the comments!

Direct download (60 MB or so.)

Continue reading “Hackaday Podcast 067: Winking Out Of IoT, Seas Of LEDs, Stuffing PCBs, And Vectrex Is Awesome”

Printable, Castable Feeders Simplify Pick-and-Place Component Management

It goes without saying that we love to see all the clever ways people have come up with to populate their printed circuit boards, especially the automated solutions. The idea of manually picking and placing nearly-microscopic components is reason enough to add a pick and place to the shop, but that usually leaves the problem of feeding components to the imagination of the user. And this mass-production-ready passive component feeder is a great example of that kind of imagination.

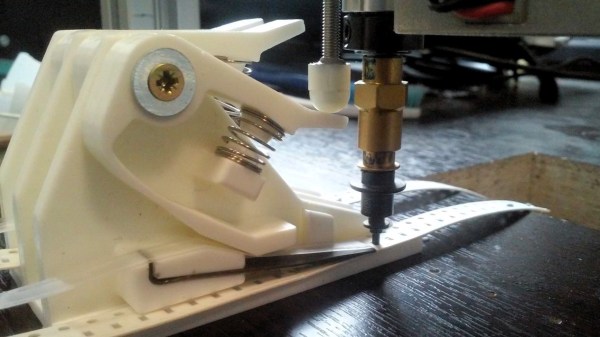
Almost every design we’ve seen for homebrew PnP component feeders have one of two things in common: they’re 3D-printed, or they’re somewhat complex. Not that those are bad things, but they do raise issues. Printing enough feeders for even a moderately large project would take forever, and the more motors and sensors a feeder has, the greater the chance of a breakdown. [dining-philosopher] solved both these problems with a simple design using only two parts, which can be resin cast. A lever arm is depressed by a plunger that’s attached to the LitePlacer tool, offset just enough so that the suction cup is lined up with the component location on the tape. A pawl in the lower arm moves forward when the tool leaves after picking up the part, engaging with the tape sprocket holes and advancing to the next component.

[dining-philosopher] didn’t attack the cover film peeling problem in his version, choosing to peel it off manually and use a weight to keep it taut and expose the next component. But in a nice example of collaboration, [Jed Smith] added an automatic film peeler to the original design. It complicates things a bit, but the peeler is powered by the advancing tape, so it’s probably worth it.

Continue reading “Printable, Castable Feeders Simplify Pick-and-Place Component Management”

Open Source Pick And Place Has A $450 BOM Cost

Give your grizzled and cramped hands a break from stuffing boards with surface mount components. This is the job of pick and place machine, and over the years these tools of the trade for Printed Circuit Board Assembly (PCBA) have gotten closer to reality for the home shop; with some models diving below the $10,000 mark. But if you’re not doing it professionally, those are still unobtanium.

The cost of this one, on the other hand, could be explained away as a project in itself. You’re not buying a $450 shop tool, you’re purchasing materials to chase the fever dream of building an open source pick and place machine. There are two major parts here, an X/Y/Z machine tool that can also rotate the vacuum-based parts picker, and the feeders that reel out components to be placed. All of this is working, but there’s still a long road to travel before it becomes a set and forget machine.

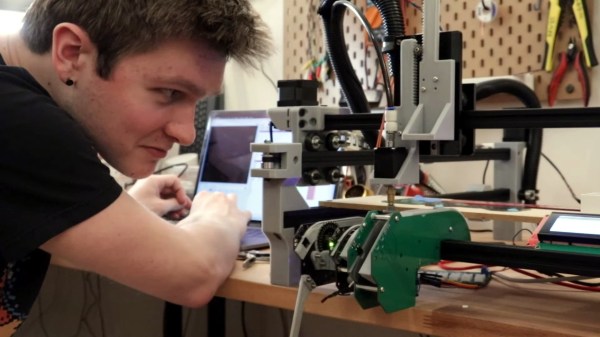
The rubber hits the road in two ways with pick and place machines: the feeders, and the optical placement. The feeders are where [Stephen Hawes] has done a ton of work, all shown in his video series that began back in January. The stackup of PCBs and 3D-prints hangs on the front rail of the gantry assembly, is adjustable for tape widths, and uses an interesting PCB encoder wheel and worm-gear for fine-tuning the feed. [Stephen’s] main controller board, a RAMPS shield for and Arduino Mega that runs a customized version of Marlin, can work with up to 32 of these feeders.

So far it doesn’t look like he’s tackled a vision system, although the Bill of Materials does include  “Downwards Camera”, confirming this is a planned feature. Vision is crucial in commercial offerings, with at least one downward camera for precise board positioning, and often an up-facing camera as well to ensure component position and orientation (if not multiple cameras for each purpose). Without these, the machine would be dead reckoning and that can lead to drift over the size of the board and the duration of the placement run as well as axial misalignment. Adding vision shouldn’t be a ground-up effort though, as [Stephen] chose to use OpenPnP to drive the machine and that project already has vision support. This will be much simpler to add when compared to the complexity of the feeders.

[Stephen] admits that much work still needs to be done and he would love to have help dialing in the performance of the feeder design, and fleshing out features on the road to perfection. Although we suspect that as in the early days of bootstrapping 3D printers, a project like this can never be truly finished. At least it’ll make his next run of LED glowties a lot easier to fabricate.

Continue reading “Open Source Pick And Place Has A $450 BOM Cost”

A Ploopy Pick And Place

A fair number of hackers reach that awkward age in their careers – too old for manual pick and place, but too young for a full-fledged PnP machine. The obvious solution is to build your own PnP, which can be as simple as putting a suction cup on the Z-axis of an old 3D-printer. Feeding parts into the pick and place, though, can be a thorny problem.

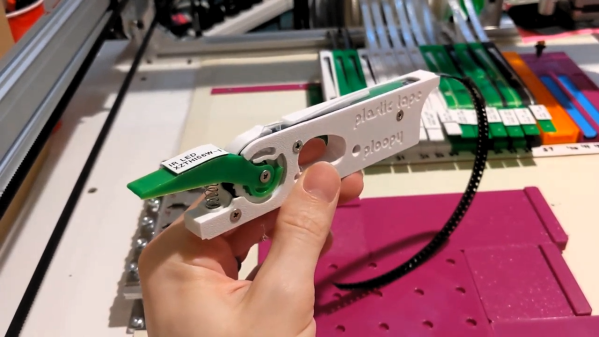
Or not, if you think your way through it like [Phil Lam] did and build these semi-automated SMD tape feeders. Built for 8-mm plastic or paper tapes, the feeders are 3D-printed assemblies that fit into a rack that’s just inside the work envelope of a pick and place machine. Each feeder has a slot in the top for the tape, which is advanced by using the Z-axis of the PnP to depress a lever on the front of the case. A long tongue in the tape slot gradually peels back the tape’s cover to expose a part, which is then picked up by the PnP suction cup. Any machine should work; [Phil] uses his with a LitePlacer. We like the idea that parts stay protected until they’re needed; the satisfyingly clicky lever action is pretty cool too. See it briefly in action in the video below.

It looks like [Phil] built this in support of his popular Ploopy trackball, which is available both as a kit and fully assembled. We think the feeder design is great whether you’re using PnP or not, although here’s a simpler cassette design for purely manual SMD work.

Continue reading “A Ploopy Pick And Place”

3D-Printed Magazines Tame The SMD Tape Beast

Chances are pretty good that you’ve got a box or a bin somewhere in your shop with coils of SMD component tapes in it. If you’re lucky, the coils are somewhat contained in their conductive Mylar bags; if you’re more like us, the tapes are flopping around loose in an attempt to seemingly tie themselves together. In either case, these 3D-printed SMD magazines will bring a little order to the chaos, and make board assembly a little bit easier.

When we saw [Robin Reiter]’s build, we thought these would be cassettes for some sort of pick-and-place machine. But while they certainly look like they could be adapted to an automated PnP setup, [Robin]’s main goal was to provide organized storage for loose tapes. Each magazine has a circular reservoir to hold the coiled tape, with an exit slot at the front and a wedge that directs the cover tape in the opposite direction. This removes the cover tape to expose the components, clears it away from the pickup area, and as a bonus, allows the component tape to be advanced just by pulling back on the cover. Each magazine has a spring-loaded latch that clips onto a base that looks a bit like a DIN-rail; the weighted base holds several magazines and makes it easy to set up a manual pick-and-place session. The video below shows all the details.

For certain personality types, this really scratches an itch. We love the modular design, and the organization that these would bring to our shop would really help clean things up a bit. And if [Robin] were ever to take this design to the next level, adding something like this could be useful.

Continue reading “3D-Printed Magazines Tame The SMD Tape Beast”