While Apple’s modern operating systems may seem like they exist independently of the rest of the computing world, they are actually close cousins of modern versions of Linux. The primary link between the two is that Apple’s offerings are Unix-based and even though Linux isn’t Unix in the strict sense, it’s built to be extremely Unix-like. Plenty of Linux software is POSIX-compliant, meaning it is effectively compatible with true Unix. But what can we do with that information? Well, to start, we can run Linux desktop environments on top of an iOS install on your favorite iPhone or iPad.
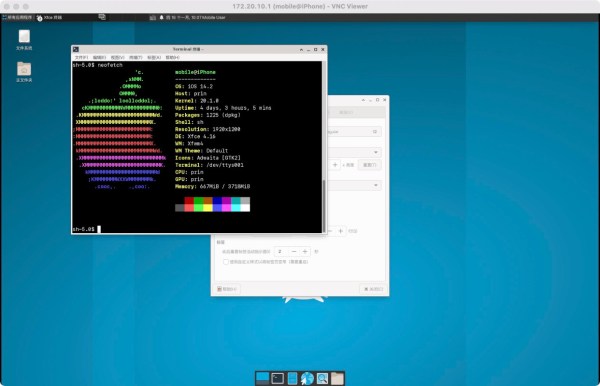
To be sure, we will be filing this hack in the “because you can” category. [Torrekie], the creator of this project, has plenty of builds (Google translate from Chinese) where the boundaries between things like Linux and Unix are either blurred or nonexistant. In this particular project, a jailbroken iOS device is essentially gifted a ported version of XFCE which is able to run fairly well on iOS thanks to its compatibility with Unix environments. Details on how this was accomplished are sparse without a full investigation of the source code right now, but you can head over to the repository if you are curious enough to try this for yourself. [Torrekie] does note that this will only work with iOS devices that have been jailbroken using the “unc0ver” jailbreak only though.
To be sure, the relationship between modern Apple operating systems and Linux is about as close as modern Porsches and the Volkswagen Beetle, but either way the two are close enough to get interesting and impressive mashups like this project. For now only time will tell if using XFCE on iOS will be useful for anyone, but other projects bridging the gap between Linux and Apple are sure to be more immediately fruitful.