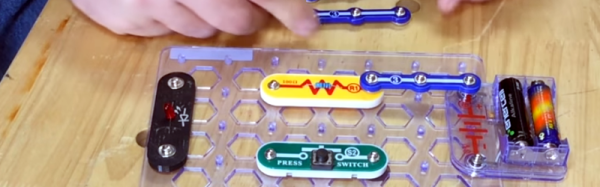
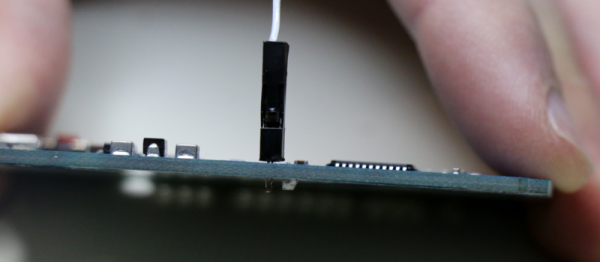
For just about as long as there have been electronics, there’s been a search for a way to let students and hobbyists build projects without a lot of effort. A board with Fahnestock clips was probably the first attempt. Today, it is more often the ubiquitous solderless breadboard. In between, we’ve seen copper pipe pieces and rubber bands, components mounted on magnets that hold them and make connections, and other even less probable schemes. A few years back, a new method appeared: Snap Circuits. The name almost says it all. A baseboard has mounting holes for different components. All the components make their electrical connections and mechanical connections through a common snap like you might find on clothing. Even the wires are little segments with snaps at both ends.
One problem with any system like this is how to integrate custom components. Of course, with the snaps, that’s not very hard, but [Chuck Hellebuyck] got creative with TinkerCad and worked out how to 3D print custom modules for the system. You can see his video, below.
It would be nice if your 3D printer could spit out PC boards. There’s been lots of work done to make that happen, mostly centered on depositing conductive material, although we’ve been surprised no one has worked out how to just 3D print a plastic resist mask.
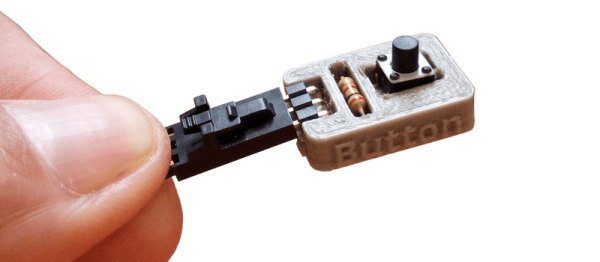
We recently found a GitHub group for [PCBPrints] which has small modules that would be useful in prototyping and breadboarding. They are really just carriers that create plug in modules for switches, LEDs, and the like. It looks like this is a aggregated list of other GitHub projects that realize these designs. The group is in Spanish, but Google Translate is your friend, as usual. You can see a video of one of the button modules in action, below.
Multi-talented hacker extraordinaire and electrical engineer [Akiba] is based in Japan, and this makes it just a hop, skip, and a jump over to Shenzhen, China, the hardware capital of the world. He’s led a number of manufacturing tours aimed at acquainting hackers with the resources there, and now he’s giving you the benefit of his experience in a 30-minute video. It’s great.
Ben Krasnow is one of those people no one has a bad opinion of. He’s part of the team at Verily (Google’s Life Science Alphabit), where he’s busy curing cancer. He co-founded Valve’s hardware division and his YouTube channel, Applied Science, is an exploration of building very high-tech tools very quickly and on a very low budget. Ben has built everything from an electron microscope to a liquid nitrogen generator to a robot that makes individual chocolate chip cookies with ingredients in different proportions. He’s curing cancer and finding the perfect chocolate chip cookie recipe.
The focus of Ben’s talk at this year’s Hackaday SuperConference is building low-cost scientific apparatus quickly. From Applied Science, Ben has cemented his position as a wizard who can find anything either on eBay or at a surplus store. The real trick, Ben tells us, is getting his boss and accounting to understand this rapid prototyping mindset.
As many of the members of the Brian Benchoff hate/fan club know, the life of a Hackaday writer is nomadic and filled with exciting adventures. Jenny List is actually crime fighting cyborg (think Bond); it’s why she knows so much about electronics. James Hobson is Iron Man. The list goes on. There are lots of unnecessary details, but to summarize: Last month I was living in Washington State, this month I am in Paris, France. It’s really nice here, the buildings are beautiful, the cathedrals stunning, and the food significantly tastier.
However, as a contracting engineer with a project involving a deadline; I found myself in dire need of a significant amount of quick turn-around 3D printing during my working vacation to France. Through a lot of trial and tribulation, I eventually discovered that the most cost-effective way to get the prints done… was to just buy a cheap 3D printer and run it into the ground.
I was spoiled by my hackerspace in Louisville, KY. They had enough 3D printers to go around and the pricing was fixed at 10 cents a gram. For the amount of printing I needed, this would be a perfectly economical arrangement. So, I set out to find a hackerspace in Paris. Whereupon I reached my first and obvious problem; I speak very little French.
Most of the hackerspaces listed in Paris are, as far as I can tell, illegally squatting in a scary part of town, exclusive to a university, exclusive to a business, or closed down.
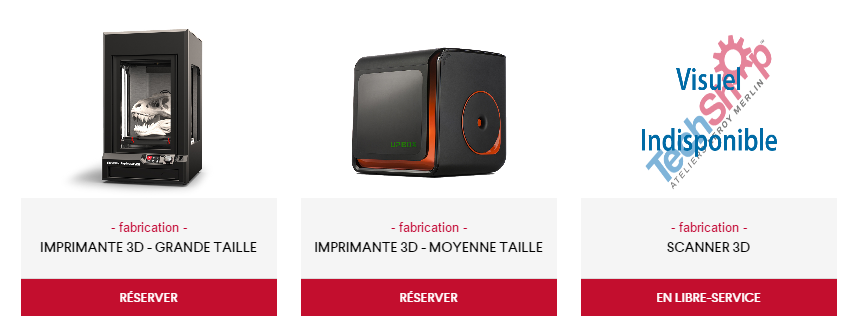
So, I googled a bit harder. Wow! Apparently a Techshop opened up in Paris. It’s about an hour away from where I live, but having toured a Techshop before, I knew they would have the nice version of the tool I need. So, one morning bright and early I got on the metro and headed over to get a tour of the place.
What I’ve discovered is this: If you need things like a water jet cutter, welding station, or a 50 grand CNC machine, Techshop is a really economical way to get access to and play with tools like that. However, if all you want is access to a laser cutter and a 3D printer, it will set you back five-hundred dollars and you’ll have to jump through some incredibly annoying hoops just to get access to them.
Only a small fee of 400 euros to used these bad boys.
See, most pieces of equipment at a Techshop need to be reserved. Only the 150 euro and 300 euro a month membership tiers can reserve equipment. The 150 tier can reserve something for two hours, the 300, four. If you’ve ever 3D printed you can immediately spot the problem with that. For small prints this could be workable, but if you have a lot of large prints four hours is just not enough. However, there is a work around. If you’re willing to take a metro ride late at night, arriving at the Techshop at 10:00pm, you can, of course, run a print overnight.
There were two more glitches in the Techshop plan. To be able to touch the printers required a two-hour course with a 100 euros fee. The filament also ran 65 euro per 500 g. My printing needs would easily cost me tens of hours in travel and had a starting fee of 400 euros to be workable.
The entrance to Usine.io is terrifying. It’s this massive pitch black hallway. I had no idea if I was in the right place until I got to the desk.
Now, I’m not saying Techshop isn’t absolutely wonderful when it comes to more advanced tools. It’s probably the only Hackerspace in the world where you’re entitled to expect that the CNC machine is in working order, properly trammed, and there are actually cutting bits for it. However, if all you need is a 3D printer, don’t bother.
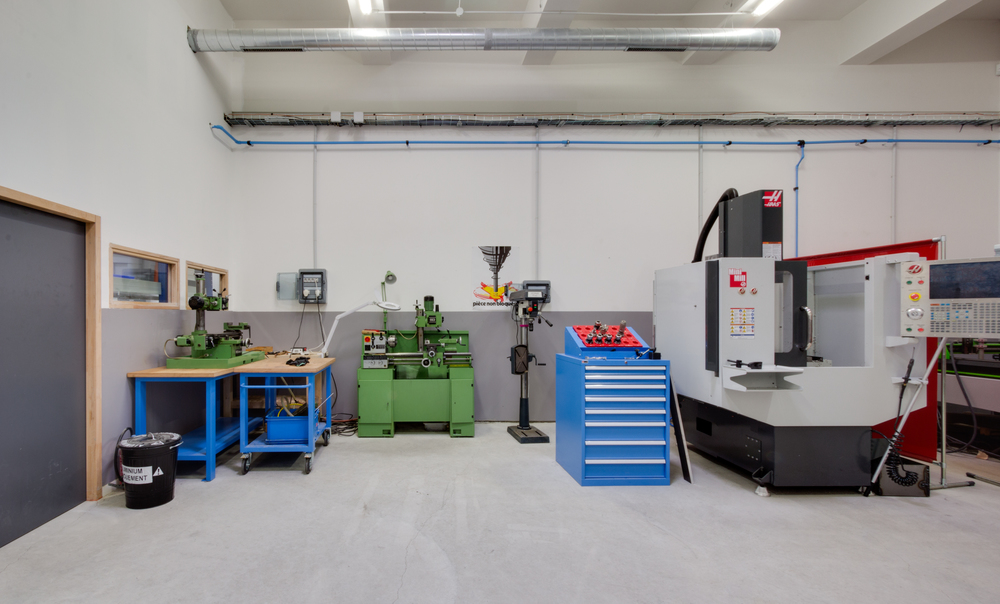
Now, I asked around some more and found that there was a competing space in Paris called Usine.io. It had a flat fee of 180 euros a month and the training was free. I actually did end up getting a membership here for access to a CNC and basic tools, but for 3D printing it was a bust. They only had three printers serving a sizable membership base. This left the printers with a 48 hour line to get your print started and a maximum of 40 hours of printing a month. A die-hard user of 3D printing can easily use 40 hours in 3 days. Because I had to test many iterations for my project, my need the next month was easily triple that number.
However, the shop itself is really nicely outfitted.
The last avenue available to me aside from 3D printer ownership was contracting someone with a 3D printer to run my prints for me. However, after asking around I found the service to be quite expensive. Rent isn’t cheap in Paris after all. If I just needed a single small print it would be worth it, but if I needed lots of printing it would quickly add up to be more money than I had.
That left me with one option. Which, honestly, sounded absolutely insane for someone visiting a country for a few months. Buy a printer. It’s an indication of the state of 3D printing that the price has come down so far that buying a printer is more economical than having someone do it for you. Even a few years ago this was not possible. However, European Amazon Prime had a workable enough import printer to my doorstep faster than any commercially available service could even process my order. We’ve come a long way since the Darwin. That’s for sure.
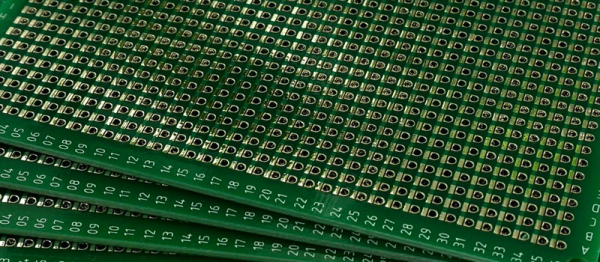
Back in 2015 [Ben Wang] attempted to re-invent the protoboard with the Perf+. Not long afterward, some improvements (more convenient hole size and better solder mask among others) yielded an updated version which I purchased. It’s an interesting concept and after making my first board with it here are my thoughts on what it does well, what it’s like to use, and what place it might have in a workshop.
Perf+ Overview
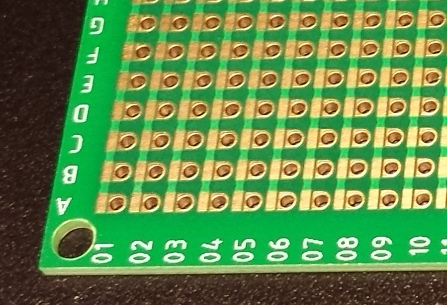
One side of a Perf+ board. Each hole can selectively connect to the bus next to it with a solder bridge. These bus strips are vertical. The ones on the back are horizontal.
The Perf+ is two-sided perfboard with a twist. In the image to the left, each column of individual holes has a bus running alongside. Each hole can selectively connect to its adjacent bus via a solder bridge. These bus traces are independent of each other and run vertically on the side shown, and horizontally on the back.
Each individual hole is therefore isolated by default but can be connected to one, both, or neither of the bus traces on either side of the board. Since these traces run vertically on one side and horizontally on the other, any hole on the board can be connected to any other hole on the board with as few as two solder bridges and without a single jumper wire.
It’s an innovative idea, but is it a reasonable replacement for perfboard or busboard? I found out by using it to assemble a simple prototype.
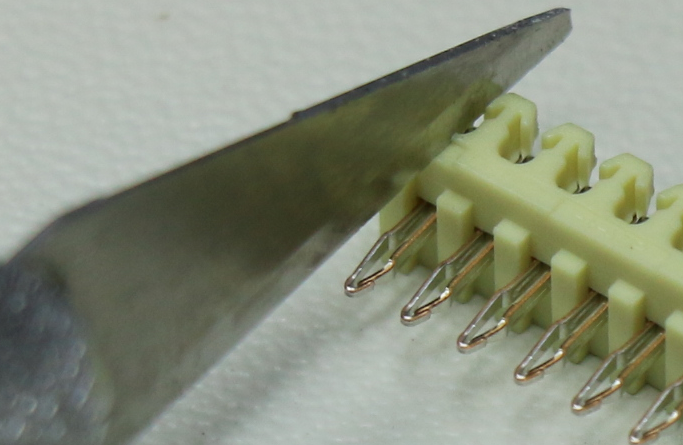
Like the fictitious invention of the Hula Hoop in Hudsucker Proxy, [David Spinden]’s big idea is small and obvious once you’ve seen it. And we’re not saying that’s a bad thing at all. What he’s done is to make a new kind of prototyping connector; one that hooks into a through-plated hole like a pogo pin, but in the horizontal direction.
This means that your test-points can do double duty as header connectors, when you need to make something more permanent, or vice-versa. That’s a lot of flexibility for a little wire, and it takes one more (mildly annoying) step out of prototyping — populating headers.
[David] makes them out of readily available header pins that already have the desired spring-like profile, and simply cuts them out and connects them to a standard Dupont-style hookup wire. Great stuff.
When we opened up the “Anything Goes” category for the Hackaday Prize, we meant it. We’re excited to see people entering large and small ideas that improve the world, even if it’s just the world of hackers.