FT-2232 Bridges Python And I2C/SPI

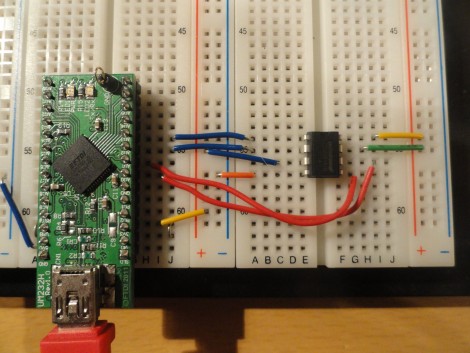
You might already have the hardware on hand to easily interface I2C and SPI devices with Python scripts on your computer. The board seen above is an FT-2232 breakout board. These chips are often used to facilitate JTAG programming via USB, but they have other features that might be useful to you as well. The chip has a Multi-Protocol Synchronous Serial Engine (MPSSE) which can speak the I2C and SPI protocols, you just need to know how to active them in your code.

[Craig] makes this easy with his MPSSE Python wrapper. Simply install his module, and you’ll be able to import all the commands you need. He demonstrates reading the data out of a 1 MB SPI flash memory chip. This could be used for a lot more, including debugging peripherals à la the Bus Pirate, or reprogramming chips to add to your projects (we’re thinking font arrays and sprites for displays, or look-up tables).

If you’re not aware, these FTDI chips were the go-to for USB support for a long time. We’ve got a guide for bit-banging using this hardware. Lately more chips have become available with USB hardware built-in. They’re quite useful and cost-effective, especially with the availability of open-source stacks like the LUFA project.
Using WebSocket With PIC Microcontrollers

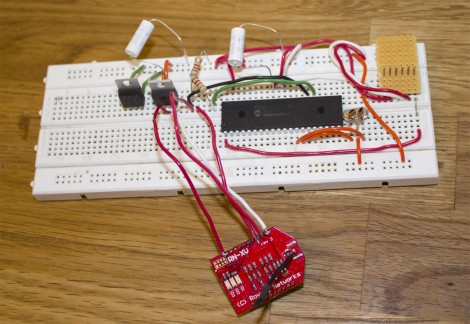
[Blaise Jarrett] has been grinding away to get the WebSocket protocol to play nicely with PIC microcontrollers. Here he’s using the PIC 18F4620 along with a Roving Networks RN-XV WiFi module to get the device on the network. He had started with a smaller processor but ran into some RAM restrictions so keep that in mind when choosing your hardware.

This project was spawned after seeing the mBed feature a few days back which combined that board along with a WebSocket library and HTML5 to pull off some pretty amazing stuff. [Blaise] doesn’t have quite as much polish on the web client yet, but he has recreated the data transfer method and improved on that project by moving to the newer version 13 of WebSockets. The protocol is kind of a moving target as it is still in the process of standardization.

The backend is a server called AutoBahn which is written in python. It comes along with client-side web server examples which gave him a chance to get up and running quickly. From there he got down to work with the WebSocket communications. They’re a set of strings that look very much like HTML headers. He outlines each command and some of the hangups one might run into with implementation. After reading what it takes to get this going it seems less complicated than we thought, but it’s obvious why you’ll need a healthy chunk of RAM to pull it off.

RF Sniffing On-the-go

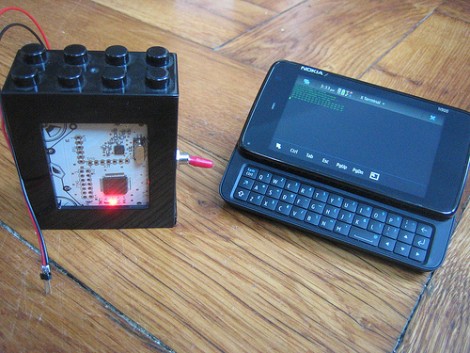
It’s been a while since we checked in on [Travis Goodspeed]. His latest post makes RF sniffing with the Next HOPE badge more portable by ditching the need to display data on a computer. He’s built on the work he did at the beginning of the year, replacing the FTDI chip on the badge with a Bluetooth module. Now he can use his Nokia N900 as a GoodFET terminal to not only display the packets pulled from the air, but the control the badge as well.

Previously, the client running on the computer was communicating with the badge via a serial connection. To get it working on the N900 [Travis] transitioned from using py-serial over to using py-bluez. All of the code changes are available from the GoodFET repository.

He’s got a few other tricks planned for this concept. He put in a parts order to add Bluetooth to the Girltech IM-ME. The pretty pink pager has the same radio chip on board, so adding Bluetooth connectivity will allow it to be used in the same way. There are also plans in the works to add a couple other packet sniffing protocols to the bag of tricks, including ZigBee.

Which Resistor Values Should You Order For All Circumstances?

A hard drive crash, and some other happenings that aren’t entirely clear to us, led [Devbisme] to put in a parts order. As he wanted to make the most of his shipping costs, he decided to fill out the order with parts that he’ll use eventually. He’s been working with surface mount designs and wanted to move from using resistors with 0805 packages to the 0603. Having nothing on hand, he devised a way to account for almost all standard values with the fewest number of different resistors.

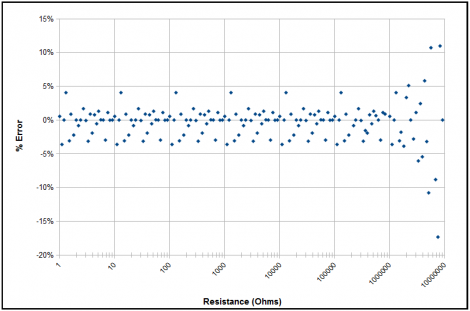
That’s a mouthful, but what he actually did was figure out what combinations of resistors can best be wired in parallel to achieve a different standard resistance value. This way, if he doesn’t have a specific value he can solder one 0603 surface mount resistor on top of another one to get there. He ended up writing a Python program to best calculate this set of values. It came up with a set that lets him synthesize 159 of the 168 standard resistor values within +/- 4% using just 19 actual resistor values. His method requires anywhere from one to three resistors to get to each value. Soldering three 0603 packages on top of each other might not be the most fun, but it makes for easy parts inventory management.

Python On A Microcontroller

The team at LeafLabs was looking for something cool to do with their new ARM development board. [AJ] asked if anyone had ever played around with Python, so [Dave] cooked up an implementation of PyMite and put it on a Maple board. While the writeup is only about blinking a LED with a microcontroller, they’re doing it with Python, interactively, and at runtime.

The build uses the Maple Native board the team is developing. The board has a 32-bit ARM chip with 1 Meg of RAM – more than enough horsepower to run PyMite. The tutorial for putting PyMite on a Maple is up on the LeafLabs wiki.

PyMite is theoretically able to control every pin on the Maple Native and do just about everything a regular Python distro can do. The LeafLabs team is still working on the necessary libraries for their board (although we don’t see anything on the Google code page), so right now only blinking the LED is supported. Still, it’s pretty cool to have Python in your pocket.

A Cellphone Based Interactive Voice Response System

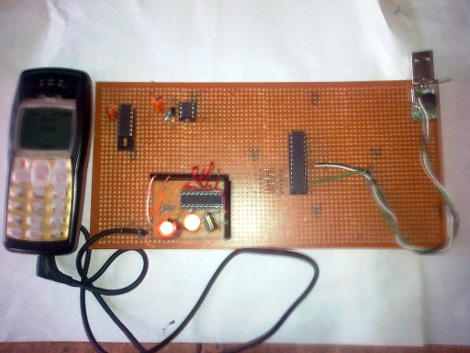
We’re all familiar with IVRS systems that let you access information using a touch-tone telephone. [Achu Wilso] built his own version which uses a cellphone, microcontroller, and computer.

The cellphone is monitored by an LM324 op-amp with an attached 555 timer chip. When a call comes in the voltage on the headphone output goes high, activating the timer circuit. If it goes low and does not go high again for about 25 seconds the call will be ended. Each incoming touch tone acts as a keepalive for the circuit.

An MT8870 DTMF (touch tone) decoder chip monitors the user input. An ATmega8 microcontroller grabs the decoded touch tones from that chip, and pushes them to a PC via USB. The PC-side software is written in Python, using MySQL bindings to access database information. eSpeak, the open source speech synthesizer software is used to read menu and database information back to the caller.

Not a bad little system, we wish there was an audio clip so we could hear it in action.

Zigbee Home Automation Gives Us Another Reason Not To Get Up

[Russell] sent in a neat home automation project he’s been working on. Even though the project only has two devices so far, we can already see the potential of his project.

Instead of the X10 standard that has been a staple of home automation for more than 30 years, [Russell] went with ZigBee modules. Aside from being much faster and more flexible than X10 home automation modules, ZigBees also open up a bunch of projects that would be impossible if he went with X10. With some well-placed IR transmitters hidden in his living room, it would be possible to have a TV and cable box controlled via the Internet.

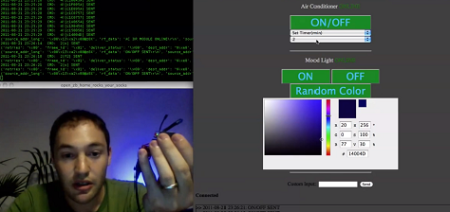
So far, [Russell] built an network-controlled RGB ‘mood lamp’ and an infrared remote for his central air. Everything is controlled through a web app, and [Russell] says that additional modules can be easily added to the code.

Check out [Russell]’s demo of his project after the break.

Continue reading “Zigbee Home Automation Gives Us Another Reason Not To Get Up”