Rapid Prototyping PCBs With The Circuit Graver

Walking around the alley at Hackaday Supercon 2024, we noticed an interesting project was getting quite a bit of attention, so we got nearer for a close-up. The ‘Circuit Graver’ by [Zach Fredin] is an unconventional PCB milling machine, utilizing many 3D printed parts, the familiar bed-slinger style Cartesian bot layout and a unique cutting head. The cutting tool, which started life as a tungsten carbide lathe tool, is held on a rotary (‘R’) axis but can also move vertically via a flexure-loaded carriage driven by a 13 kg servo motor.

The stocky flexure took a lot of iteration, as the build logs will show. Despite a wild goose chase attempting to measure the cutting force, a complete machine solution was found by simply making everything stiff enough to prevent the tool from chattering across the surface of the FR4 blank. Controlling and maintaining the rake angle was a critical parameter here. [Zach] actually took an additional step, which we likely wouldn’t have thought of, to have some copper blanks pre-fabricated to the required size and finished with an ENIG coating. It’s definitely a smart move!

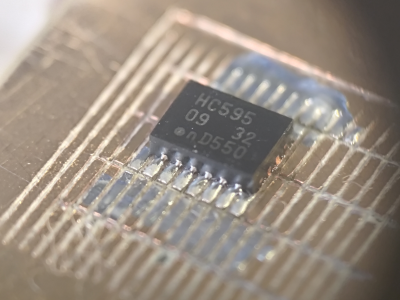
To allow the production of PCB-class feature sizes compatible with a traditional PCB router, the cutting tool was sharpened to a much smaller point than would be used in a lathe using a stone. This reduced the point size sufficiently to allow feature sizes down to 4 mils, or at least that’s what initial characterization implied was viable.  As you can see from the build logs, [Zach] has achieved a repeatable enough process to allow building a simple circuit using an SMT 74HC595 and some 0402 LEDs to create an SAO for this year’s Supercon badge. Neat stuff!

We see a fair few PCB mills, some 3D printed, and some not. Here’s a nice one that fits in that former category. Milling PCBs is quite a good solution for the rapid prototyping of electronics. Here’s a guide about that.

Continue reading “Rapid Prototyping PCBs With The Circuit Graver”

No Solder! Squeeze Your Parts To The PCB

What’s solder for, anyway? It’s just the stuff that sticks the parts to the PCB. If you’re rapid prototyping, possibly with expensive components, and want to be able to remove chips from the board easily when you spin up the next iteration, it would be great if you didn’t have to de-solder them to move on. If only you could hold the parts without the solder…

That’s exactly the goal behind [Zeyu Yan] et al’s SolderlessPCB, which uses custom 3D printed plastic covers to do the holding. And it has the knock-on benefit of serving as a simple case.

In their paper, they document some clever topologies to make sure that the parts are held down firmly to the board, with the majority of the force coming from screws. We especially like the little hold-down wings for use with SMD capacitors or resistors, although we could absolutely see saving the technique exclusively for the more high value components to simplify design work on the 3DP frame. Still, with the ability to automatically generate 3D models of the board, parts included, this should be something that can be automated away.

The group is doing this with SLA 3D printing, and we imagine that the resolution is important. You could try it with an FDM printer, though. Let us know if you do!

This is the same research group that is responsible for the laser-cut sheet-PCB origami. There’s clearly some creative thinking going on over there.

Lego Plays Electronic Drums

The ability to quickly try out an idea, and then expand and develop it, is what rapid prototyping is all about. Although we tend to think of 3D printing when rapid prototyping is mentioned, [Brick Technology] reminds us of the power of Lego, as he rapidly builds and improves an electromechanical drum machine.

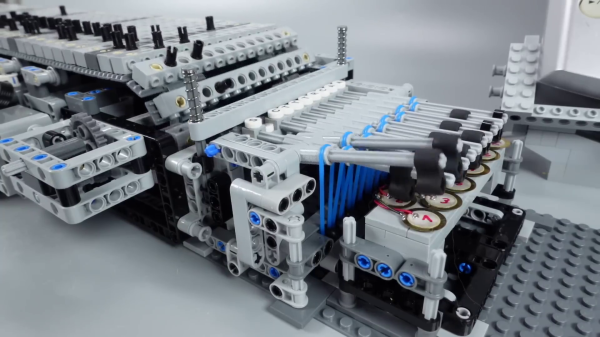
Using Lego Technic pieces, he starts with a simple music box-style drum with moveable pins that pluck on spring-loaded levers, which in turn hit piezoelectric discs. The electronics side is simple, with the discs wired to a Roland sound module from an existing electronic drum kit. With the ability to instantly adjust, add and remove pieces, he quickly finds and fixes the problem of getting eleven hammer mechanisms together and working smoothly.

To get around the limited pin space on the drum and increase the length and variation potential of the rhythms, [Brick Technology] moved to a belt design that can accommodate significantly more pins. He also added an electric motor and various gearbox ratios for consistent and adjustable tempo. Together with his water vortex ball machine, he makes us think our workshops probably need a few hundred Lego Technic pieces.

Continue reading “Lego Plays Electronic Drums”

Used Facemasks Turned Into Rapid Antigen Tests With Injection Molding

Here’s a little eye-opener for you: next time you’re taking a walk, cast your eyes to the ground for a bit and see how far you can go without spotting a carelessly discarded face mask. In our experience, it’s no more than a block or two, especially if you live near a school. Masks and other disposal artifacts of the COVID-19 pandemic have turned into a menace, and uncounted billions of the things will be clogging up landfills, waterways, and byways for decades to come.

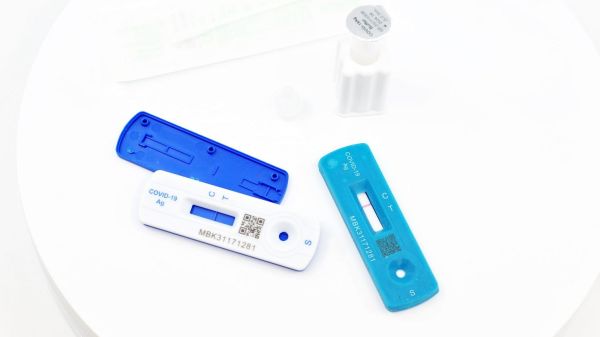
Unless they can be recycled into something useful, of course, like the plastic cases used for rapid antigen tests. This comes to us by way of [Ric Real] from the Design and Manufacturing Futures lab at the University of Bristol in the UK. If any of this sounds or looks familiar, refer back to October when the same team presented a method for turning old masks into 3D printer filament. The current work is an extension of that, but feeds the polypropylene pellets recovered from the old masks into a desktop injection molding machine.

The injection molding machine is fitted with 3D-printed molds for the shells of lateral flow devices (LFD) used for COVID-19 rapid antigen testing. The mold tooling was designed in Fusion 360 and printed on an Elegoo Mars MSLA printer using a high-strength, temperature-resistant resin. The molds stood up to the manual injection molding process pretty well, making good-quality parts in the familiar blue and white colors of the starting material. It’s obviously a proof of concept, but it’s good to see someone putting some thought into what we can do with the megatonnes of plastic waste generated by the pandemic response.

Rapid Prototyping Hack Chat

Join us on Wednesday, June 10 at noon Pacific for the Rapid Prototyping Hack Chat with Erika Earl!

When one thinks of the Jet Propulsion Lab, the NASA lab responsible for such amazing feats of engineering as Mars rovers and galaxy-exploring spacecraft like Voyager, one does not necessarily think of it as a hotbed of medical innovation. But when the COVID-19 pandemic started its march around the globe, JPL engineers decided to turn their skills from exploring other worlds to helping keep people alive in this one. Fittingly, the challenge they tackled was perhaps the most technically challenging: to build a ventilator that’s simple enough to be built in large numbers, enough to make a difference to the predicted shortfall, but that does the non-trivial job of keeping people breathing as safely as possible.

The result was VITAL, or Ventilator Intervention Technology Accessible Locally. It was designed, prototyped, and tested on an incredibly ambitious timetable: 37 days total. That number alone would be shocking enough, but when one adds in the disruptions and disconnection forced on the team of JPL engineers by the sudden need to self-isolate and work remotely that came up in the middle of the design process, it’s a wonder the team was able to get anywhere. But they worked through the technical and managerial issues and delivered a design that has now been licensed out to eight manufacturers under a no-fee license.

What does it take to bring something as complex as a ventilator to market in so short a time? To delve into that question, Supply Frame’s Erika Earl, who was part of the VITAL team, will stop by the Hack Chat. We’ll talk to her about being on the JPL team, what the design and prototyping process was like, and how the lessons learned here can apply to any team-based rapid-prototyping effort. You may not be building a ventilator in 37 days, but chances are good you can learn something useful from those who did.

join-hack-chatOur Hack Chats are live community events in the Hackaday.io Hack Chat group messaging. This week we’ll be sitting down on Wednesday, June 10 at 12:00 PM Pacific time. If time zones have you down, we have a handy time zone converter.

Click that speech bubble to the right, and you’ll be taken directly to the Hack Chat group on Hackaday.io. You don’t have to wait until Wednesday; join whenever you want and you can see what the community is talking about.
Continue reading “Rapid Prototyping Hack Chat”

Rapid Prototyping System Gives Wheels To Wearables

Wearables are kind of a perplexing frontier for electronics. On the one hand, it’s the best possible platform for showing off a circuit everywhere you go. On the other hand, the whole endeavor is fiddly because the human body has no straight lines and moves around quite a bit. Circuits need to be flexible and comfortable. In other words, a wearable has to be bearable.

[Konstantin], [Raimund], and [Jürgen] have developed an intriguing system for prototyping e-textiles that opens up the wearables world to those who don’t sew and makes the prototyping process way easier for everyone.

It’s a small and portable roll-on ironing device that lays down different kinds of custom ‘tapes’ on to textiles. The conductive fabric tapes can be used as touchable traces, and can support components such as flexible e-ink screens and solar panels. Some tapes provide single or multiple points of connectivity, and others are helper substrates like polyimide tape that multiply the possibilities for complex circuits.

The device uses a modified soldering iron to transfer the tapes, which are loaded onto 3D-printed spools that double as the wheels. Check it out after the break — there’s a 30-second tour and a 5-minute exploration of the whole process.

Everyone needs to prototype, even the seasoned stitchers. The next time you’re thinking in thread, throw some magnets into the process.

Continue reading “Rapid Prototyping System Gives Wheels To Wearables”

Magnets Make Prototyping E-Textiles A Snap

How do you prototype e-textiles? Any way you can that doesn’t drive you insane or waste precious conductive thread. We can’t imagine an easier way to breadboard wearables than this appropriately-named ThreadBoard.

If you’ve never played around with e-textiles, they can be quite fiddly to prototype. Of course, copper wires are floppy too, but at least they will take a shape if you bend them. Conductive thread just wants lay there, limp and unfurled, mocking your frazzled state with its frizzed ends. The magic of ThreadBoard is in the field of magnetic tie points that snap the threads into place wherever you drape them.

The board itself is made of stiff felt, and the holes can be laser-cut or punched to fit your disc magnets. These attractive tie-points are held in place with duct tape on the back side of the felt, though classic double-stick tape would work, too. We would love to see somebody make a much bigger board with power and ground rails, or even make a wearable ThreadBoard on a shirt.

Even though [chrishillcs] is demonstrating with a micro:bit, any big-holed board should work, and he plans to expand in the future. For now, bury the needle and power past the break to watch [chris] build a circuit and light an LED faster than you can say neodymium.

The fiddly fun of e-textiles doesn’t end with prototyping — implementing the final product is arguably much harder. If you need absolutely parallel lines without a lot of hassle, put a cording foot on your sewing machine.

Continue reading “Magnets Make Prototyping E-Textiles A Snap”