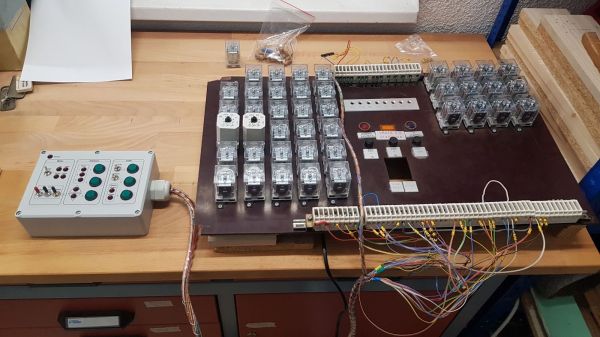
Homebrew Relay Computer Looks Like It Could Be A Commercial Product

You may not have noticed, but we here at Hackaday really love our clicky stuff. Clicky mechanical keyboards, unnecessarily noisy flip-dot displays, and pretty much anything made with a lot of relays — they all grab our attention, in more ways than one. So it’s with no small surprise that we appear to have entirely missed perhaps the clickiest build of all: a fully operational 8-bit computer using nothing but relays.

What’s even more amazing about our failure to find and feature [Paul Law]’s excellent work is that he has been at it for the better part of a decade now. The first post on his very detailed and very well-crafted blog describing the build dates from 2013, when he was just testing LEDs in the arithmetic-logic unit (ALU). Since then, [Paul] has made incredible progress, building module after module, each containing a small portion of the computer’s functionality. The modules plug into card cages with backplanes to connect them, and the whole thing lives in an enclosure made from aluminum extrusion and glossy black panels for a truly sleek look. The computer is incredibly compact for something that uses 400+ DPDT relays to do its thinking.

In addition to the blog, [Paul] has a criminally undersubscribed YouTube channel with a quite recent series going over the computer in depth. We included the overall tour below, but you should really check out the rest of the videos to appreciate how much work went into this build. We’ve seen relay computers ranging in size from single-board to just plain ludicrous, but this one really takes the prize for fit and finish as well as functionality.

Continue reading “Homebrew Relay Computer Looks Like It Could Be A Commercial Product”

Industrial Stack Light Keeps An Eye On Prusa Mini

When most people want to keep tabs on what their 3D printer is up to while they’re out and about, they’ll install OctoPrint on a Pi and be done with it. But what if you’re just on the other side of the room? Inspired by the stack lights used on factory floors, [Jeff Glass] decided to add a similar system to his Prusa Mini so he could see what it’s up to at a glance.

It turns out you can get these lights pretty cheaply online from the usual retailers, and as [Jeff] explains in the video after the break, driving them is about as easy as it gets. Rather than being some kind of addressable device, they generally have a single common 12 or 24 volt DC wire and ground lines for each color. With a USB controlled relay board, kicking on the appropriate light is simple from your operating system of choice.

What ended up being a bit harder was finding out what the Prusa Mini was up to. The printer offers up a simple status web page, but it has a few oddball quirks that make it difficult to scrape; such as presenting a little pop-up message that you have to manually close each time you load the page. But after spending some time with the powerful Selenium library for Python, he was able to create a script that worked its way through the UI and pulled the relevant status messages. Obviously the resulting code is Prusa specific, but the general concept would work on other printers assuming you can find a reliable way to pull the device’s current status.

After coming up with a wall mounted enclosure for the electronics that doubles as a mount for the light itself, [Jeff] can now see if his printer needs attention from clear across the room. An especially nice feature when the printer is all buttoned up inside of its enclosure.

Continue reading “Industrial Stack Light Keeps An Eye On Prusa Mini”

DIY Relay Module Saves Time

As any programmer could tell you, there’s significant value in automating a process that is performed often enough. The more times that process is used, the more it makes sense to automate it or at least improve its efficiency. This rule isn’t limited to software though; improvements to hardware design can also see improvements in efficiency as well. For that reason, [Hulk] designed a simple relay module in order to cut the amount of time he spends implementing this solution in his various other projects.

While driving a relay with a transistor is something fundamental, this project isn’t really about that per se. It’s about recognizing something that you do too much, and then designing that drudgery out of your projects. [Hulk] was able to design a PCB with 12 modules on it, presumably saving fabrication costs. He can then easily populate them with specific components as soon as he needs one. Another benefit of designing something like this yourself, rather than an off-the-shelf relay module, is that you can do away with any useless features you’ll never need (or add ones that aren’t available in commercial devices).

We can appreciate the efficiency gains this would make for our next project that needs a simple driver for a light, garage door opener, or any other binary electronic device. It can be a hassle to go find the correct transistor and relay, solder it all on the project board, and hope it all works. A pre-made solution solves all these issues, but we do wish the schematics were available to keep us from having to design our own. Driver boards are a pretty common project for all the different types of relays we see around here, so there is probably one available out there.

The Internet Of Bubble Machines

Everyone loves a good bubble machine. These oddly satisfying novelty items have brought children and adults mindless entertainment since their inception. [8BitsAndAByte] had the same thought, but wanted to give their bubble machine a taste of the IoT-age.

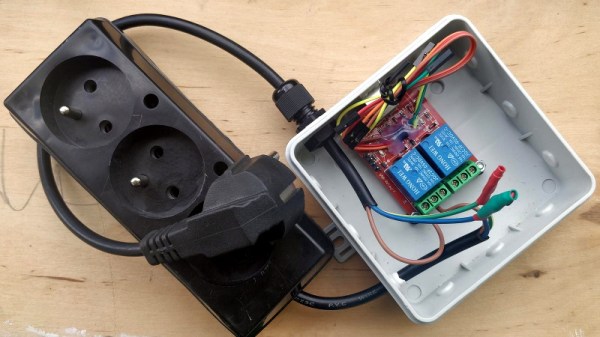
First, they modified an off-the-shelf bubble machine with a Raspberry Pi and relay module. The Pi can easily trigger the bubbling mechanism by controlling power to the machine using the relay. Seems simple enough. The part of this project that might be a bit more unfamiliar to you is controlling the robot over the internet using remo.tv.

Remo.tv is a robot controller platform that’s both free and open-source, and we’ve seen [8BitsAndAByte] take advantage of this web controller before. Seems like they’re really getting the hang of it. Their writeup links to a detailed setup guide for configuring the Pi, so hopefully, that’s not too much trouble.

Couple the IoT setup with a Pi camera and you’ve got a live stream that’s admittedly oddly satisfying to watch with or without the bubbles.

Continue reading “The Internet Of Bubble Machines”

Smoking Meat With A Commodore 64

When [Deadline] couldn’t find a replacement control module for his Masterbuilt electric smoker, he could have just tossed the thing in the trash. Instead, he decided to come up with his own system to take over for the smoker’s original brain. Basing it around the nearly 40 year old Commodore 64 probably wouldn’t have been our first choice, but it’s hard to argue with the end result.

Connectors to control the smoker’s hardware.

At the most basic level, controlling an electric smoker like this only requires a temperature sensor, a relay to control the heating element, and something to get those two devices talking to each other. But for the best results you’ll also want some kind of a timer, and an easy way to change the target temperature on the fly. Connecting the relay and temperature sensor up to the back of the C64 was easy enough, all he had to do was write the BASIC code to glue it all together.

This hack was made considerably easier thanks to the fact that the Masterbuilt’s original controller interfaced with the smoker by way of a couple relatively well documented connectors. So instead of having to mess with any of the mains voltage electronics, he simply had to bring a wire in the connector high to fire up the smoker’s heating element. This bodes well for anyone looking to replace the controller in a similar smoker, with a C64 or otherwise.

In the past we’ve seen some very impressive custom smoker controllers that look as though they could easily be adapted for use with these commercial units. Though the true smoke aficionados might prefer building the entire thing to their exacting specifications.

Continue reading “Smoking Meat With A Commodore 64”

Retrotechtacular: The Nernst Lamp

After dominating the illumination market for more than a century, it’s easy to think of the glowing filament of the standard incandescent lamp as the only way people found to turn electricity into light. But plenty of fertile minds turned out alternative designs, one of which is the fascinating Nernst lamp, which we’d previously never heard of.

If the name sounds familiar, it’s likely through exposure to [Walther Nernst]’s equation for electrochemistry, or for his “New Heat Theorem” which eventually became the Third Law of Thermodynamics. Pal of [Einstein] and eventual Nobel laureate, [Nernst] was also a bit of a tinkerer, and he came up with a design for an incandescent lamp in 1897 that was twice as efficient as carbon-filament lamps. The video below, from the Edison Tech Center, details the design, which used a ceramic “glower rod” that would incandesce when current flowed through it. The glower, though, was not conductive until it was quite hot, so separate heater coils that gave the glower a start on the process were included; these were switched off by a relay built into the base of the lamp once the glower started conducting.

It’s a complicated design, but its efficiency, coupled with a better light spectrum and the fact that it didn’t need a vacuum bulb since the glower wouldn’t oxidize like a carbon or tungsten filament, gave it certain advantages that let it stake out a decent share of the early market for electric illumination. It was even the light source for one of the first facsimile machines. We find it a very clever use of what were at the time exotic materials, and wonder if this could have lead to something like vacuum tubes without the vacuum.

Continue reading “Retrotechtacular: The Nernst Lamp”

Vacuum Dust Collection With Self-Powered Relays

Like many people with multiple woodworking tools, [Will Stone] wanted to create a centralized dust collection system. But he quickly found that the devil was in the details, as he struggled to find an economic way to automatically kick on the vacuum when one of the tools started up. His final solution might be one of the most elegant, and surely the cheapest, we’ve ever come across.

As with other DIY systems we’ve seen over the years, [Will] is using a simple inductive current sensor to detect when AC power is being drawn by one of his tools. But where the similarity stops is that there’s nothing so pedestrian as a microcontroller reading the output of the sensor. He realized that when the coils in the sensor were energized they were putting out about 7 volts AC, which should be more than enough to trigger a relay.

So he threw together a rectifier circuit on a piece of perfboard, using four LEDs in true hacker style. With the addition of a capacitor to smooth out the voltage, this little circuit is able to trip the 40 amp solid state relay controlling power to the vacuum using nothing more than the energy harvested from the sensor’s coil.

Using a current sensor is great when the tools are close enough to all be plugged into the same line, but that doesn’t help the folks with cordless tools or supersized shops. In that case, you might need to look into a sound-activated system.