Some might consider a broken ribbon cable to be unsalvagable. They’re delicate and fragile as can be, and sometimes just fussing with them further is enough to cause additional damage. However, with the right set of skills, it’s sometimes possible to achieve the unthinkable. As [Master Liu] demonstrates, you can indeed repair a broken ribbon cable, even a tiny one.
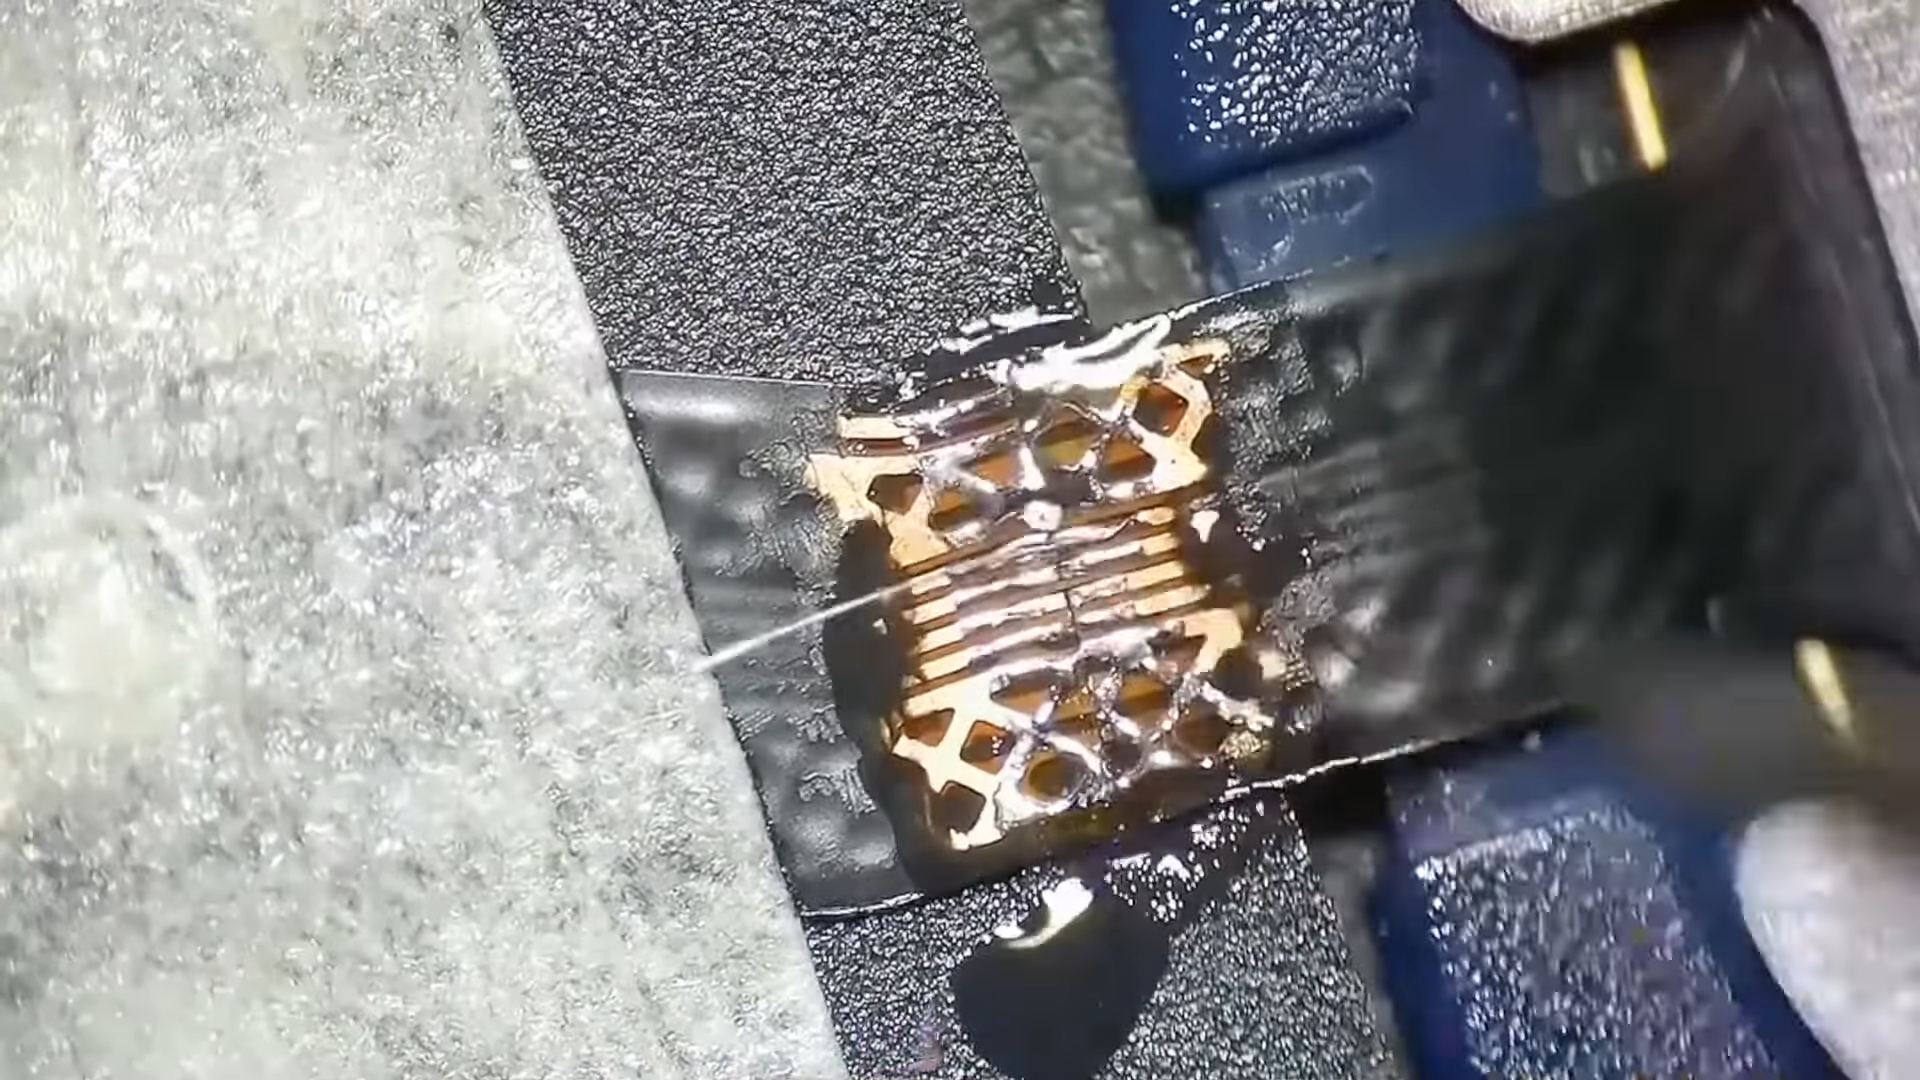 The video concerns a ribbon cable linked to a Touch ID fingerprint sensor from an Apple device. It’s common to break these ribbon cables when repairing a phone, and doing so causes major problems. The Touch ID device is paired with the host phone, and cannot easily be replaced. Thus, repair is justified if at all possible.
The repair involves scraping back the outer coating on the two sections of ribbon cable to reveal the copper pads underneath. The copper is then coated with flux and solder to prepare them to be rejoined. Ultra-fine strands of wire are used to join the individual traces. Then, the repaired section is coated in some kind of sealant or epoxy to hold the joint together and protect it from failing again. The theory is easy, it’s just the execution that’s hard.
Ribbon cable repair is becoming one of our favorite topics of late. Sometimes you just need a steady hand and the guts to have a go. Video after the break.