TRS-80 Model 100 Gets 64-Bit CPU And A Very Wide LCD

To say the TRS-80 Model 100 was ahead of its time would be something of an understatement. It had a high-quality mechanical keyboard, phenomenal battery life, plenty of I/O and expansion capabilities, and was actually small and light enough to easily carry around. While its layout might seem to be a bit dated to modern eyes, there’s little debate that it was one of the most successful and influential computers in history.

So it’s little surprise that [belsamber] thought the Model 100 might make an ideal platform for his mobile command line work. With a few modifications, naturally. While technically the nearly 40 year old portable could connect to a Linux computer as a simple serial terminal, its outdated and non-backlit LCD leaves a bit to be desired in 2021. But there’s little sense in upgrading the display if he’d still be saddled with the anemic Intel 80C85 motherboard, so he decided to clean house and replace everything.

Once stripped of the original hardware, the Model 100’s enclosure offered up plenty of room for a Pine A64 LTS single-board computer, four 18650 cells, and a 1920×480 ultra-wide LCD. While not a perfect match for the dimensions of the original panel, the new screen is an exceptionally close fit. The keyboard has been left intact, but rather than adding a QMK-compatible microcontroller to the mix, [belsamber] wired the matrix directly into the GPIO of the A64.

While we know some retro aficionados might shed a tear to see an iconic computer get gutted, [belsamber] mentions that nothing will go to waste; the parts he pulled from this machine will serve as spares for a second Model 100 he has in his collection. Besides, given the immense popularity of these machines, they aren’t exactly rare to begin with.

As an aside, we recently saw this same unique display used in a 3D printed desktop computer with distinctively retro-futuristic styling. We didn’t have miniature 4:1 ratio displays on our list of 2021 hardware predictions, but it seems they’re already making a strong showing.

3D Printed Pi Laptop Honors The Iconic GRiD Compass

If you’re familiar with vintage portable computers, you know about the GRiD Compass. Even if you’re not into computers of yesteryear, there’s a good chance you’ve seen a Compass or two without realizing it. From battling xenomorphs in Aliens to making the trip to orbit aboard the Space Shuttle, the trendsetting clamshell computer seemed to be everywhere in the 1980s. While far too expensive for the average consumer to afford back then, its no-compromise design and sleek looks helped lay the groundwork for today’s ubiquitous laptops.

Getting your hands on a working GRiD Compass in 2021 isn’t a whole lot easier than it was in 1982, so [Mike] decided to do the next best thing and build his own. His GRIZ Sextant certainly isn’t a replica, but the family resemblance is strong enough to get the point across. The Raspberry Pi powered machine has a greatly reduced “trunk” section in the back as you might expect, but the overall layout is very similar. The Commodore 64 inspired color scheme is probably the biggest departure from the source material, but it’s hard to argue with the results.

It’s clear at a glance that a lot of thought was put into the external aesthetics of the Sextant, but a peek under the hood shows the internal details are equally impressive. [Mike] tells us he has a background in product design, and it shows. Rather than approaching this project as a one-off creation, he’s clearly taken great pains to ensure the design is as reproducible as possible.

All of the individual components of the 3D printed frame and enclosure have been carefully designed so they’ll fit within the build volume of the average desktop machine. Electronic components are screwed, not glued, to the internal framework; making future repairs and maintenance much easier. When combined with the ample internal volume available, this modular approach should make adding custom hardware a relatively painless process as well.

So when will you be able to build a GRIZ Sextant of your own? Hopefully, very soon. [Mike] says he still needs to work some kinks out of the power supply and finalize how the speakers will get mounted into the case. Once those last tweaks are locked in, he plans to release all the STL files and a complete Bill of Materials. For those who want to get a sneak peek before they start warming up the extruder, he’s also started documenting the assembly of the Sextant on his YouTube channel. Continue reading “3D Printed Pi Laptop Honors The Iconic GRiD Compass”

DevTerm Beats Cyberdeck Builders To The Punch

What makes a cyberdeck? Looking as though it came from an alternate reality version of the 1980s is a good start, but certainly isn’t required. If you’re really trying to adhere to the cyberpunk ethos, any good deck should be modular enough that it can be easily repaired and upgraded over time. In fact, if it’s not in a constant state of evolution and flux, you’ve probably done something wrong. If you can hit those goals and make it look retro-futuristic at the same time, even better.

Which is why the Clockwork DevTerm is such an interesting device. It ticks off nearly every box that the custom cyberdeck builds we’ve covered over the last couple years have, while at the same time being approachable enough for a more mainstream audience. You won’t need a 3D printer, soldering iron, or hot glue gun to build your own DevTerm. Of course if you do have those tools and the skills to put them to work, then this might be the ideal platform to build on.

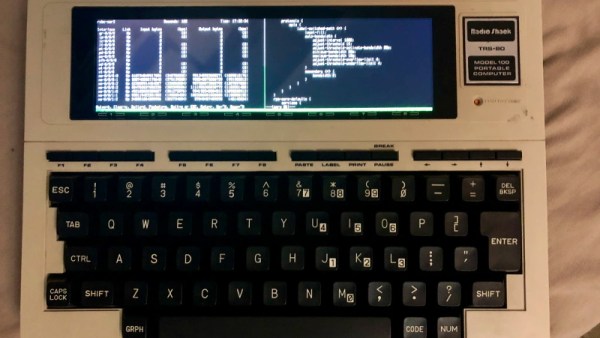
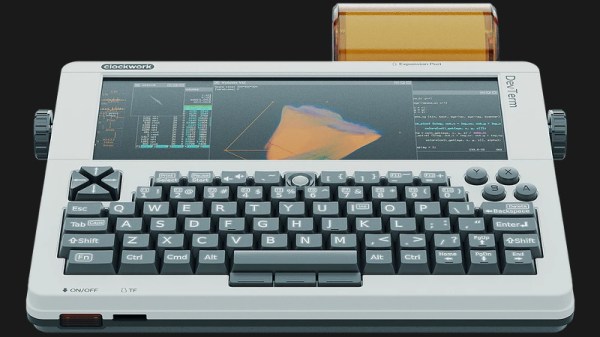
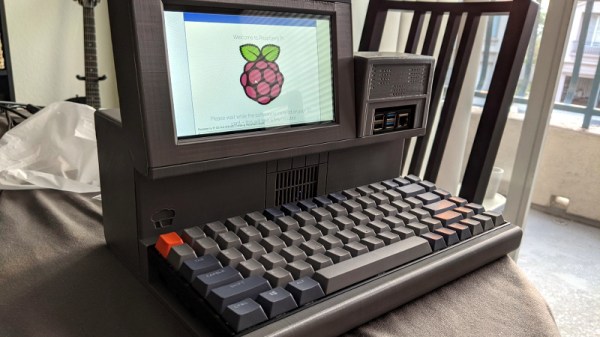
With a 65% QWERTY keyboard and widescreen display, the DevTerm looks a lot like early portable computers such as the TRS-80 Model 100. But unlike the machines it draws inspiration from, the display is a 6.8 inch 1280 x 480 IPS panel, and there’s no pokey Intel 8085 chip inside. The $220 USD base model is powered by the Raspberry Pi Compute Module 3, and if you need a little more punch, there are a few higher priced options that slot in a more powerful custom module. Like the Waveshare Pi CM laptop we recently looked at, there’s sadly no support for the newer CM4; but at least the DevTerm is modular enough that it doesn’t seem out of the question that Clockwork could release a new mainboard down the line. Or perhaps somebody in the community will even do it for them.

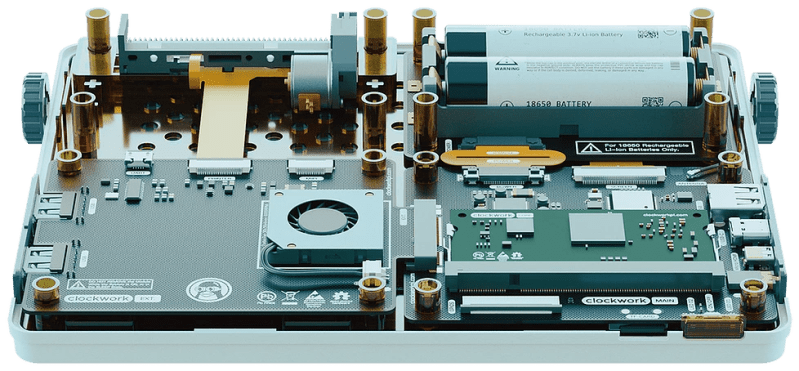
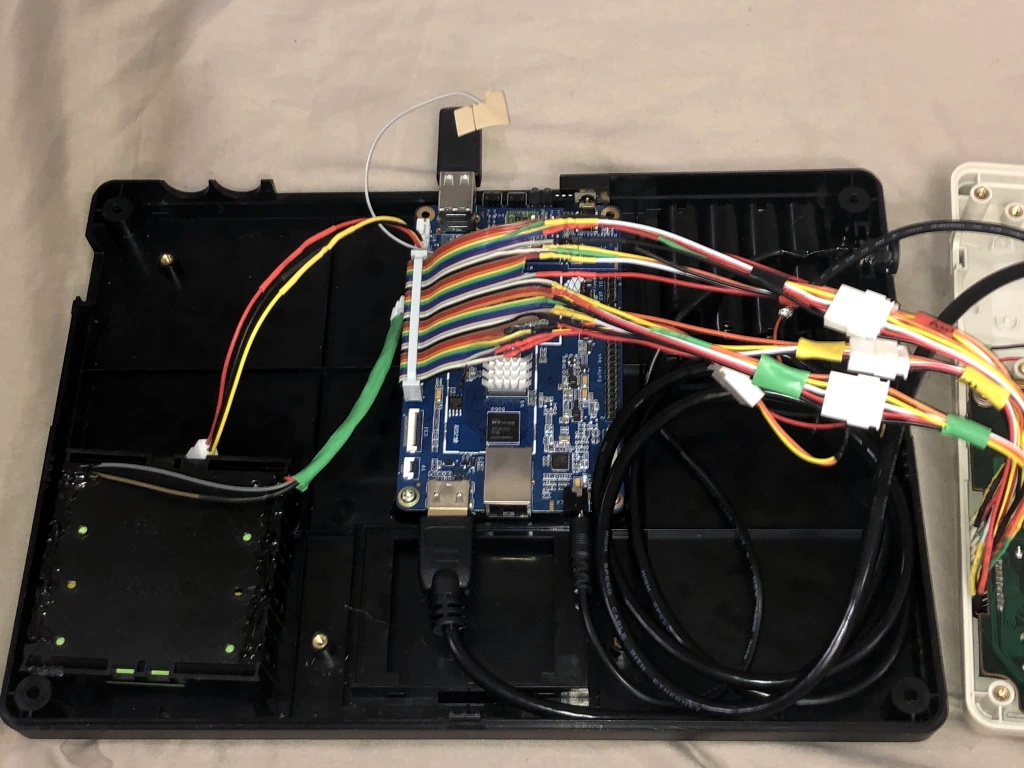
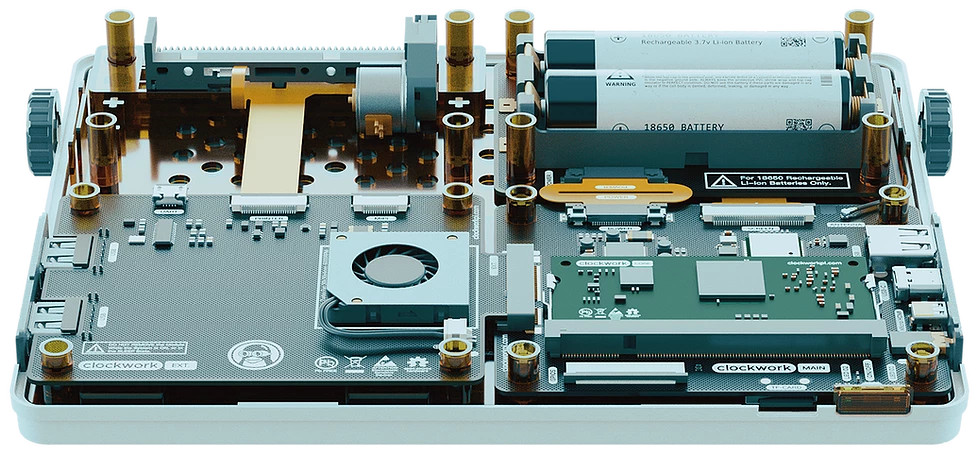
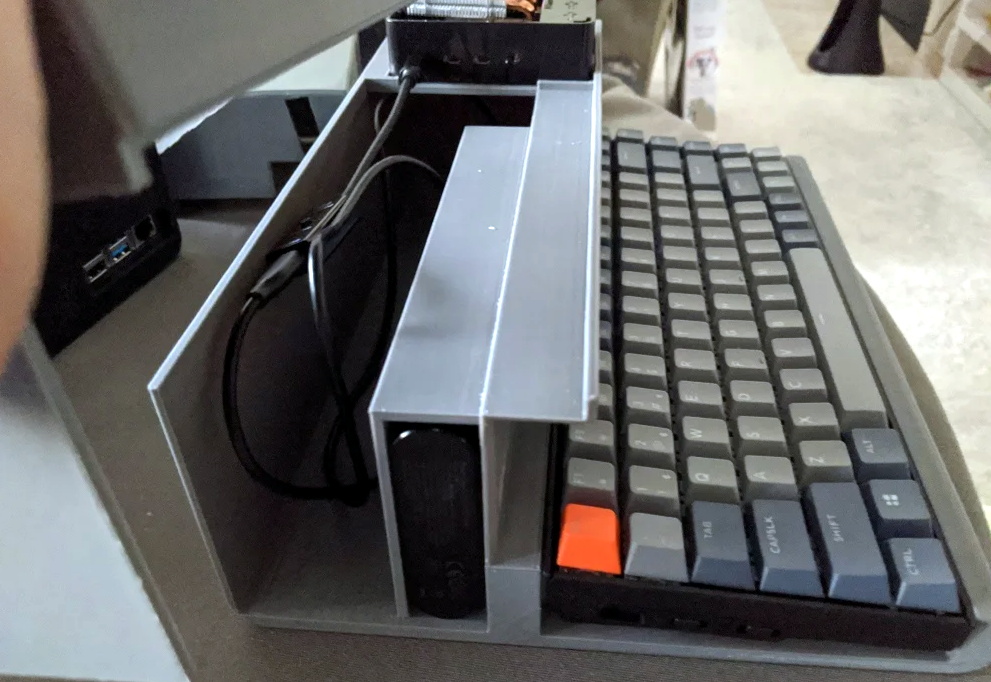
Speaking of which, the board in the DevTerm has been designed in two pieces so that “EXT Module” side can be swapped out with custom hardware without compromising the core functionality of the system. The stock board comes with extra USB ports, a micro USB UART port for debugging, a CSI camera connector, and an interface for an included thermal printer that slots into a bay on the rear of the computer. Clockwork says they hope the community really runs wild with their own EXT boards, especially since the schematics and relevant design files for the entire system are all going to be put on GitHub and released under the GPL v3.

They say that anything that sounds too good to be true probably is, and if we’re honest, we’re getting a little of that from the DevTerm. An (CPU BLOBs aside!) open hardware portable Linux computer with this kind of modularity is basically a hacker’s dream come true, and thus far the only way to get one was to build it yourself. It’s hard to believe that Clockwork will be able to put something like this out for less than the cost of a cheap laptop without cutting some serious corners somewhere, but we’d absolutely love to be proven wrong when it’s released next year.

HALWOP Recreates Retro Style With The Raspberry Pi

Modern computers are incredible feats of engineering, but there are many that still yearn for the simpler times. When keyboards clacked and a desktop computer quite literally dominated the top of your desk. There’s a whole community of folks who scratch that itch by restoring vintage computers, but not everyone has the time, money, or skill for such pursuits. Plus, even the most lovingly cared for Apple II isn’t going to help you watch YouTube.

Those who wish to recreate the look and feel of a vintage computer with modern internals will certainly be interested in the HALWOP by [Maz_Baz]. While its 3D printed case isn’t a replica of any one computer, it does draw inspiration from iconic machines like the Apple Lisa and IBM XT. It’s an amalgamation of design ideas that seemed like a good idea circa 1982 or so, with plenty of 90° angles and air vents to go around.

Considering the size of the Raspberry Pi 4 that powers the HALWOP, most of the case is just hollow plastic. But of course, the whole idea depends on it being almost comically large. On the plus side, [Maz_Baz] says you can use one of those empty compartments to hold a Anker PowerCore 26800 battery pack. At least in theory that makes it a “luggable” computer, though good luck trying to move it around.

In addition to the Pi 4 and battery pack, the HALWOP also uses a seven-inch touch LCD and Keychron K2 Bluetooth mechanical keyboard. Since everything is so modular, assembly is about as simple as it gets. Outside of the USB cables that power everything, you just need a long enough ribbon cable to connect the LCD to the Pi.

We know the purists don’t like the idea of a “retro” computer based on the Raspberry Pi, but of course, such projects aren’t about maintaining historical accuracy. They are a way to bridge the gap between modern technology and the unique aesthetics of a bygone era. Designs like the HALWOP allow a new generation to experience a taste of what computing was like in the early days, without giving up the ground that’s been gained in the intervening years.

Z80 Computer Is Both Arduino And Shield

There have been plenty of Z80 computer builds here on Hackaday, but what sets them apart is what you do with them. [Andrew] writes in with his Z80 single-board computer made from scratch, using the Arduino standard headers for its I/O. In turn, since he needed an easy way to program the flash memory which holds the software to run on the Z80, he used an Arduino Mega as a debugger, making the SBC an Arduino shield itself.

Using such a common header pinout for the Z80 computer allows it to be used with a variety of readily-available Arduino shields. This compatibility is achieved with an analog-digital converter and a 3.3 V regulator, mimicking the pins found in an Arduino Uno. The code, available on GitHub, includes an extensive explanation and walkthrough over the process in which the Mega takes over the bus from the Z80 to function as a fully-featured debugger. Programs can be loaded through embedding an assembly listing into the Mega’s sketch, or, once the debugger is up you can also upload a compiled hex file through the serial connection.

This isn’t the first time [Andrew] has been featured here, and his past projects are just as interesting. If you need to translate a Soviet-era calculator’s buttons into English, hack a metallurgical microscope or even investigate what’s that Clacking Clanking Scraping Sound, he’s the one you should call.

How Many Commodores Does It Take To Crack A Nut?

It’s brilliant enough when composers make use of the “2SID” technique to double the channels in a Commodore 64 with two sound chips, but even then some people like to kick things up a notch. Say, five times more. [David Youd], [David Knapp] and [Joeri van Haren] worked together to bring us just that, ten Commodore computers synchronously playing a beautiful rendition of the Dance of the Sugar Plum Fairy at this year’s Commodore Retro eXpo.

The feat is composed of nine Commodore 64 computers and one Commodore 128, all fitted with the SID chip. It is a notorious synthesizer chip for utilizing both analog and digital circuitry, making each and every one of its revisions unique to a trained ear, not to mention impossible to faithfully reproduce in emulation. The SID was designed by Bob Yannes at MOS Technology, who later went on to co-found Ensoniq with his experience in making digital synthesizers.

How this orchestra of retro computers came to be, including details on how everything is pieced together can be found on this slideshow prepared by the authors of the exhibition. It’s interesting to note that because of timing differences in each computer’s crystal clock and how only the start of the song is synchronized between them, they can’t play long music tracks accurately yet, but a 90-second piece works just fine for this demonstration.

These synthesizer chips are slowly going extinct since they’re no longer being manufactured, so if you need a new replacement solution, FPGAs can fill that SID-shaped hole in your heart. If you need the whole computer though, the newer Teensy 3.6 will do just fine emulating it all. Check out this beast of a display in action after the break. While we’re at it, this isn’t the only time multiple 8-bit computers have been combined as an orchestra, though these Commodores sound a lot better than a table full of ZX Spectrums.

Continue reading “How Many Commodores Does It Take To Crack A Nut?”

Supercon Badge Hardware Hacking: Here’s What To Bring

Hackaday Superconference is just a week away (precious few tickets remain), a celebration of all things Hackaday, which naturally includes creative projects making the most of their hardware. Every attendee gets a platform for hacking in the form of the conference badge.

To make the most of your badge hacking fun, plan ahead so you will have the extra components and the tools you need. At the most basic, bring along a serial to USB cable and a PIC programmer. These are common and if you don’t own them, ask around and you will likely be able to borrow them. Now is also the time to put in a parts order for any components you want to use but don’t have on hand!

The badge is hackable without any extras, but it’s designed for adding hardware and hacking the firmware. We’re excited to see what you can do with it. We gave an overview of this retro themed pocket computer a few days ago, today we’re inviting you to exploit its potential for your hardware hacks.

Continue reading “Supercon Badge Hardware Hacking: Here’s What To Bring”