If you want to not take for granted how easy and seamless computers have become, take up vintage computing as a hobby. If you venture down the retro path, you’ll quickly question how anyone ever got any useful work done with computers, and the farther back you go in computer history, the more difficult everything seems to become.
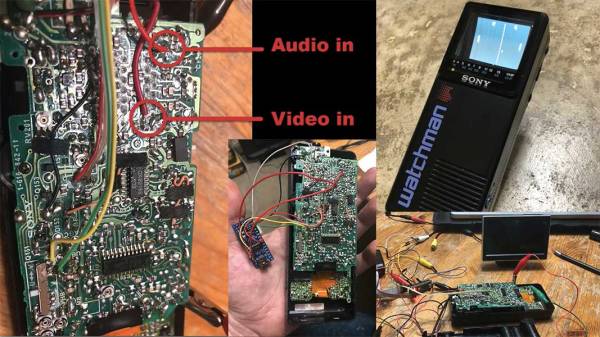
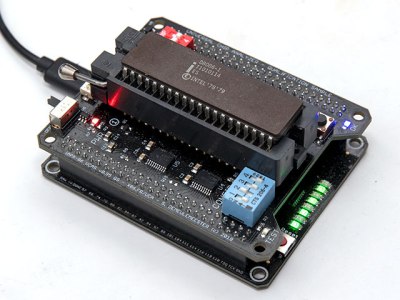
Case in point: how do you easily transfer files between a home-brew PC/XT and your modern desktop? Back in the day we did it with null modem cables or by sneaker-netting stacks of floppies, but [Scott M. Baker] found another way — putting a Raspberry Pi on the ISA bus as a virtual floppy drive. The heart of the ISA card is an IDT7130, a 1-kb RAM chip that allows simultaneous asynchronous access over dual ports. One port talks to the ISA bus and the other talks to the GPIO of the Pi, after level-shifting to make everything voltage compatible, of course. [Scott] wrote a driver for the card, plugged a Pi Zero W into the header pins, and threw a Python server together that makes local images available to the shared memory on the card. The upshot of this is that the retro machine thinks it has a floppy in it, but it’s actually a server. The video below has tons of detail and shows the card in action. Pretty slick.
[Scott]’s projects are always fun to check out, and he really seems to have the retro life dialed in. Whether it’s old jukebox hacks or a Unix-ish OS for Z80s, there’s plenty to learn. Although we’d like to see more about that PC/XT in the video; are those Nixies we spy along the front panel?
Continue reading “Making Vintage Computing Easy, The Hard Way”
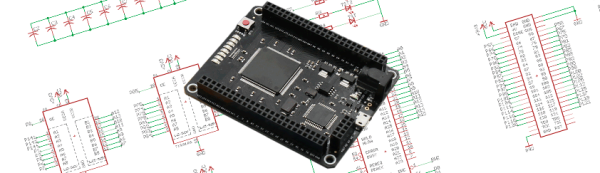
 So, how does it actually test? Synthesized inside the FPGA is everything the CPU needs from the motherboard to make it tick, including ROM, RAM, bus controllers, clock generation and interrupt handling. Many testing frequencies are supported (which is helpful for spotting fakes), and if connected to a computer via USB, the UCA can check power consumption, and even benchmark the chip. We can’t begin to detail the amount of thought that’s gone into the design here, from auto-detecting data bus width to the sheer amount of models supported, but you can read more technical details