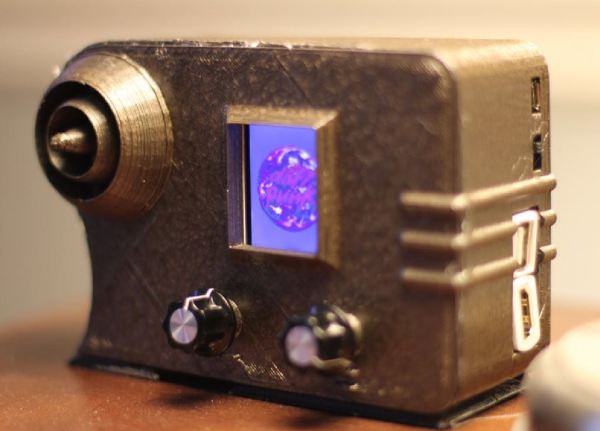
Ok, so you want a radio — but not just any radio. It has to be wireless, access a variety of music services, and must have a vintage aesthetic that belies its modern innards. Oh, and a tiny screen that displays album art, because that’s always awesome. This 1938 Emerson AX212-inspired radio delivers.
Building on the backbone of a Raspberry Pi Zero W and an Adafruit MAX 98357 mono amp chip, the crux of this single-speaker radio is the program Mopidy. Mopidy is a music player that enables streaming from multiple services, with the stipulation that you have a premium Spotify account. Once signed up, [Tinkernut] helpfully outlines how to set up Mopidy to run automatically once the Pi boots up. The addition of a screen to display album art adds flair to the design, and Adafruit’s 1.8″ TFT LCD screen is small enough to fit the bill.
Anyone who’s into retro aviation gear falls in love with those mysterious displays, dials, keypads, banks of knife switches. There’s a lot of sexy in those devices, built with high standards in a time when a lot of it was assembled by hand.
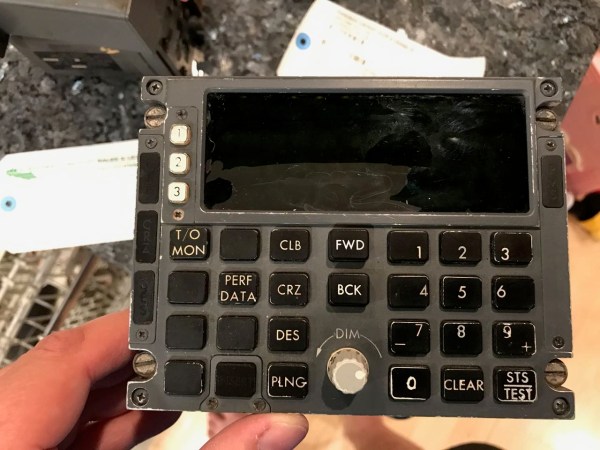
[Jeremy Gilbert] bought a 747-200’s Control Display Unit (CDU)– the interface with the late ’70s in-flight computer–and is bringing it back to life in a Hackaday.io project. His goal is to get it to light up and operate just as if it were installed in a 747.
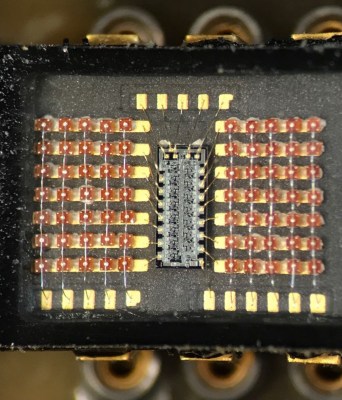
Of particular interest is the display, which turned out to consist of a series of 5×7 matrices (seen on the right) controlled by chips no one uses any more. However, [Jeremy] found a blog post where someone had hacked out Arduino code for a cousin of the chip, saving him a lot of time. However, he’s got a lot more sleuthing yet to do.
If you’re into retro displays, we’ve mentioned a number of good ones, including the legendary Apollo DSKY and an awesome retrocomputer.
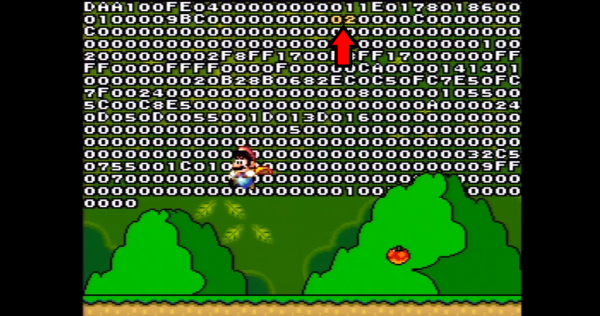
[Seth] is quick to say he didn’t do all this alone. This mod came to be thanks to help from [Cooper Harasyn] who discovered a save file corruption glitch, [MrCheese] who optimized the hex editor, and [p4plus2] who wrote some awesome mods.
While no soldering and programming of parts are required, installing this mod still requires quite a bit of hardware. Beyond the SNES and cartridge, you’ll need two multitaps, three controllers, and clamps to hold down buttons on the controllers. Even then the procedure will take about an hour of delicate on-screen gymnastics. Once the jailbreak is installed though, it is kept in savegame C, so you only have to do it once.
What does a hex editor allow you to do? Anything you want. Mario’s powerup state can be edited, one memory location can be modified to complete a level anytime you would like. It’s not just modifying memory locations though – you can write code that runs, such as [p4plus2’s] sweet telekinesis mod that allows Mario to grab and move around any enemy on the screen.
[Greisi] started by desoldering all the ICs and mapping out a schematic for the board. The design centers around common parts for the era, such as a UV-erasable EPROM and some 74-series logic. [Greisi] decided to then modernise the design and make some improvements. Adding a fuse should avoid the cartridge catching on fire, and a bunch of decoupling capacitors on all the ICs should reduce noise. A FLASH chip is used instead of the old school UV-erasable part, which makes writing to the device much easier.
[MmmmFloorPie] revived an old project to create the retro mashup of a 6845 CRT controller and a modern Arduino Uno. When it comes to chips, the Motorola 6845 is the great granddaddy of Cathode Ray Tube (CRT) interfaces. It was used in the IBM Monochrome display adapter, the Hercules graphics controller, CGA, Apple II terminal cards, and a host of other microcomputer and terminal systems.
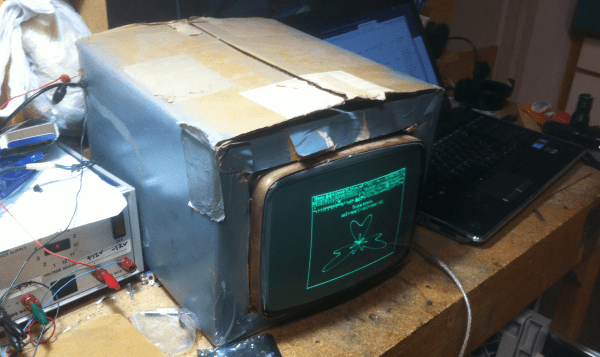
Way back in 1989, [MmmmFloorPie] was a senior in college. His capstone project was a 68000 based computer which could record and playback audio, as well as display waveforms on a CRT. The CRT in question was ordered from a classified add in Popular Science magazine. It was a bare tube, so the heavy cardboard box it shipped in was repurposed as a case.
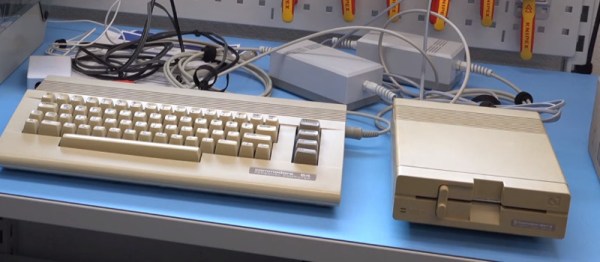
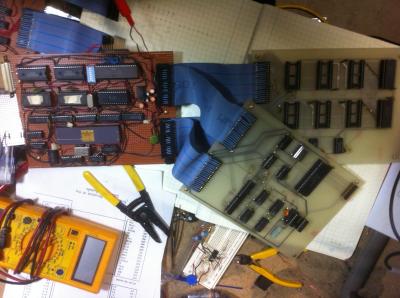
Fast forward to today, and [MmmmFloorPie] wanted to power up his old project. The 68000 board was dead, and he wasn’t up to debugging the hundreds of point to point soldered connections. The CRT interface was a separate board including the 6845 and 32 KByte of RAM. It would only take a bit of hacking to bring that up. But what would replace the microprocessor?
If you are a connoisseur of analogue audio, it’s probable you might have a turntable and a stack of records at home somewhere. If you are of a certain age you may even have a cassette deck, though you’re more likely to have abandoned that format some time in the 1990s. If you are old enough to have been around in the 1960s or 1970s though, you may have owned another analogue audio format. One of several that you might have found in a well-equipped home of that period was the 8-track stereo cartridge, a self-contained tape cassette format that fit four stereo tracks onto a single quarter-inch tape loop as eight parallel tracks, four each of left and right. A triumph of marketing, really, it should more accurately have been called 4-track stereo.
8-track cartridges were developed from earlier tape cartridge formats, largely to satisfy the demands of the automotive industry for interchangeable in-car entertainment. Thus if you owned an 8-track player it was most likely to have been found in your car, but it was not uncommon to find them also incorporated into home hi-fi systems. Thus we come to our subject today. Our retrotechtacular series usually highlights a video showing a bygone technology, but today we’re going to get a little more hands-on.
Some time in the early 1990s, I acquired an 8-track player, a BSR McDonald unit manufactured in the UK and dating from the early 1970s. BSR were much more well-known for their turntables, so this is something of an oddity. Where I found it has disappeared into the mists of time, but it was probably at a radio rally or junk sale. I certainly didn’t buy it because I wanted it to play 8-track tapes, instead I wanted a talking point for my hi-fi, something quirky to set it apart from everyone else’s. So every incarnation of listening enjoyment chez List for the last quarter century has had an 8-track player nestling within it, even if it has never played a tape while in my ownership. Thus we have a unique opportunity for this retro teardown.
Anyone with grandparents already knows that in ye olden days, televisions did not have remote control. Your parents probably still complain about how, as children, they were forced to physically walk over to the TV in order to switch between the three available channels. In these modern times of technological wonder, we have voice control, programmable touch screen remotes, and streaming services that will automatically play an entire season of the show you’re binge watching. However, before these, and before the ubiquitous infrared remote, television manufacturers were experimenting with ways to keep kids from having to run across the living room every time the channel needed to be changed.
Early remote controls were simply wired affairs — nothing too surprising there. But, it wasn’t long before methods of wireless control were being introduced. One early effort called the Flashmatic would shine light onto a photoelectric cell on the television set to control it. Of course, it might also be controlled by unintended light sources, and users had to have good aim to hit the sensor. These issues soon led to the introduction of the Zenith Space Command remote control, which used ultrasonic frequencies to control the TV.