A Handy Breakout Board For E-Paper Hacking

If you follow the exploits of [Aaron Christophel] (and trust us, you should), you’ll know that for some time now he’s been rather obsessed with electronic price tags, specifically those with e-paper displays. It’s certainly not hard to see why — these low-power devices are perfect for ambient displays, and their integrated wireless capabilities mean you can put one in every room and update them from a central transmitter.

But with such a wide array of products on the market, [Aaron] has found himself doing a lot of e-paper reverse engineering. This involves sticking a logic analyzer between the display and the tag’s microcontroller, which he found to be a rather finicky task. That’s why he created the Universal E-Paper Sniffer: a breakout PCB that lets you snoop on display communication without having to resort to unpleasant methods like scratching off the solder mask to tap into the traces by hand.

It’s a pretty simple gadget: on either side, you’ve got a connector for 24 pin 0.5 mm pitch flat flex cable, which [Aaron] has identified as the most common interface for these displays, and in the middle you’ve got a standard 2.54 mm pitch header. There are no other components on the board, and all the traces go right through to the other side.

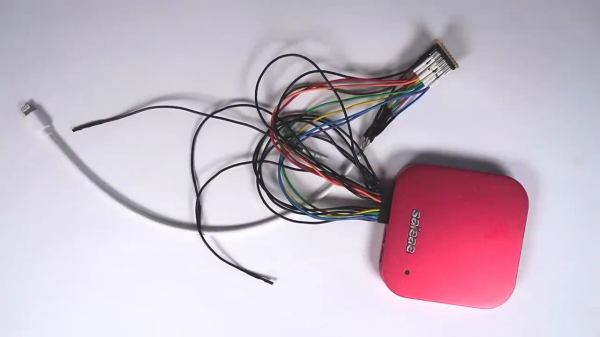
Add a few jumpers and a cheap logic analyzer, and you’re ready to sniff some SPI commands. Check out the video after the break for a general walk-through of what it looks like to start sniffing around a new display.

The Gerber files for the breakout are available for free, or you can chose to buy a fabricated board through PCBWay to kick [Aaron] a portion of the sale price. However you get one, we think this will be a handy little tool to have around if you find yourself bitten by the price tag hacking bug.

Continue reading “A Handy Breakout Board For E-Paper Hacking”

The Tools That Lovingly Tore Apart A Vintage Computer Game

The structure of computer game assets can be a bit of a mystery, even more so the older a game is, and some amount of reverse-engineering can be expected when pulling apart a game like 1995’s Night Light.

[voussoir] had fond memories of this game by GTE Entertainment, which had an interesting “flashlight” mechanic to serve the exploration theme. Spooky shapes in dark rooms would be revealed to be quite ordinary (and therefore not scary at all) once illuminated with a flashlight, which was directed by the mouse.

Extracting game assets was partly straightforward, thanks to many of them being laid out in a handy folder structure, with .bmp files for each level in a modest resolution. But there were also some unusual .mov files that were less than a second long, and those took a little more work to figure out.

It turns out that these unusual movie files were 80 frames in length, and each frame was a tile of a larger image. [voussoir] used ffmpeg to extract each frame, then wrote a Python script to stitch the tiles together. Behold! The results are high-resolution versions of each level’s artwork. Stitching the first 16 frames into a 4×4 grid yields a 1024×768 image, and the remaining 64 frames can be put into a 8×8 grid for a fantastic 2048×1376 version. The last piece was extracting audio, but sadly the ISO [voussoir] was using seems to have had errors, and not all the audio survived.

With intact assets in hand, [voussoir] was able to re-create the core of the game, which can be seen about halfway down into the writeup. Audio clues play simply while the flashlight effect is re-created in the browser with the game’s original level artwork, and it’s enough to ring those nostalgia bells. It’s a pretty successful project, even though not all of the assets have been tracked down, and not all of the audio was able to be extracted due to corruption. If you have any insights on that front, don’t keep them to yourself! Send [voussoir] an email, or chime in here in the comments.

Reverse engineering has a strong history when it comes to games, and has manifested itself in sometimes unusual ways, like the time Atari cracked the NES. Had the subsequent legal challenge gone differently, the game landscape might have looked very different today.

The microcontroller described in the article, on the PCB taken out of the kettle

Dumping Encrypted-At-Rest Firmware Of Xiaomi Smart Kettle

[aleaksah] got himself a Mi Smart Kettle Pro, a kettle with Bluetooth connectivity, and a smartphone app to go with it. Despite all the smarts, it couldn’t be turned on remotely. Energized with his vision of an ideal smart home where he can turn the kettle on in the morning right as he wakes up, he set out to right this injustice. (Russian, translated) First, he tore the kettle down, intending to dump the firmware, modify it, and flash it back. Sounds simple enough — where’s the catch?

This kettle is built around the QN9022 controller, from the fairly open QN902X family of chips. QN9022 requires an external SPI flash chip for code, as opposed to its siblings QN9020 and QN9021 which have internal flash akin to ESP8285. You’d think dumping the firmware would just be a matter of reading that flash, but the firmware is encrypted at rest, with a key unique to each MCU and stored internally. As microcontroller reads the flash chip contents, they’re decrypted transparently before being executed. So, some other way had to be found, involving the MCU itself as the only entity with access to the decryption key.

Continue reading “Dumping Encrypted-At-Rest Firmware Of Xiaomi Smart Kettle”

Research: It’s Like Cheating, But Fair

My niece’s two favorite classes in high school this year are “Intro to AI” and “Ethical Hacking”. (She goes to a much cooler high school than I did!) In “Hacking”, she had an assignment to figure out some bug in some body of code. She was staring and staring, figuring and figuring. She went to her teacher and said she couldn’t figure it out, and he asked her if she’d tried to search for the right keywords on the Internet.

My niece responded “this is homework, and that’d be cheating”, a line she surely must have learned in her previous not-so-cool high school. When the teacher responded with “but doing research is how you learn to do stuff”, my niece was hooked. The class wasn’t abstract or academic any more; it became real. No arbitrary rules. Game on!

But I know how she feels. Whether it’s stubborn independence, or a feeling that I’m cheating, I sometimes don’t do my research first. But attend any hacker talk, where they talk about how they broke some obscure system or pulled off an epic trick. What is the first step? “I looked all over the Internet for the datasheet.” (Video) “I found the SDK and that made it possible.” (Video) “Would you believe this protocol is already documented?” In any serious hack, there’s always ample room for your creativity and curiosity later on. If others have laid the groundwork for you, get on it.

If you have trouble overcoming your pride, or NIH syndrome, or whatever, bear this in mind: the reason we share information with other hackers is to give them a leg up. Whoever documented that protocol did it to help you. Not only is there no shame in cribbing from them, you’re essentially morally obliged to do so. And to say thanks along the way!

The BluePill board used for this hack, wired to the DYMO RFID reader, after all the wires for this hack have been soldered onto the BluePill board.

#FreeDMO Gets Rid Of DYMO Label Printer DRM

DYMO 550 series printer marketing blurb says “The DYMO® LabelWriter® 550 Turbo label printer comes with unique Automatic Label Recognition™”, which, once translated from marketing-ese, means “this printer has DRM in its goshdarn thermal stickers”. Yes, DRM in the stickers that you typically buy in generic rolls. [FREEPDK] didn’t like that, either, and documents a #FreeDMO device to rid us of yet another consumer freedom limitation, the true hacker way.

The generic BluePill board and two resistors are all you need, and a few extra cables make the install clean and reversible – you could definitely solder to the DYMO printer’s PCBs if you needed, too. Essentially, you intercept the RFID reader connections, where the BluePill acts as an I2C peripheral and a controller at the same time, forwarding the data from an RFID reader and modifying it – but it can also absolutely emulate a predetermined label and skip the reader altogether. If you can benefit from this project’s discoveries, you should also take a bit of your time and, with help of your Android NFC-enabled phone, share your cartridge data in a separate repository to make thwarting future DRM improvements easier for all of us. Continue reading “#FreeDMO Gets Rid Of DYMO Label Printer DRM”

An assortment of MemoryStick cards and devices, some of them, arguably cursed, like a MemoryStick-slot-connected camera.

Hacker Challenges MemoryStick To A Fight And Wins

It’s amazing when a skilled hacker reverse-engineers a proprietary format and shares the nitty-gritty with everyone. Today is a day when we get one such write-up – about MemoryStick. It is one of those proprietary formats, a staple of Sony equipment, these SD-card-like storage devices were evidently designed to help pad Sony’s pockets, as we can see from the tight lock-in and inflated prices. As such, this format has always remained unapproachable to hackers. No more – [Dmitry Grinberg] is here with an extensive breakdown of MemoryStick protocol and internals.

If you ever want to read about a protocol that is not exactly sanely designed, from physical layer quirks to things like inexplicable large differences between MemoryStick and MemoryStick Pro, this will be an entertaining read for hackers of all calibers. Dmitry doesn’t just describe the bad parts of the design, however, as much as that rant is entertaining to read – most of the page is taken by register summaries, struct descriptions and insights, the substance about MemoryStick that we never got.

One sentence is taken to link to a related side project of [Dmitry] that’s a rabbithole on its own – he has binary patched MemoryStick drivers for PalmOS to add MemoryStick Pro support to some of the Sony Clie handhelds. Given the aforementioned differences between non-Pro and Pro standards, it’s a monumental undertaking for a device older than some of this site’s readers, and we can’t help but be impressed.

To finish the write-up off, [Dmitry] shares with us some MemoryStick bit-banging examples for the STM32. Anyone who ever wanted to approach MemoryStick, be it for making converter adapters to revive old tech, data recovery or preservation purposes, or simply hacker curiosity, now can feel a bit less alone in their efforts.

We are glad to see such great hacking on the MemoryStick front – it’s much needed, to the point where our only article mentioning MemoryStick is about avoiding use of the MemoryStick slot altogether. [Dmitry] is just the right person for reverse-engineering jobs like this, with extensive reverse-engineering history we’ve been keeping track of – his recent reverse-engineering journey of an unknown microcontroller in cheap E-Ink devices is to behold.

retro breadboard

Retro Breadboard Gives Up Its 1960s Secrets

When we see [Ken Shirriff] reverse engineering something, it tends to be on the microscopic level. His usual forte is looking at die photos of strange and obsolete chips and figuring out how they work. And while we love those efforts, it’s nice to see him in the macro world this time with a teardown and repair of a 1960s-era solderless breadboard system.

If you’d swear the “Elite 2 Circuit Design Test System” featured in [Ken]’s post looks familiar, it’s probably because you caught his partner-in-crime [CuriousMarc]’s video on the very same unit, an eBay score that arrived in non-working condition. The breadboard, which retailed for $1,300 in 1969 — an eye-watering $10,000 today — was clearly not aimed at the hobbyist market. Truth be told, we didn’t even know that solderless breadboards were a thing until the mid-70s, but live and learn. This unit has all the bells and whistles, including three variable power supplies, an array of switches, buttons, indicator lamps, and jacks for external connections, and a pulse generator as well as a legit function generator.

Legit, that would be, if it actually worked. [Ken]’s contribution to the repair was a thorough teardown of the device followed by reverse-engineering the design. Seeing how this thing was designed around the constraints of 1969 technology is a real treat; the metal can transistor and ICs and the neat and tidy PCB layout are worth the price of admission alone. And the fact that neon lamps and their drivers were cheaper and easier to use than LEDs says a lot about the state of the art at the time.

As for the necessary repairs, [Marc]’s video leaves off before getting there. That’s fine, we’re sure he’ll put [Ken]’s analysis to good use, and we always enjoy [Marc]’s video series anyway. The Apollo flight comms series was a great one, too. Continue reading “Retro Breadboard Gives Up Its 1960s Secrets”