Cordless Tool Battery Pack Turned Into Portable Bench Supply

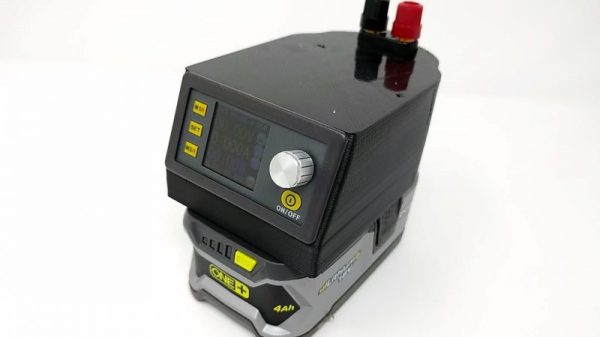
Say what you want about the current crop of mass-marketed consumer-grade cordless tools, but they’ve got one thing going for them — they’re cheap. Cheap enough, in fact, that they offer a lot of hacking opportunities, like this portable bench power supply that rides atop a Ryobi battery.

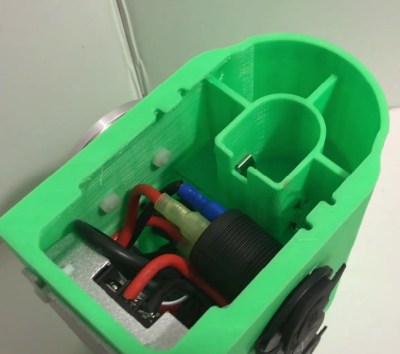
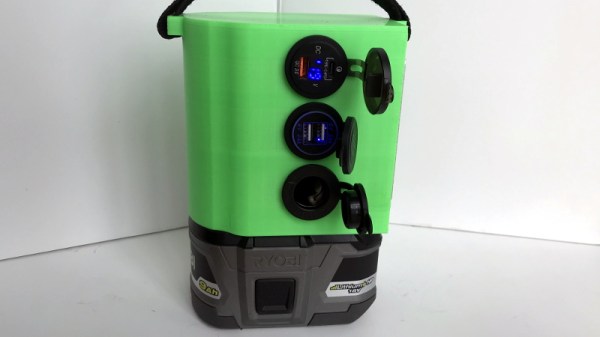
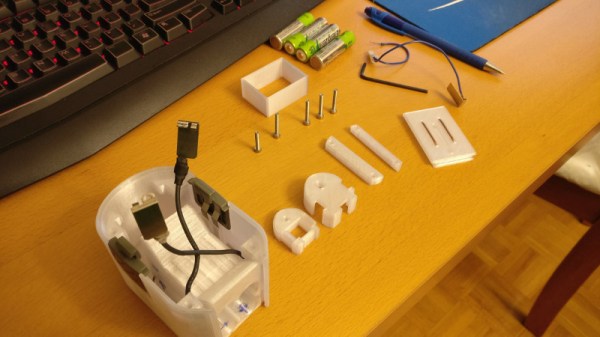
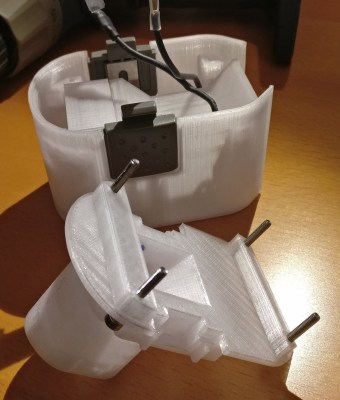
Like many of the more common bench supply builds we’ve seen,  [Pat K]’s more portable project relies on the ubiquitous DPS5005 power supply module, obtained from the usual sources. [Pat K] doesn’t get into specifics on performance, but supplied with 18 volts from a Ryobi One+ battery, the DC-DC programmable module should be able to do up to about 16 volts. Mating the battery to the supply is easy with the 3D-printed case, which has a socket for the battery that mimics the sockets on tools from the Ryobi line. It’s simple and effective, as well as neatly executed. The files for the case are on Thingiverse; sadly, only an STL file is included, so if you want to support another brand’s batteries, you’ll have to roll your own.

Check out some of the other power supplies we’ve featured that use the DPS5005 and its cousins, like this nice bench unit. We’ve also covered some of the more hackable aspects of this module, such as an open-source firmware replacement.

Cross-Brand Adapter Makes For Blended Battery Family

Even though he’s a faithful DeWalt cordless tool guy, [Richard Day] admits to a wandering eye in the tool aisle, looking at the Ryobi offerings with impure thoughts. Could he stay true to his brand and stick with his huge stock of yellow tools and batteries, or would he succumb to temptation and add another set of batteries and chargers so he could have access to a few specialty lime green tools?

Luckily, we live in the future, so there’s a third way — building a cross-brand battery adapter that lets him power Ryobi tools with his DeWalt batteries. [Richard]’s solution is a pure hack, as in physically hacking battery packs and forcing them to work and play well together. Mechanically, this was pretty easy — a dead Ryobi pack from the recycling bin at Home Depot was stripped down for its case, which was glued to a Dewalt 20-v to 18-v battery adapter. The tricky part came from dealing with the battery control electronics. Luckily, the donor DeWalt line has that circuitry in the adapter, while Ryobi puts it in the battery. That meant simply transplanting the PCB from the adapter to the Ryobi battery shell would be enough. The video below shows the process and the results — Ryobi tools happily clicking away on DeWalt batteries.

While [Richard] took a somewhat brute-force approach here, we imagine 3D-printed parts might make for a more elegant solution and offer other brand permutations. After all, printing an adapter should be easier than whipping up a cordless battery pack de novo.

Continue reading “Cross-Brand Adapter Makes For Blended Battery Family”

3D Printed Battery Pack Keeps Old Drill Spinning

The greatest enemy of proprietary hardware and components is time. Eventually, that little adapter cable or oddball battery pack isn’t going to be available anymore, and you’re stuck with a device that you can’t use. That’s precisely what happened to [Larry G] when the now antiquated 7.2V NiCd batteries used by his cordless drill became too hard to track down. The drill was still in great shape and worked fine, but he couldn’t power the thing. Rather than toss a working tool, he decided to 3D print his own battery pack.

The 3D modeling on the battery pack is impeccable

He could have just swapped new cells into his old pack, but if you’re going to go through all that trouble, why not improve on things a little? Rather than the NiCd batteries used by the original pack, this new pack is designed around readily available AA NiMH batteries. For the light repairs and craft work he usually gets himself into, he figures these batteries should be fine. Plus he already had them on hand, and as we all know, that’s half the battle when putting a project together.

Interestingly, the original battery pack was wired in such a way that it provided two voltages. In older tools such as this one, this would be used for rudimentary speed control. Depending on which speed setting the drill is on, it would either connect to 4 or 6 cells in the original pack. [Larry] didn’t want to get involved with the extra wiring and never used the dual speeds anyway, so his pack only offers the maximum speed setting. Though he does mention that it may be possible to do PWM speed control in the battery itself via a 555 timer if he feels like revisiting the project.

[Larry] tells us the pack itself was rendered completely from scratch, using only the original battery pack and trial-and-error to get the fit perfect. He reused the side-mounted release buttons to save time, but otherwise everything is 3D printed in PETG for its strength and chemical resistance.


This is an entry in Hackaday’s

Repairs You Can Print contest

The twenty best projects will receive $100 in Tindie credit, and for the best projects by a Student or Organization, we’ve got two brand-new Prusa i3 MK3 printers. With a printer like that, you’ll be breaking stuff around the house just to have an excuse to make replacement parts.

Modifications to a Razor E300 motor controller to remove limits

Converting An Electric Scooter To Lithium Batteries And Disabling The Safeties

There’s a bunch of different electric scooters available nowadays, including those hoverboards that keep catching fire. [TK] had an older Razor E300 that uses lead acid batteries. After getting tired of the low speeds and 12 hour charge times, [TK] decided it was time to swap for lithium batteries.

The new batteries were sourced from a Ryobi drill. Each provides 18 V, giving 36 V in series. The original batteries only ran at 24 V, which caused some issues with the motor controller. It refused to start up with the higher voltage. The solution: disable the safety shutdown relay on the motor controller by bridging it with a wire.

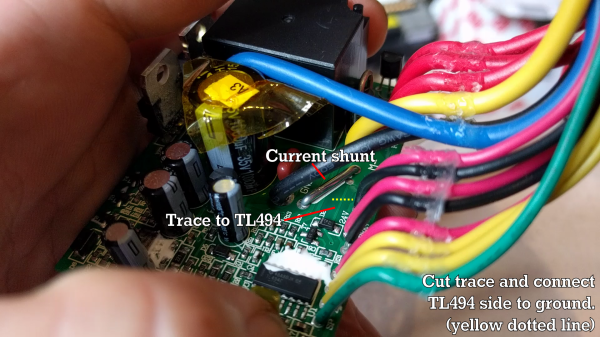
With the voltage issue sorted out, it was time for the current limit to be modified. This motor controller uses a TI TL494 to generate the PWM waveforms that drive a MOSFET to provide variable power to the motor. Cutting the trace to the TL494’s current sense pin removed the current limit all together.

We’re not saying it’s advisable to disable all current and voltage limits on your scooter, but it seems to be working out for [TK]. The $200 scooter now does 28 km/h, up from 22 km/h and charges much faster. With gearing mods, he’s hoping to eke out some more performance.

After the break, the full conversion video.

Continue reading “Converting An Electric Scooter To Lithium Batteries And Disabling The Safeties”

[James] Multiplies His Floor Sander By Four

Hackaday contributor and new homeowner [James Hobson] had a dilemma on his hands. He had rented a commercial drum sander to begin a floor refinishing project. Like many before him, James was a bit too aggressive with the drum sander in places. The uneven stripes didn’t show up until the sander was returned and the floor was stained. Renting the sander again would be an expensive prospect. There had to be a better answer…

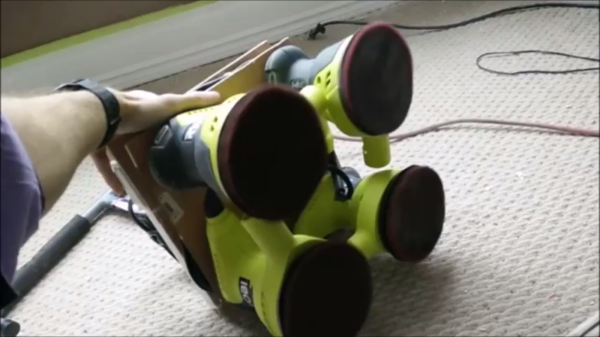
That’s when [James] put on his [Hacksmith] cape and got to work. He built himself a DIY floor sander (YouTube Link) using four Ryobi orbital sanders, some scrap wood, and a bit of ingenuity. [James] screwed the four sanders to a plywood sub plate, then added a top plate with a handle. He even gave the sander its own outlet strip so he wouldn’t be dragging four power cords behind him.

[James] found that synthetic steel wool pads weren’t cutting through the floor very well, so he upgraded to 220 grit sandpaper. That did the trick, and the sander worked great. Now he won’t have to rent a drum sander when it comes time to refinish the first floor of his new house!

Continue reading “[James] Multiplies His Floor Sander By Four”

Emergency Power Based On Cordless Drill Batteries

[Don Eduardo] took matters into his own hands after experiencing a days-long power outage at his house. And like most of us have done at least one, he managed to burn his fingers on a regulator in the process. That’s because he prototyped a way to use power tool batteries as an emergency source — basing his circuit on a 7812 linear regulator which got piping hot in no time flat.

His next autodidactic undertaking carried him into the realm of switch-mode buck converters (learn a bit about these if unfamiliar). The device steps down the ~18V output to 12V regulated for devices meant for automotive or marine. We really like see the different solutions he came up with for interfacing with the batteries which have a U-shaped prong with contacts on opposite sides.

The final iteration, which is pictured above, builds a house of cards on top of the buck converter. After regulating down to 12V he feeds the output into a “cigarette-lighter” style inverter to boost back to 110V AC. The hardware is housed inside of a scrapped charger for the batteries, with the appropriate 3-prong socket hanging out the back. We think it’s a nice touch to include LED feedback for the battery level.

We would like to hear your thoughts on this technique. Is there a better way that’s as easy and adaptive (you don’t have to alter the devices you’re powering) as this one?

Continue reading “Emergency Power Based On Cordless Drill Batteries”

Drill-based Kinect Camera

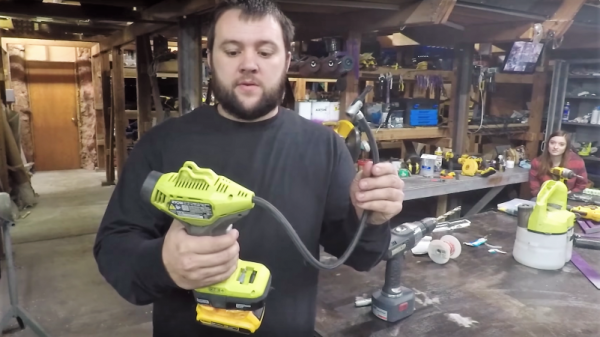
[Brett Graham] and [David Cox] are taking the Kinect out into the world thanks to this handheld hack they call the Drill of Depth. Apparently, the Kinect wants 12V at 1A which is quite easy to provide with a rechargeable power tool like this Ryobi drill. The setup features a 4.3″ touchscreen display, connected to the Gumstix Overo Air that is running Linux. They claim that there’s a “legitimate scientific reason” for building the device but they’re not sharing it yet.

So what would you use this for? We wonder if it would be possible to roll a GPS into the mix, then use post processing from the captured data to recreate the environment in a virtual setting? Imagine if a weekend spent walking around campus and processing the results let you model your University and make it an add-on level for your favorite game. Or perhaps this could be paired with a regular camera to generate high-quality 3D skinning data for Google Earth. That’s what we came up with, what do you think?