DIY Syringe Pump Saves Big Bucks For Hacker’s Lab

If you had a choice between going to your boss and asking for funds for a new piece of gear, would you rather ask for $3000 to buy off-the-shelf, or $200 for the parts to build the same thing yourself? Any self-respecting hacker knows the answer, and when presented with an opportunity to equip his lab with a new DIY syringe pump for $200, [Dr. D-Flo] rose to the challenge.

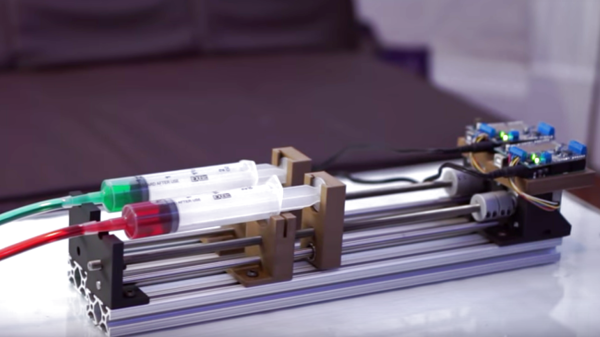
The first stop for [Dr. D-Flo] was, naturally, Hackaday.io, which is where he found [Naroom]’s syringe pump project. It was a good match for his budget and his specs, but he needed to modify some of the 3D printed parts a little to fit the larger syringes he intended to use. The base is aluminum extrusion, the drive train is a stepper motor spinning threaded rod and a captive nut in the plunger holders, and an Arduino and motor shield control everything. The drive train will obviously suffer from a fair amount of backlash, but this pump isn’t meant for precise dispensing so it shouldn’t matter. We’d worry a little more about the robustness of the printed parts over time and their compatibility with common lab solvents, but overall this was a great build that [Dr. D-Flo] intends to use in a 3D food printer. We look forward to seeing that one.

It’s getting so that that you can build almost anything for the lab these days, from peristaltic pumps to centrifuges. It has to be hard to concentrate on your science when there’s so much gear to make.

Continue reading “DIY Syringe Pump Saves Big Bucks For Hacker’s Lab”

Solder Paste Dispenser Has No 3D Printed Parts!

If you’ve never used a solder paste dispenser, you’re missing out. Think about always using a crappy soldering iron, and then for the first time using a high-end one. Suddenly you’re actually not bad at soldering things! It’s kind of like that.

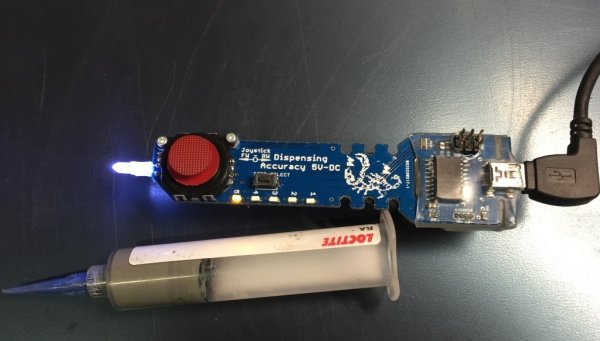
Most solder paste dispensers make use of compressed air, which requires an extra setup to use that you might not have. The goal of this project was to make a solder paste dispenser that doesn’t use compressed air, and doesn’t have any 3D printed parts (in case you don’t have a 3D printer) — and it looks like the inventor, [MikeM], succeeded!

Continue reading “Solder Paste Dispenser Has No 3D Printed Parts!”

Pump Up The Volume With The 3D Printed Syringe Pump Rack

Syringe pumps are valuable tools when specific amounts of fluid must be dispensed at certain rates and volumes. They are used in many ways, for administering IV medications to liquid chromatography (LC/HPLC). Unfortunately, a commercial pump can cost a pretty penny. Not particularly thrilled with the hefty price tag, [Aldric Negrier] rolled up his sleeves and made a 3D-printed version for 300 USD.

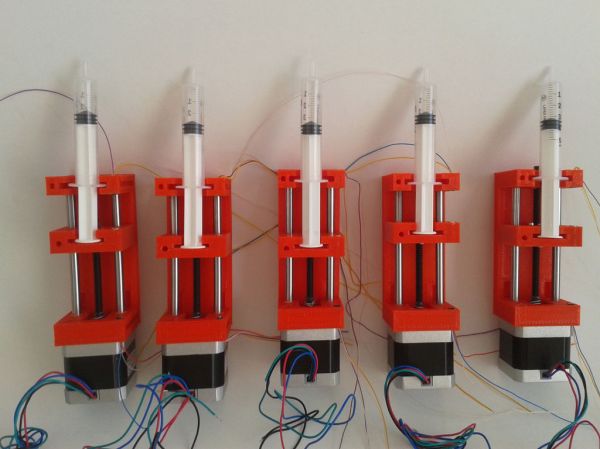
[Aldric] has been featured on Hackaday before, so we knew his latest project would not disappoint. His 3D Printed Syringe Pump Rack contains five individual pumps that can operate independently of each other. Five pieces are 3D-printed to form the housing for each pump. In addition, each pump is composed of a Teflon-coated lead screw, an Arduino Nano V3, a Pololu Micro stepper motor driver, and a NEMA-17 stepper motor. The 3D Printed Syringe Pump Rack runs on a 12V power supply using a maximum of 2 amps per motor.

While the standard Arduino IDE contains the Stepper library, [Aldric] wanted a library that allowed for more precise control and went with the Accelstepper library. The 3D Printed Syringe Pump Rack has a measured accuracy of 0.5µl in a 10ml syringe, which is nothing to laugh at.

Syringe pump racks like [Aldric’s] are another great example of using open source resources and the spirit of DIY to make typically expensive technologies more affordable to the smaller lab bench. If you are interested in other open source syringe pump designs, you can check out this entry for the 2014 Hackaday Prize.

Continue reading “Pump Up The Volume With The 3D Printed Syringe Pump Rack”

Forget Treating Your Diabetes – Use Your Insulin Syringe As A Logic Probe

syringe-logic-probe

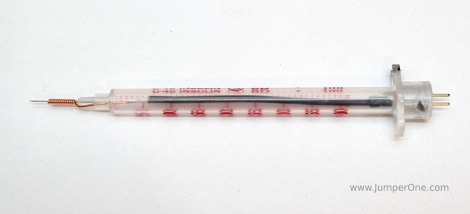
Hackaday reader [JumperOne] was in need of a logic probe that he could use to reliably test some tiny .5mm pitch IC pins. The probe that came with his oscilloscope was a bit too big and not near sharp enough to do the job, but he figured that a syringe might do the trick nicely.

He drilled a small hole near the business end of the syringe, through which he fed a piece of stripped twisted pair cabling. [JumperOne] then soldered a pair of pins to a small piece of coaxial cable, attaching the opposite end to the twisted pair already in the syringe. After carefully coiling the thin cable around the needle, he secured the coaxial cable and its pins in place with a bit of hot glue.

[JumperOne] says that his makeshift logic probe works very well and the sharp needle would easily pierce through any oxidation or solder mask that stands in its way. One extra benefit of using a syringe as a probe is that they come complete with caps which help protect both ends of the delicate tool.

Water Glider Prototype

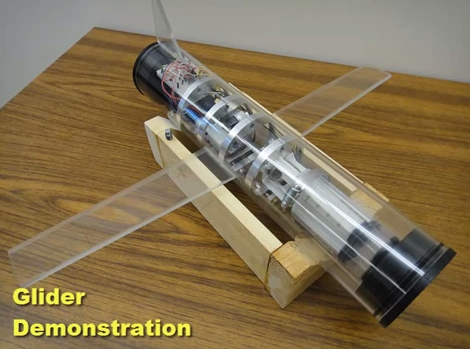
[Byrel Mitchell] wrote in to share some details on this water glider which he has been working on with his classmates at the Nonlinear Autonomous Systems lab of Michigan Technological University. As its name implies, it glides through the water rather than using propulsion systems typically found on underwater ROVs. The wings on either side of the body are fixed in place, converting changes in ballast to forward momentum.

The front of the glider is at the bottom right of the image above. Look closely and you’ll see a trio of syringes pointed toward the nose. These act as the ballast tanks. A gear motor moves a pinion connected to the syringe plungers, allowing the Arduino which drives the device to fill and empty the tanks with water. When full the nose sinks and the glider moves forward, when empty it rises to the surface which also results in forward movement.

After the break you can find two videos The first shows off the functionality and demonstrates the device in a swimming pool. The second covers the details of the control systems.

Continue reading “Water Glider Prototype”

Hacking Together A Color Changing Water Wall

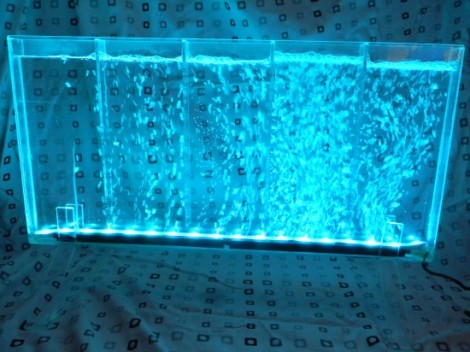
[BadWolf’s] girlfriend wanted him to build her a lamp for Christmas and he didn’t disappoint. What he came up with is a water-filled color changing lamp with bubbles for added interest. See for yourself in the clip after the jump.

The color changing properties are easily taken care of by some waterproof RGB LED strips. [BadWolf] went the Arduino route for this project but any microcontroller will be able to fill the role of color cycling. The enclosure is all hand-made from acrylic sheets. He grabbed some chemical welding liquid from the hardware store and applied it to the acrylic with a syringe. That’s easy enough when attaching the edges to one side of the enclosure. But it gets much tougher when it’s time to seal up the other side. He recorded a video of this which shows the syringe taped to a rod so he can get it down in there, pushing the plunger with a second extension device.

Bubbles are supplied by a small aquarium pump. We’re wondering if this will need frequent cleaning or if you can get some pool chemicals to keeps it nice and clear (or just a teaspoon of bleach)? Continue reading “Hacking Together A Color Changing Water Wall”

Cocktail Machine Minces Words

For those living in a magical land of candy, with orange-faced helpers to do their bidding, the ability to taste your words is nothing new. But for the rest of us, the ability to taste what you type in cocktail form is a novelty. [Morskoiboy] took some back-of-the-envelope ideas and made them into a real device that uses syringes as keys, and facilitates the injection of twenty-six different flavorings into a baseline liquid. He figures that you can make each letter as creative as you want to, like representing different alcohols with a letter (T for tequila) or matching them to colors (R for red). Check out the video after the break to see an ‘Any Word’ cocktail being mixed.

This setup is entirely mechanical, and makes us wonder if [Morskoiboy] works in the medical equipment design industry. Each letter for the keyboard is affixed to the plunger on a syringe. When depressed, they cause the liquid in an external vessel (not seen above) to travel through tubing until it fills the proper cavities on a 15-segment display to match the letter pressed. From there the additive is flushed out by the gravity-fed base liquid into the drinking glass. We can’t imagine the time that went into designing all of the plumbing!

Continue reading “Cocktail Machine Minces Words”