The Glia project aims to create a suite of free and open-source medical equipment that can be assembled cheaply and easily when and where it’s needed. Even essential tools like stethoscopes and tourniquets can be difficult to acquire in certain parts of the world, especially during times of war or civil unrest. But armed with a 3D printer and the team’s open-source designs, an ad-hoc factory can start producing these lifesaving tools anywhere on the planet.
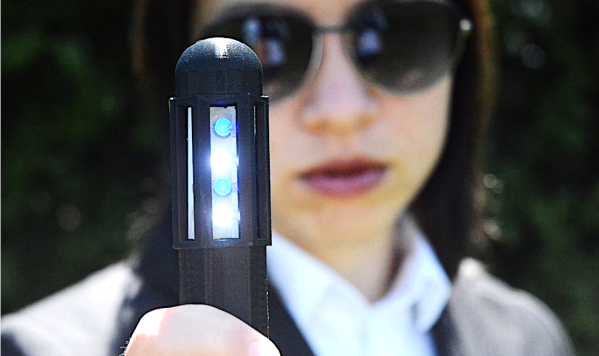
 Glia member [Tarek Loubani] has recently written a blog post discussing the team’s latest release: an otoscope that can be built for as little as $5. Even if you don’t recognize the name, you’ve almost certainly seen one of them in use. The otoscope is used to look inside the ear and can be invaluable in diagnosing illnesses, especially in children. Unfortunately, while this iconic piece of equipment is quite simple on a technical level, professional-quality versions can cost hundreds of dollars.
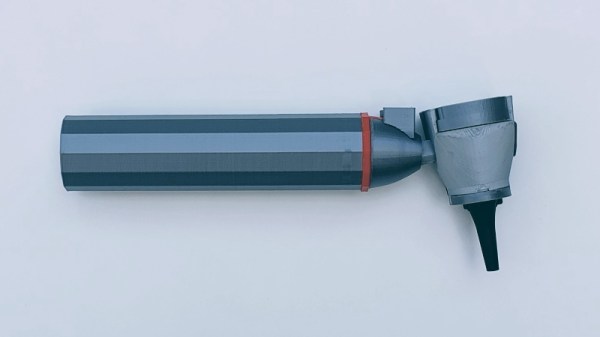
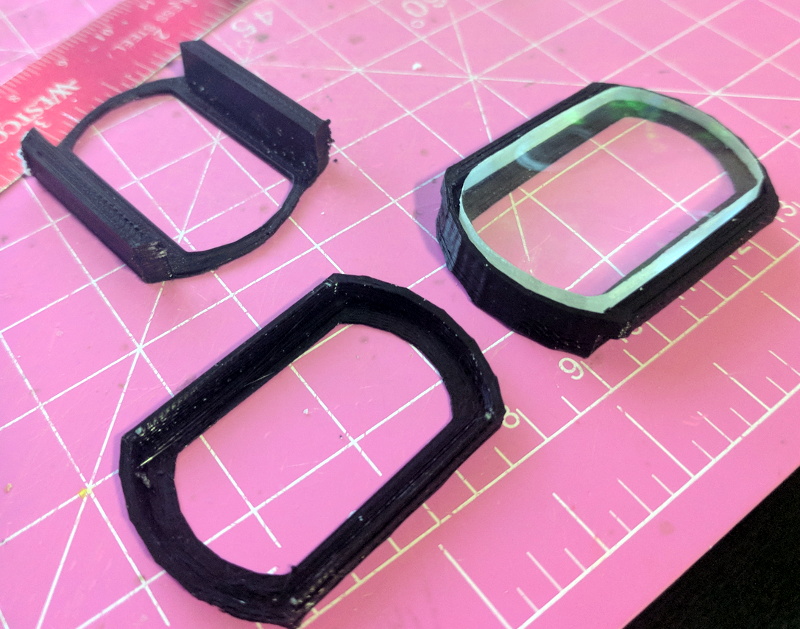
Now to be fair, you’ll need quite a bit more than just the 3D printed parts to assemble the device. The final product requires some electrical components such as a battery holder, rocker switch, and LED. It also requires a custom lens, though the Glia team has thought ahead here and provided the files for printable jigs that will allow you to cut a larger lens down to the size required by their otoscope. In a situation where you might have to improvise with what you have, that’s a very clever design element.
So far the team is very happy with how the otoscope performs, but they’ve run into a bit of a logistical snag. It turns out that early work on the project was done in the web-based TinkerCAD, which isn’t quite in line with the team’s goals of keeping everything free and open. They’d like some assistance in recreating the STLs in FreeCAD or OpenSCAD so they’re easier to modify down the road. So if you’re a FOSS CAD master and want to earn some positive karma, head over to the GitHub page for the project and put those skills to use.
We’ve previously covered Glia’s work with 3D printed tourniquets to treat gunshot wounds, a project that led to [Tarek] himself being shot by a sniper while attempting to field test the design in Gaza. If that’s not commitment to the principles of open-source hardware, we don’t know what is.
Continue reading “Glia Is Making Open Medical Devices, And You Can Help” →