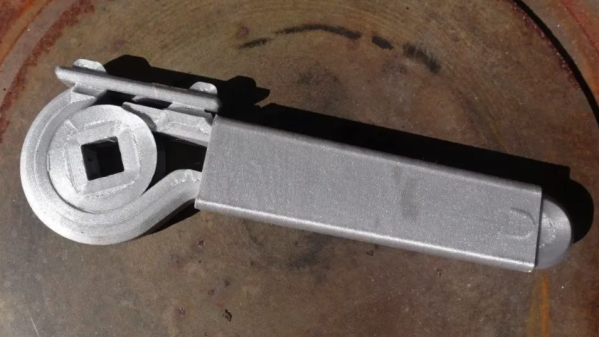
Printed tools aren’t exactly known for their durability, but [Gladius] shows us that with some thoughtful design, it’s possible to print a ratcheting wrench that can handle surprising amounts of torque.
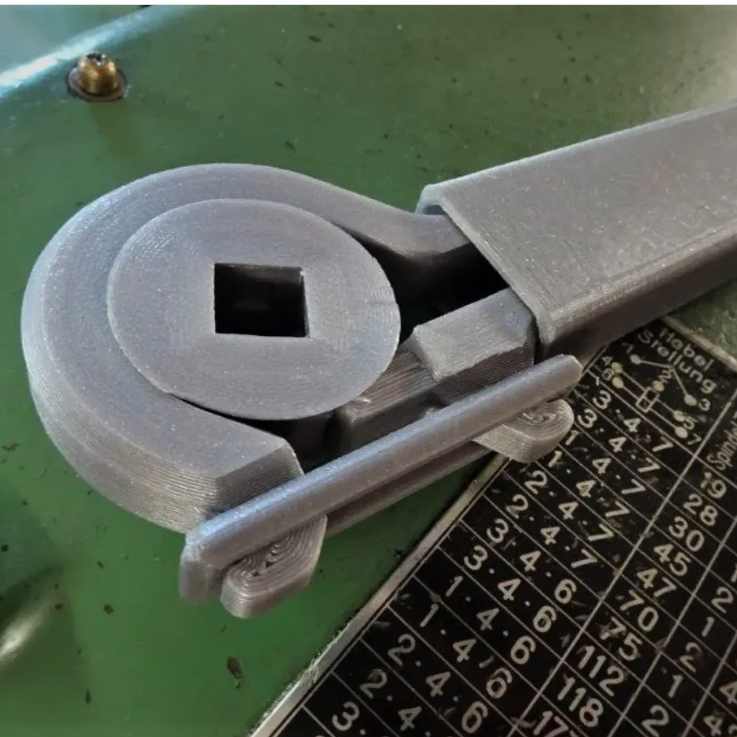
This particular wrench is inspired by NASA’s 3D printed ratcheting wrench, and also from an early 1900s design. It sports a 1/2 inch square socket into which modern adapters can be fitted, allowing those steel parts to do their job while the wrench itself delivers the muscle.
[Gladius] found that the strongest results came from slicing parts — especially the handle — so that they come out consisting almost entirely of perimeters, with virtually no traditional infill. Want to know more? There’s a discussion on reddit where [Gladius] goes into added detail about measurements and performance.
Over the years, we’ve seen our share of powerful prints. For example, what the Crimson Axlef*cker can do looks downright intimidating. Speaking of printing things that move, we want to remind you about this handy tip for easily and reliably joining motor shafts to printed parts by (mis)using jaw couplings.